
Appearance
Batch Processing
Upload files
Open the Mercury module.
Drag and drop your documents onto the page, or click Browse Files to select them from your computer.
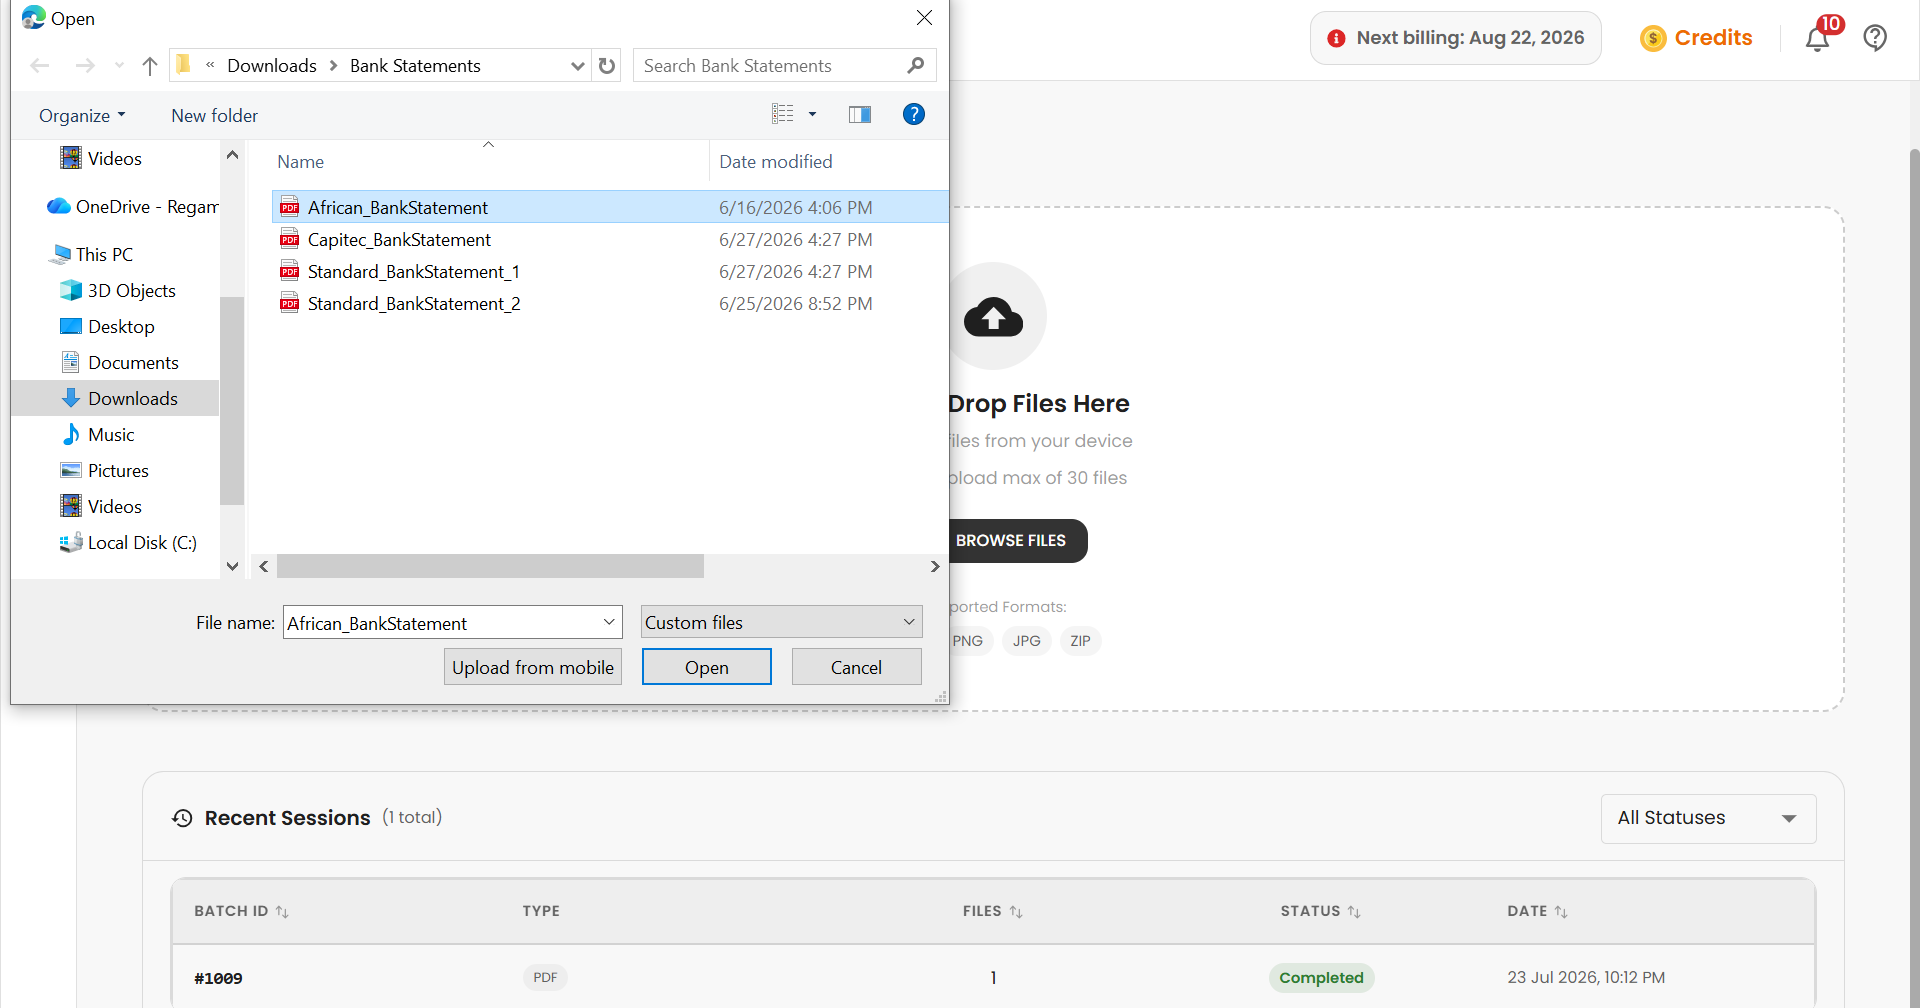
Check the file names, sizes, and upload status in the list, and remove any file you don't want to process.
Click Next Step to move on to classification.
Classify documents
Classification sorts your uploaded documents into categories — such as Bank Statement, KYC Document, Financial Report, Invoice, or Tax Document — so Mercury applies the right template to each one.
After upload, Mercury automatically assigns a category to each document.
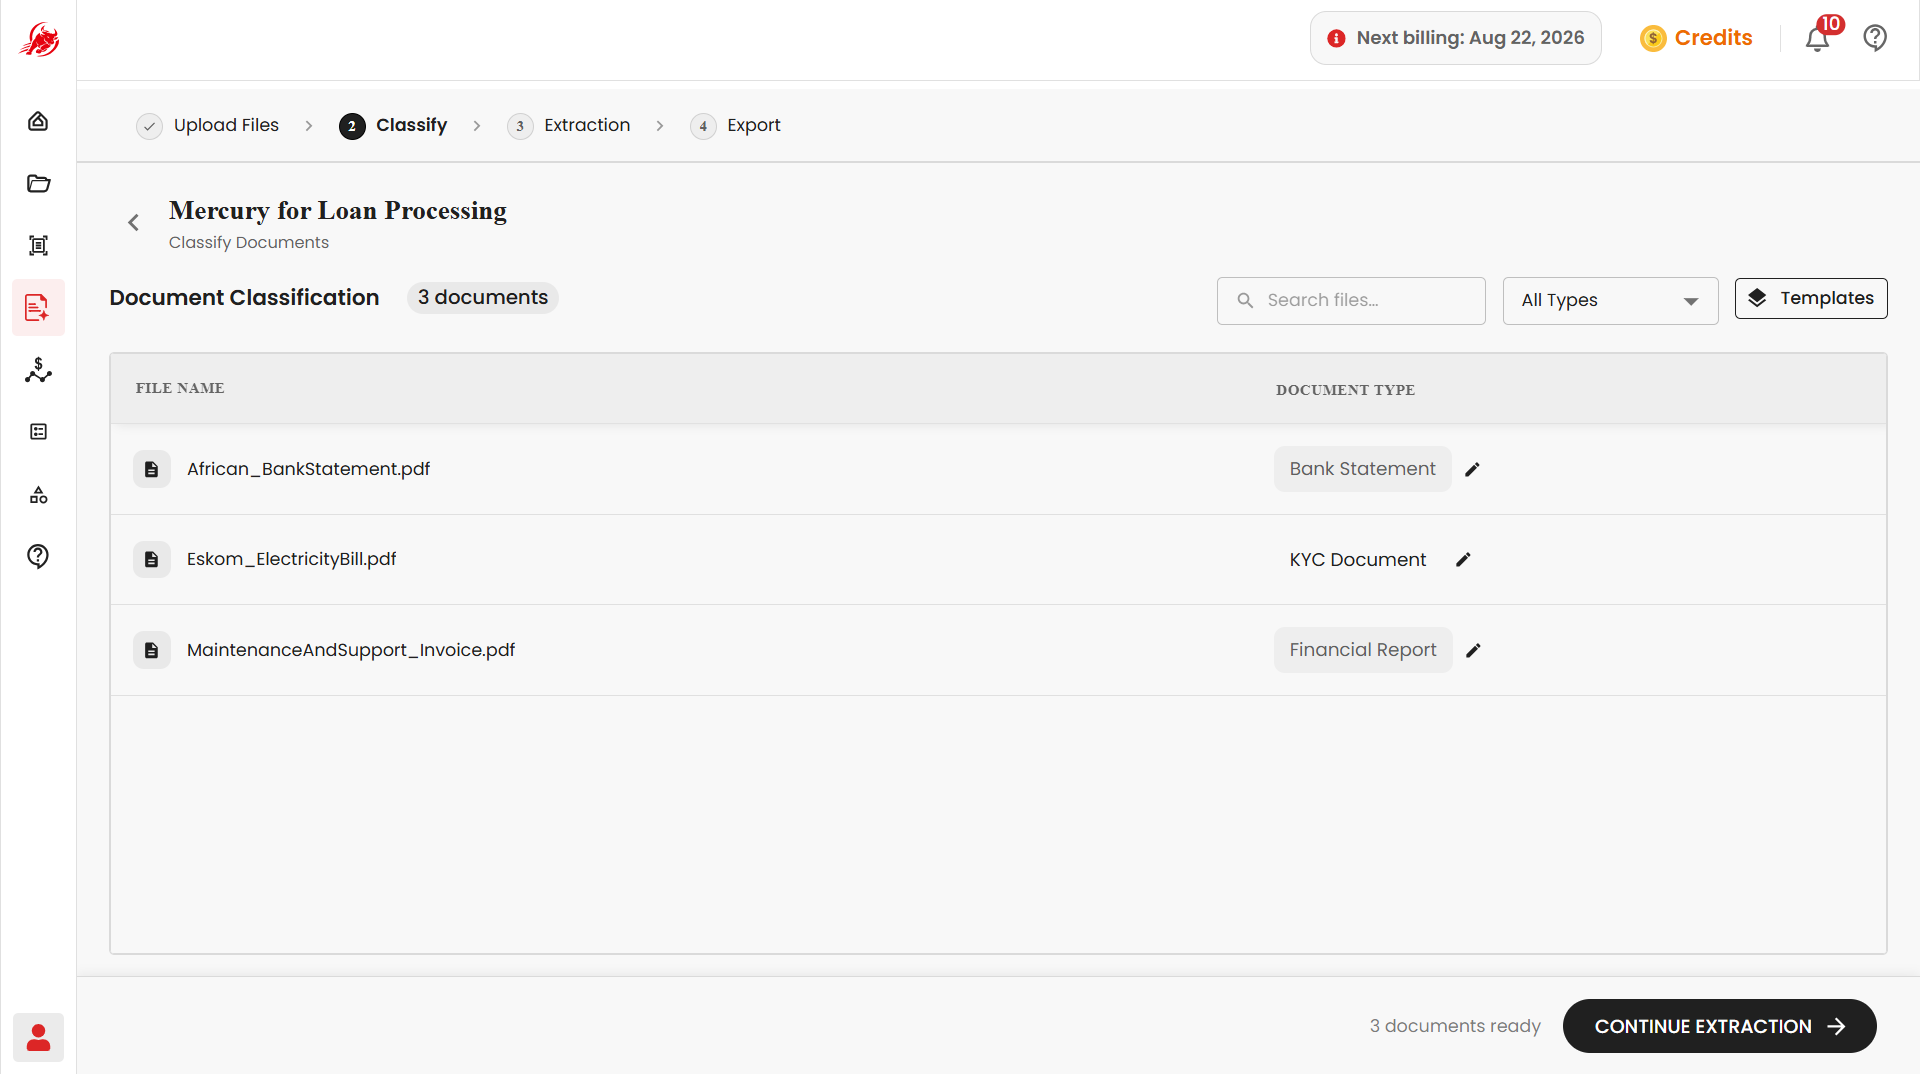
If a document is in the wrong category, select it and choose the correct one.
Use the search bar to find a specific document, or use the type filter to show only one category at a time.
Map templates
A template is a saved pattern that tells Mercury which fields to look for on a document and where to find them — for example, a Financial Template for financial reports, or a KYC Template for ID documents.
Open the Templates panel.
For each document category, choose the template it should use.
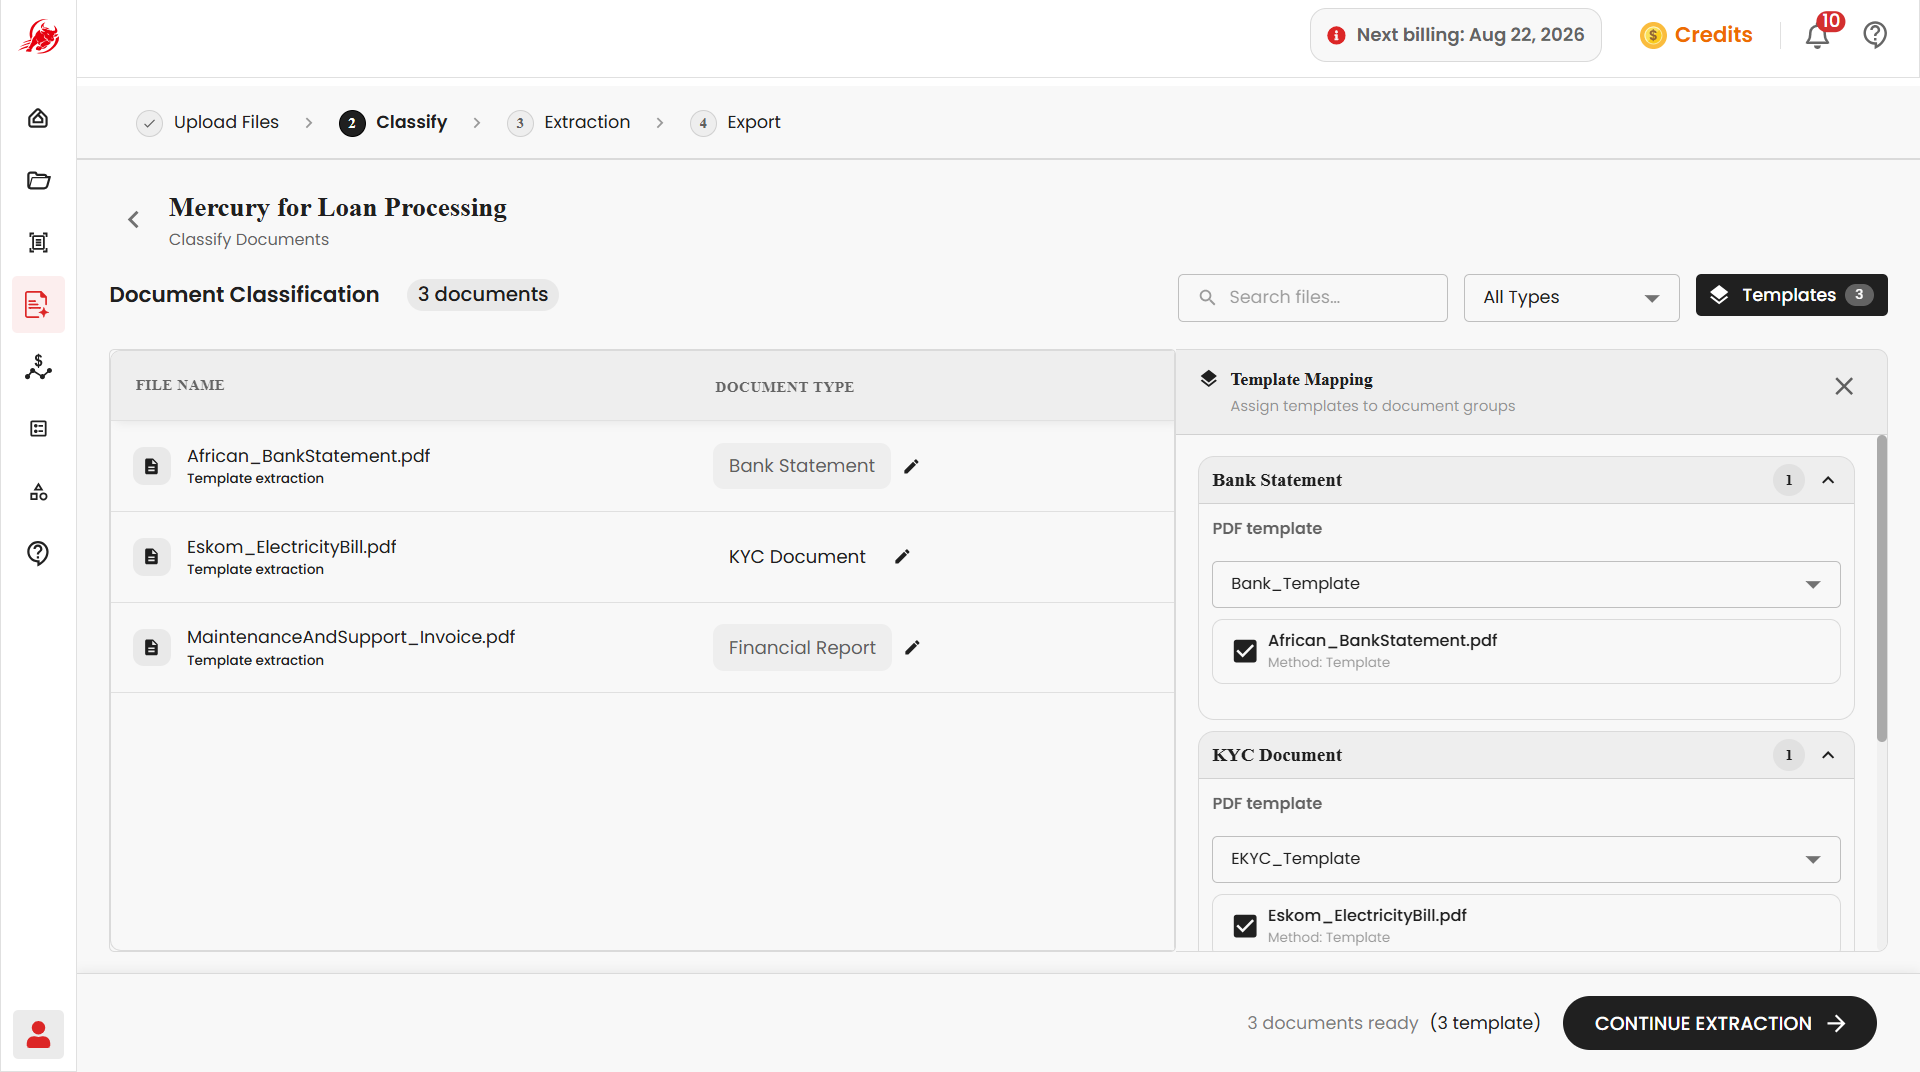
Check that the right template is assigned and that it covers the fields you need.
Click Continue Extraction to proceed.
TIP
Reuse the same template for documents you process regularly — see Template to create one.
Continue extraction
Mercury reads the text from each document using OCR (Optical Character Recognition — technology that turns a scan or photo of text into text you can edit and search) and pulls out the fields defined by its template.
Extraction starts automatically once templates are mapped.
Review the results — extracted fields, OCR confidence, and any missing values appear next to a preview of the document.
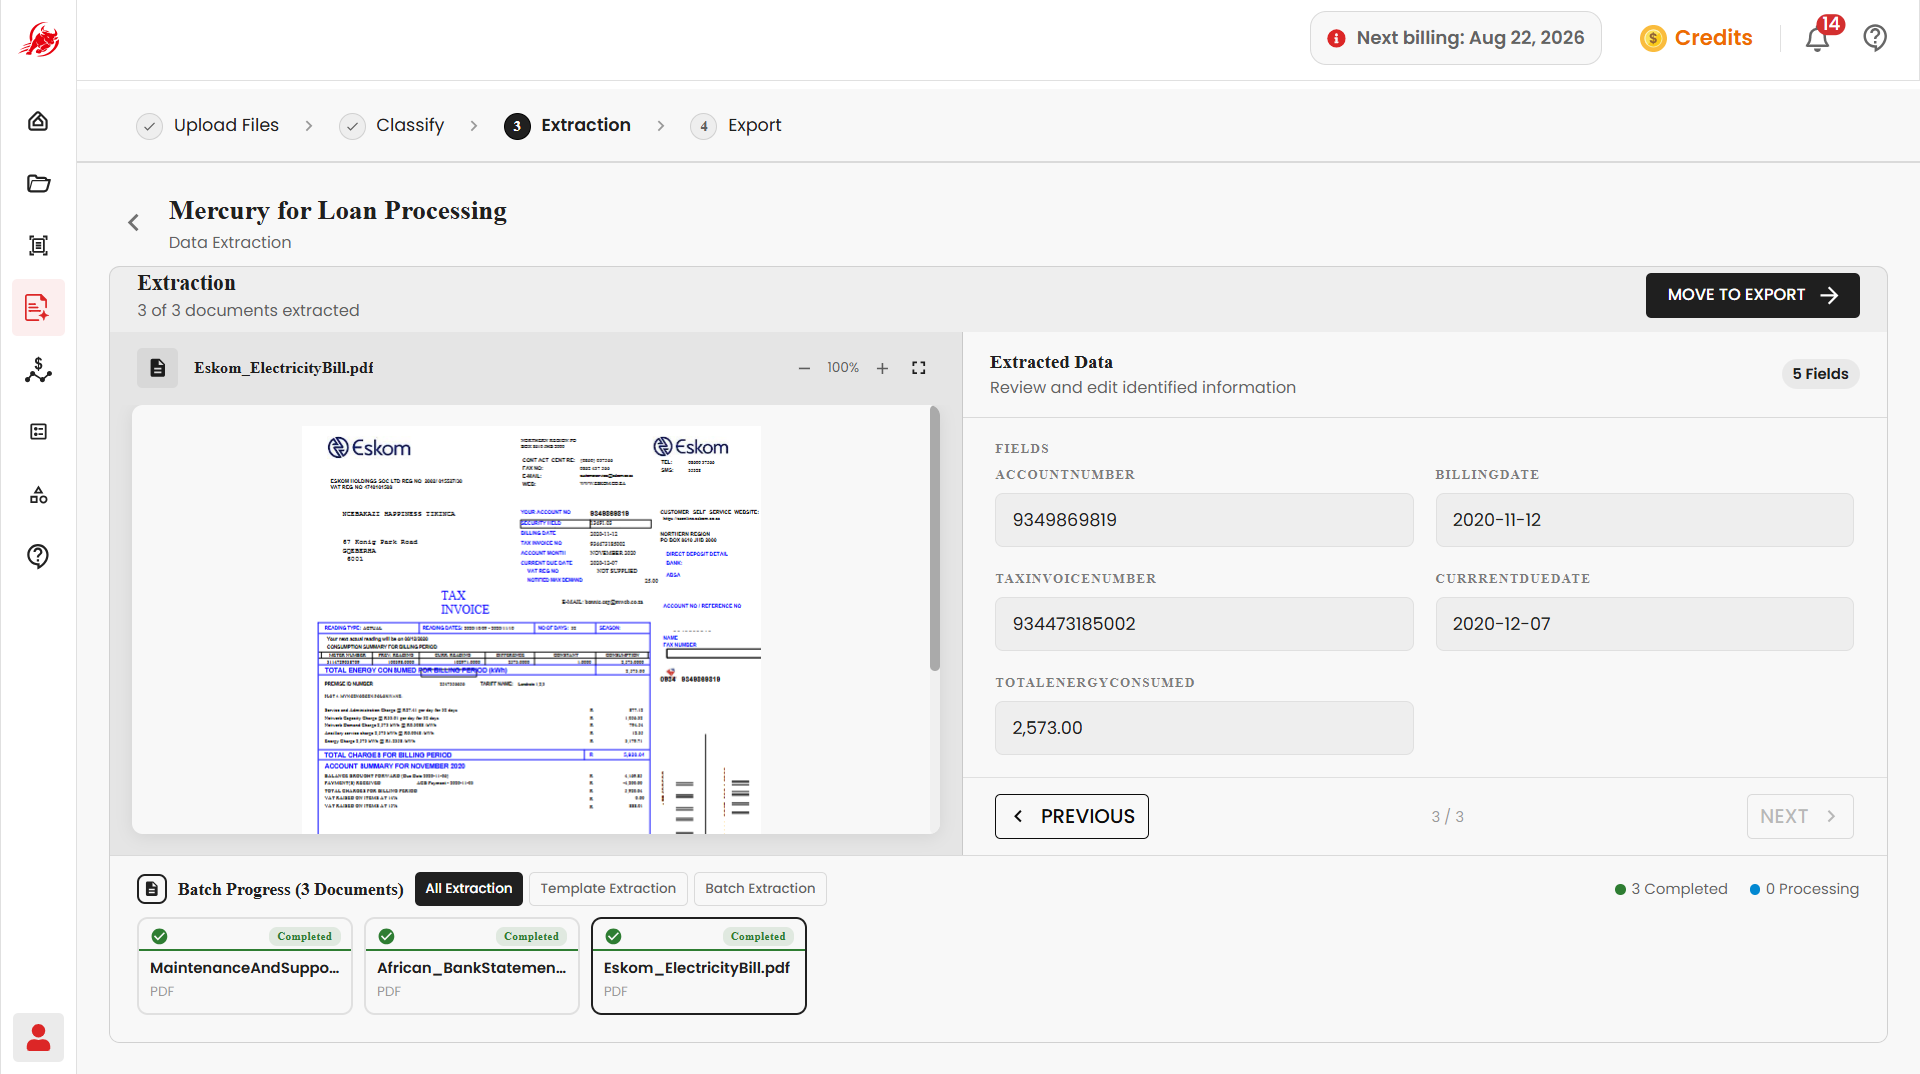
Correct any field that's wrong or low-confidence.
Click Move to Export when you're done reviewing.
Export results
Choose an export format: Excel or JSON.
Choose how to structure the export — one Combined File for everything, or Separate Files by Type for each document category.
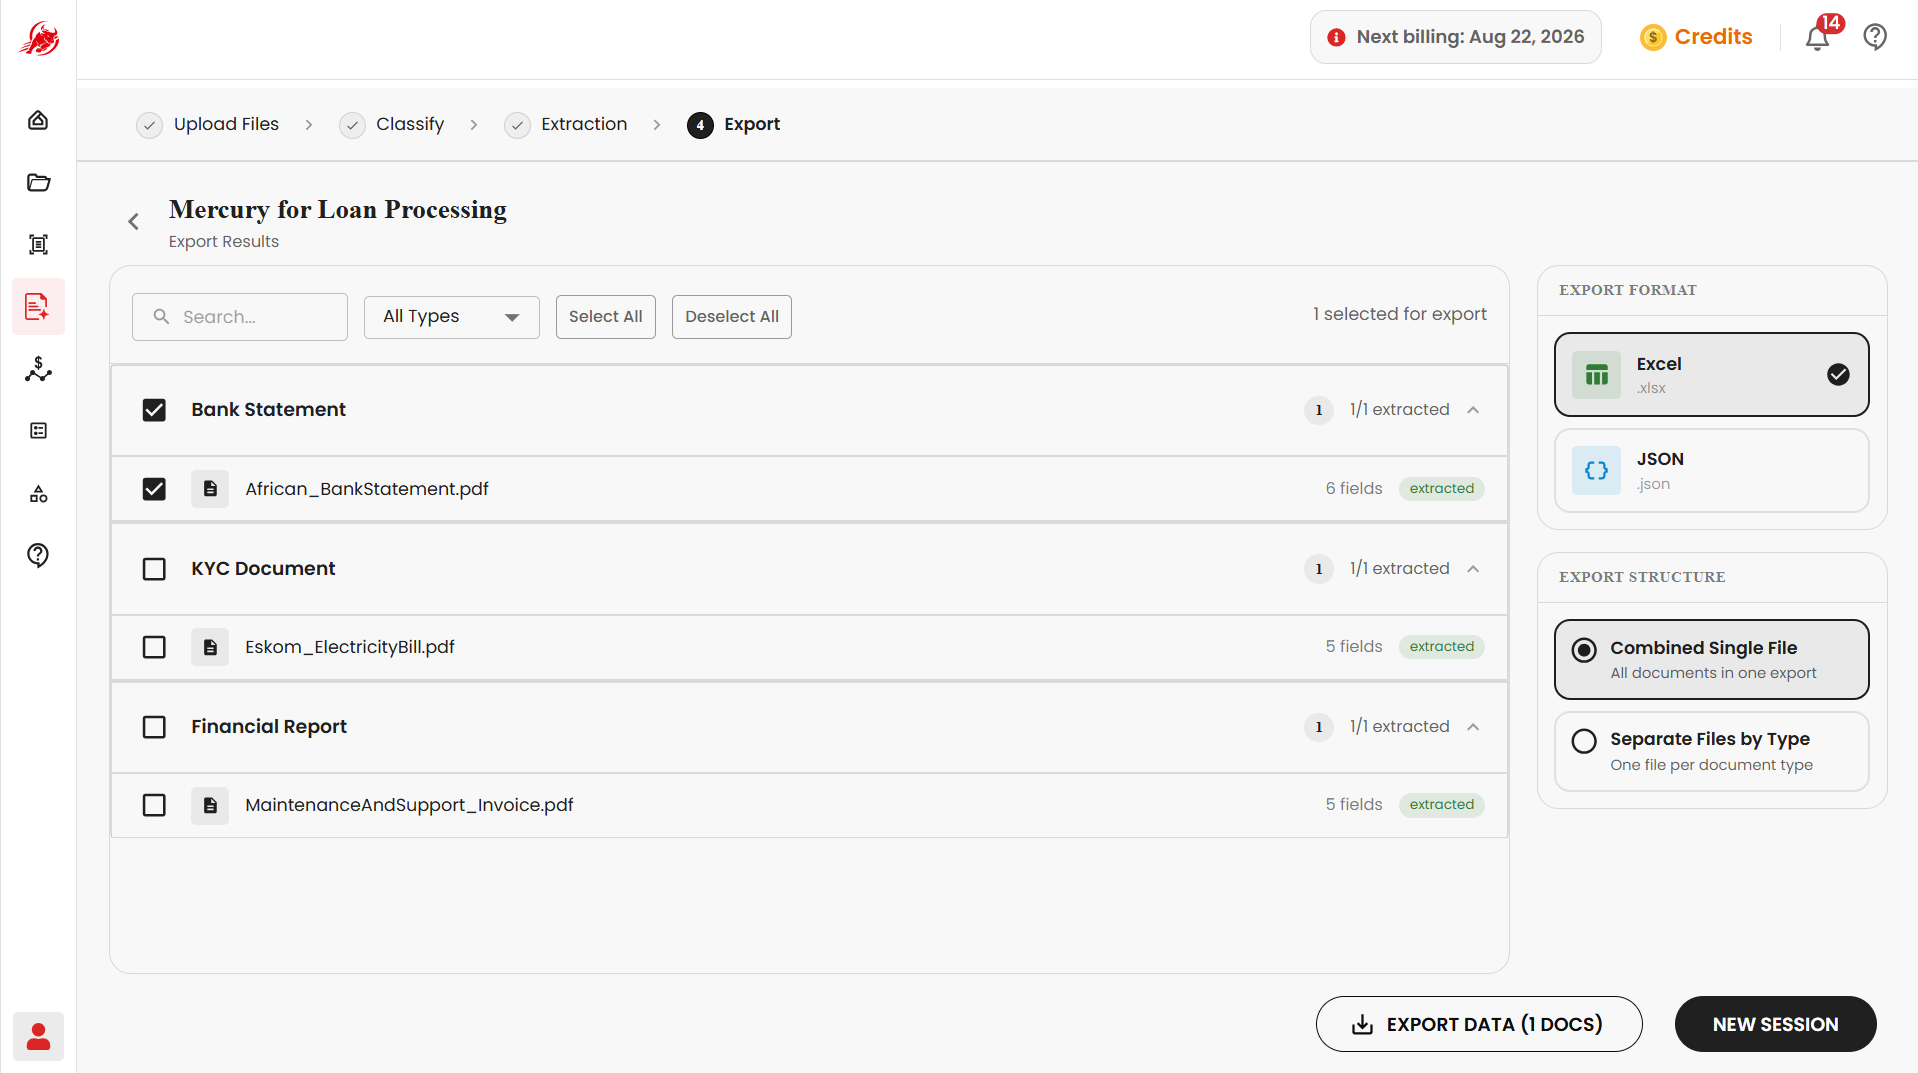
Click Export to download the results.
Exported files are also saved in the Workspace module, so you can access or share them later without exporting again.