Appearance
Manage Files
Upload a file
- Open the My Files tab.
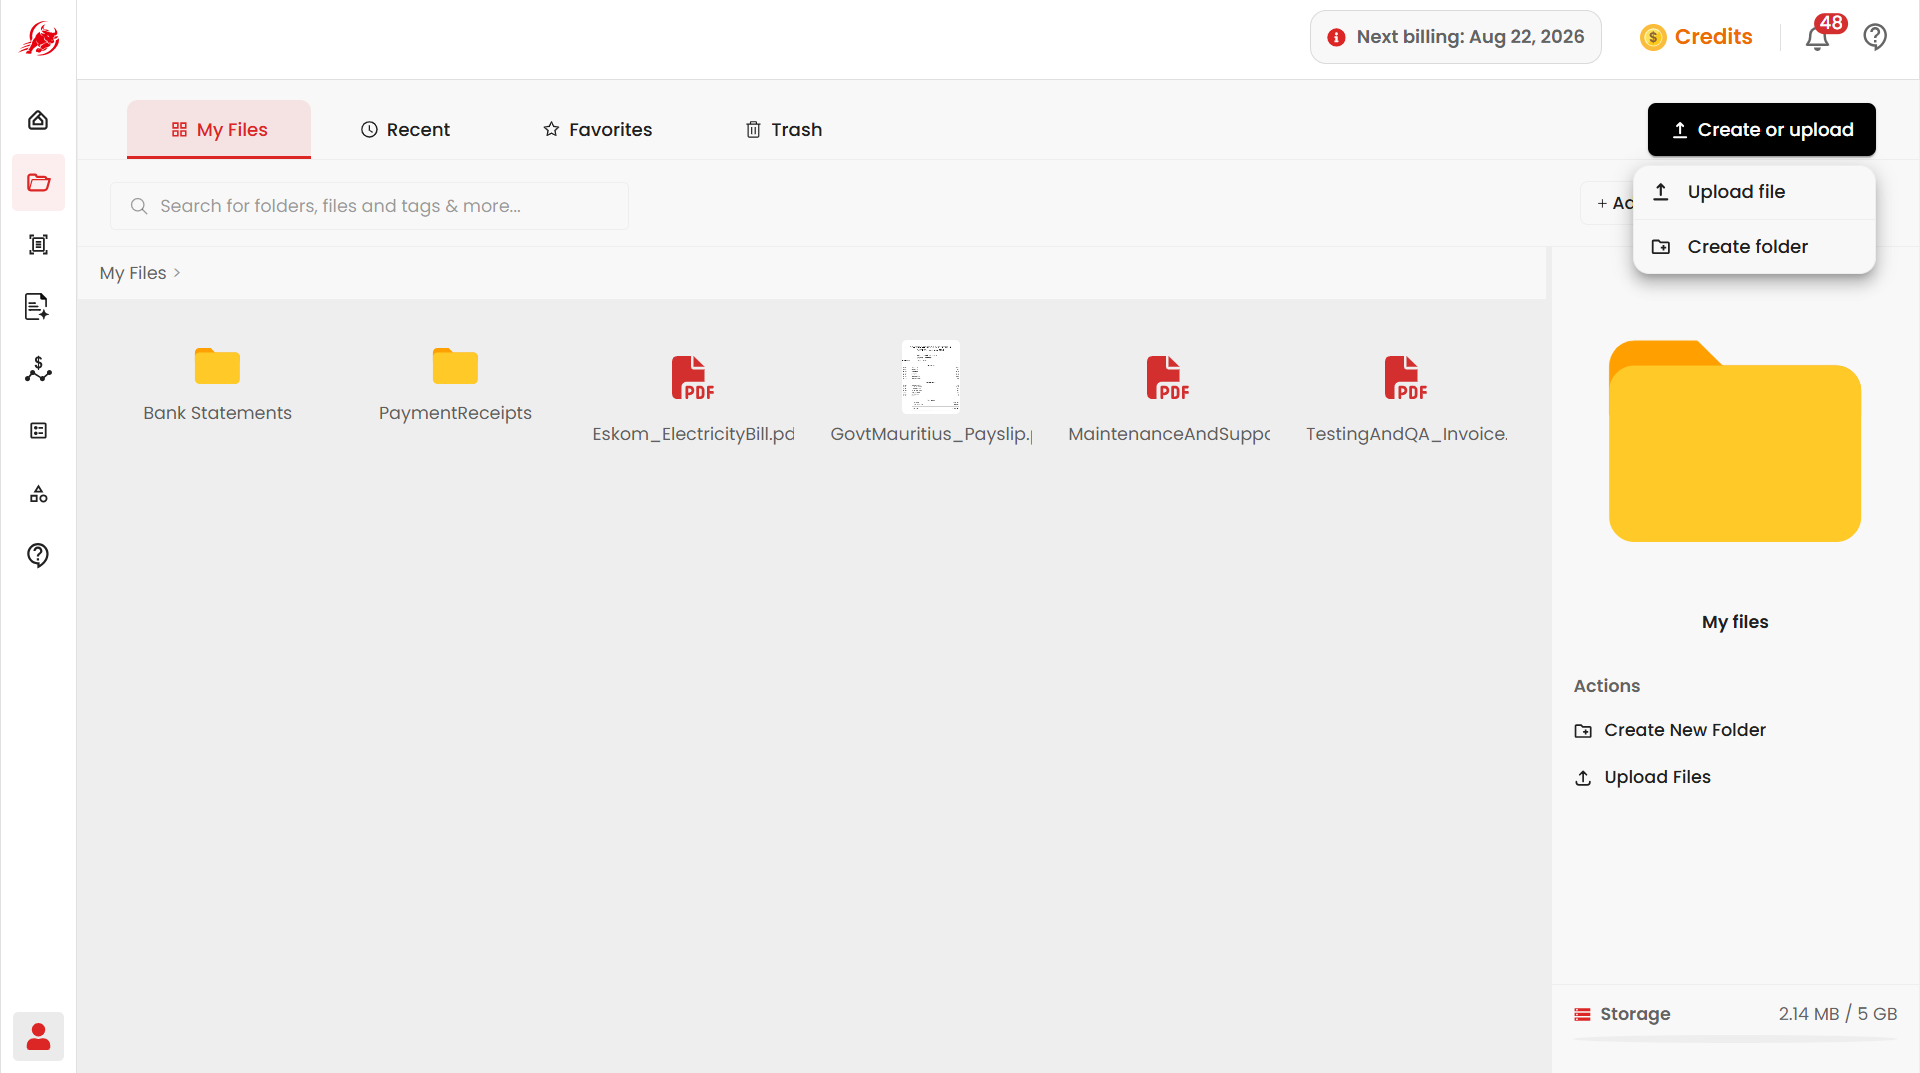
- Click Create or upload in the top-right corner.
- Select Upload Files, then choose files from your computer — or drag and drop them onto the page.
You can upload PDFs, images (PNG, JPG, WEBP), and ZIP files.
Create a folder
- Click Create or upload.
- Select Create New Folder.
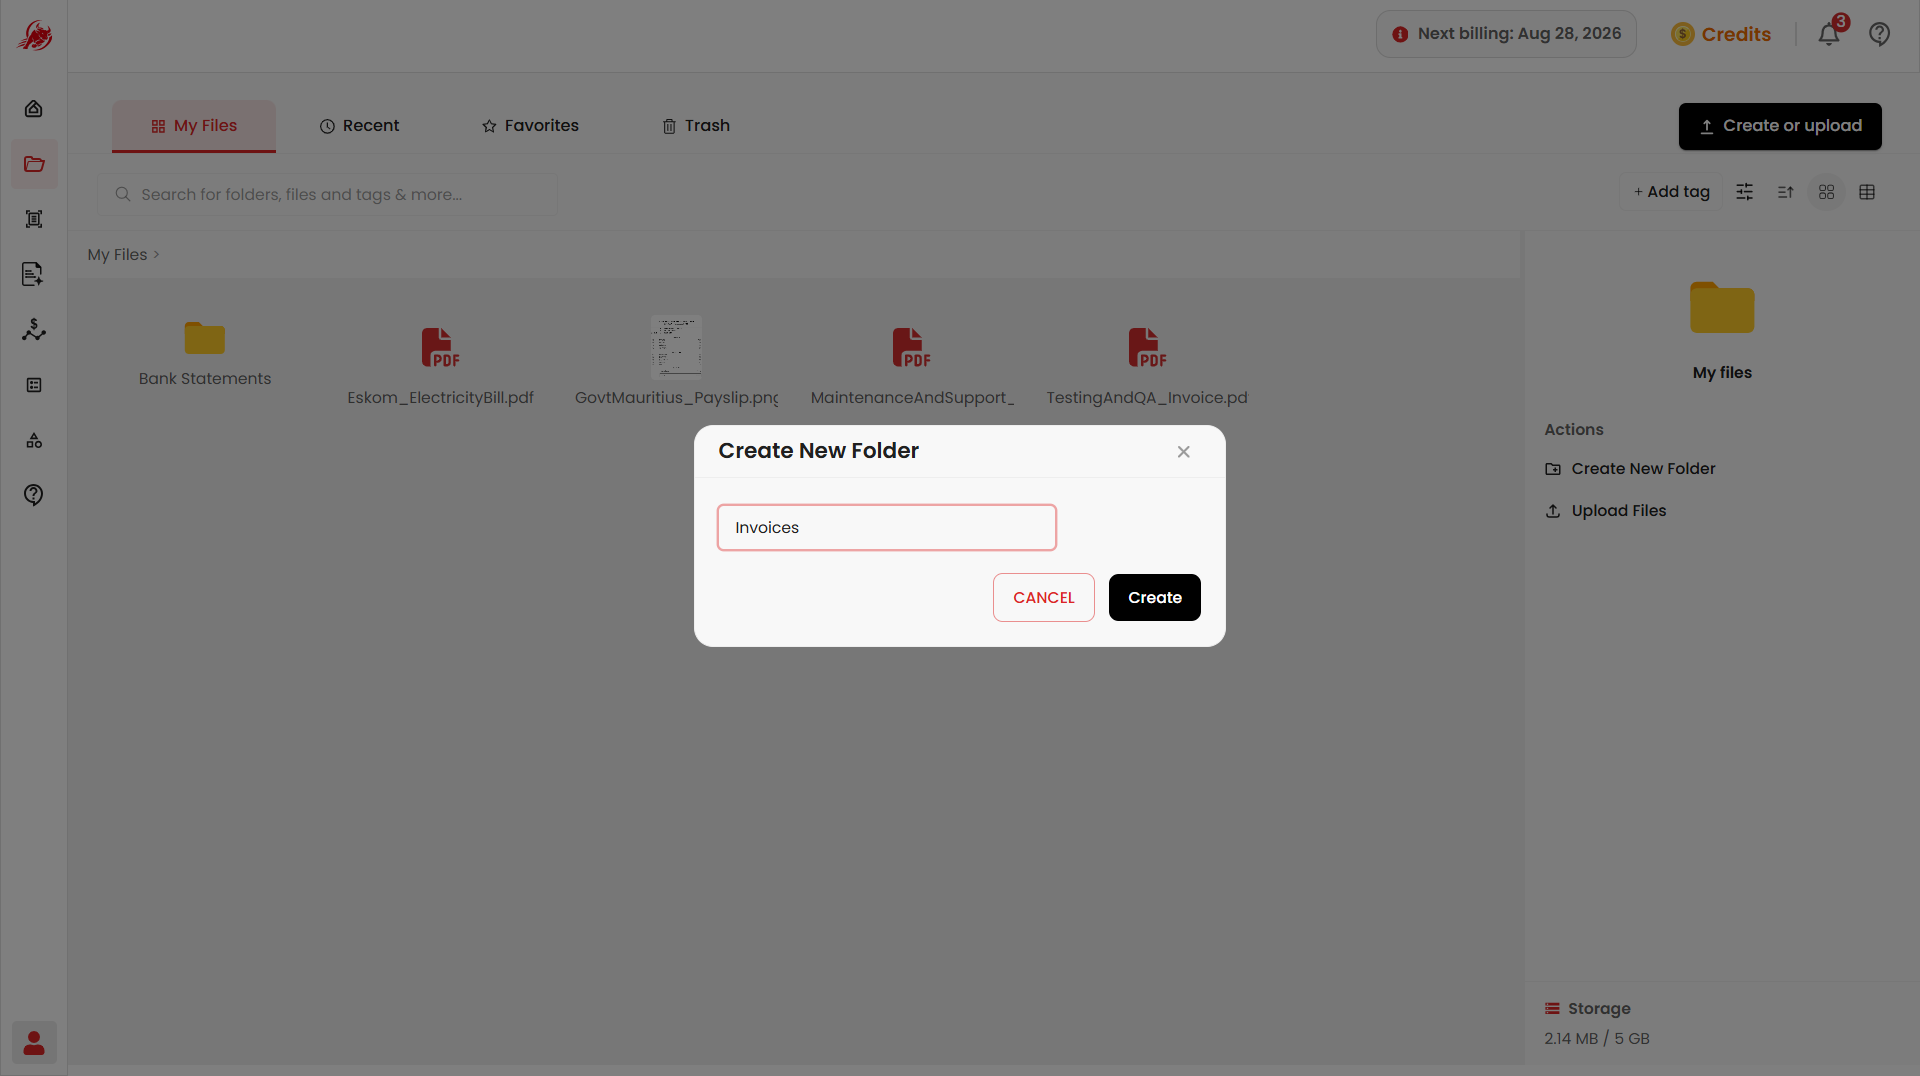
- Type a name for the folder — for example, a project, client, or document type — and confirm.
Manage a file
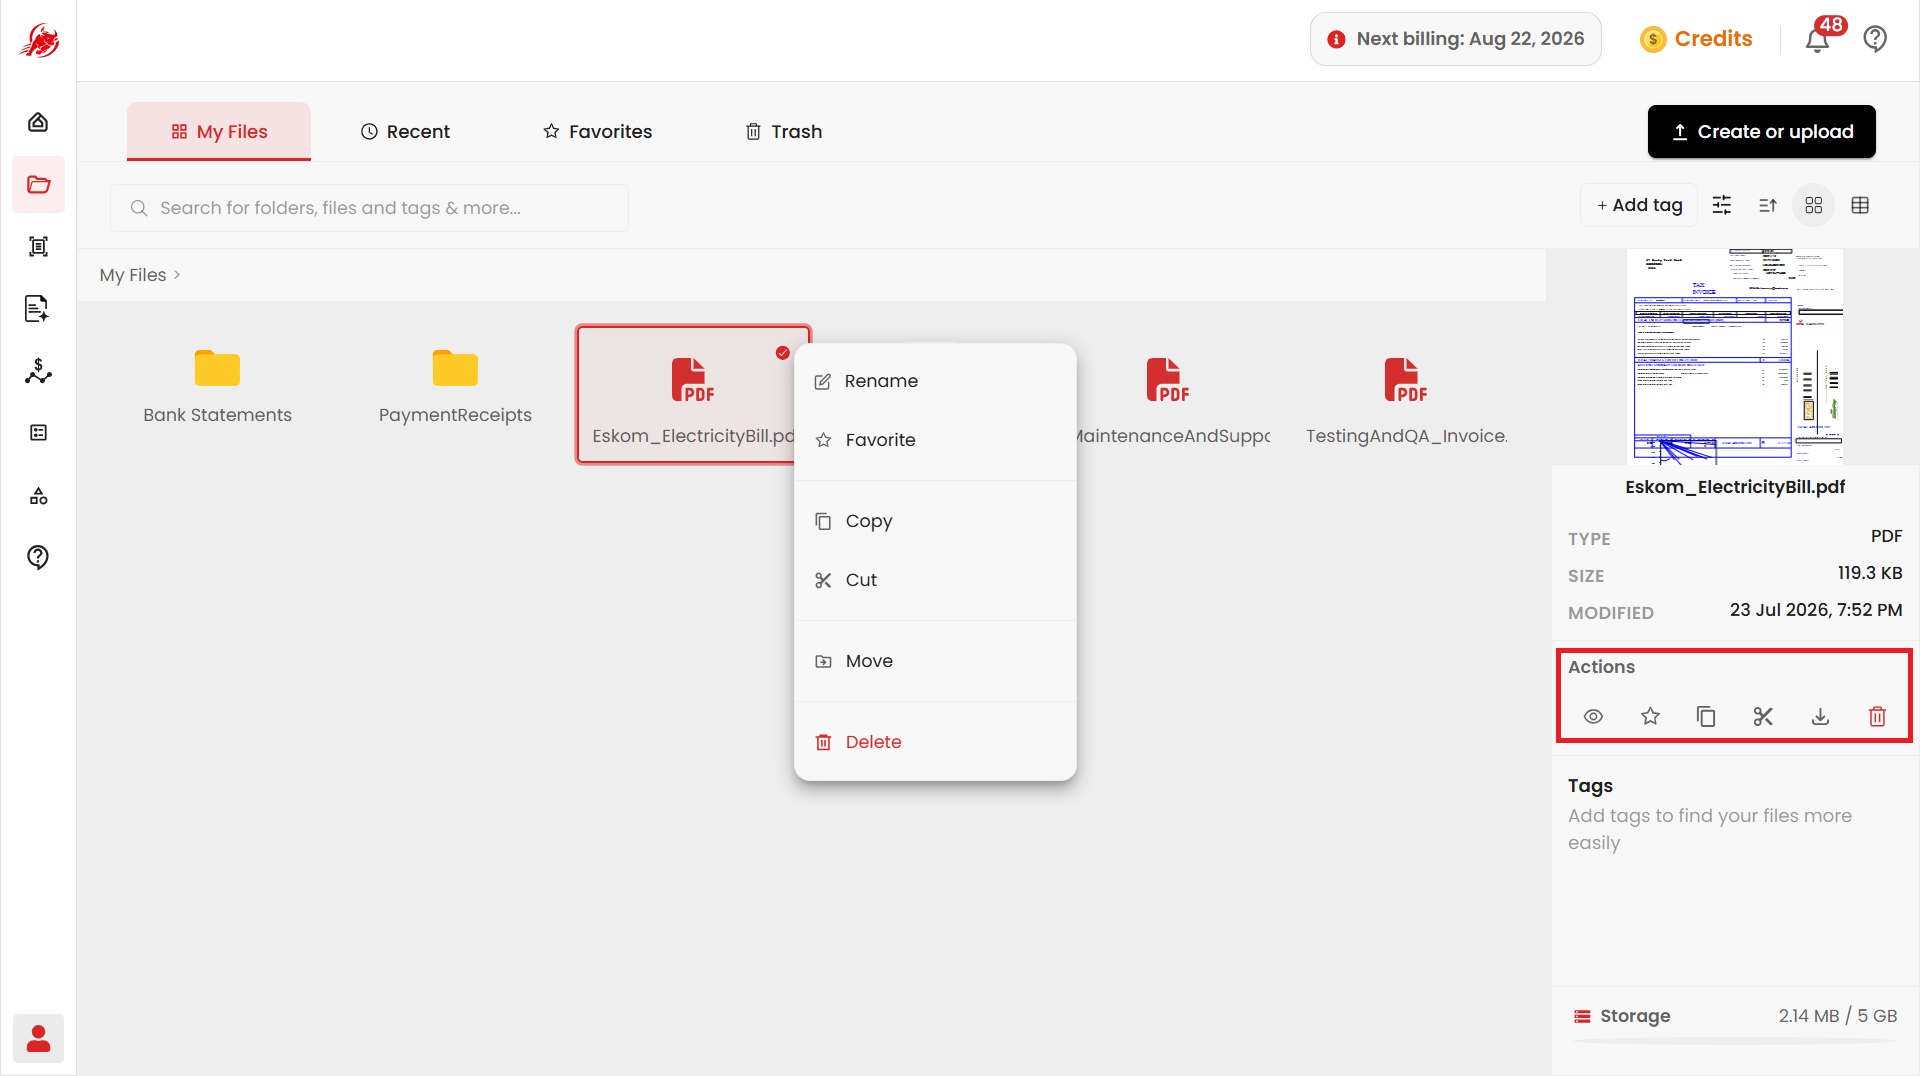
Right-click a file (or select it and use its action menu) to perform file operations such as Rename, Share, Favorite, Copy, Cut, Move and Delete — send it to Trash
Selecting a file also opens a details panel on the right, showing its type, size, date modified, and any tags you've added.
TIP
Share option only appears if your account belongs to an organization (Team plan). If you're on an individual account, you won't see it.
Tag a file
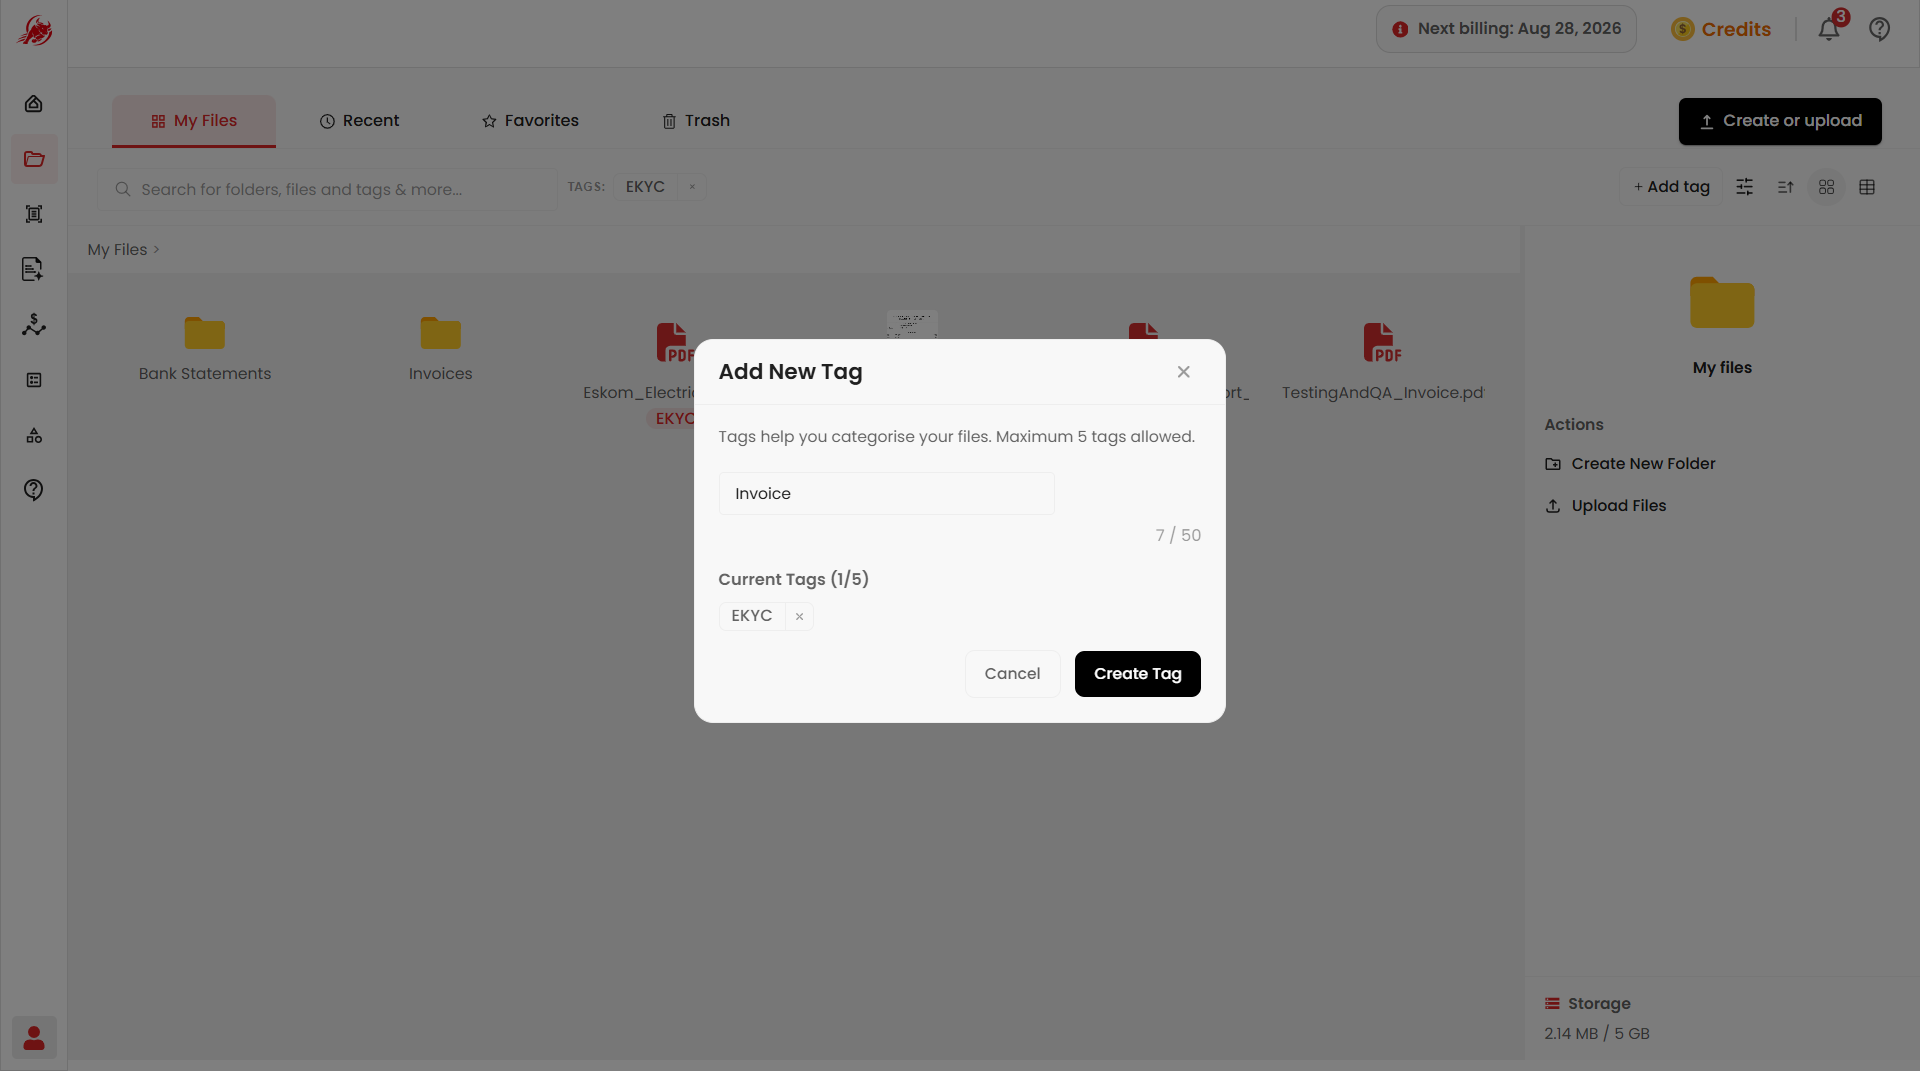
A tag is a short label you add to a file to make it easier to find later — for example, Invoice or EKYC.
- Select the file you want to tag.
- Click Add tag in the toolbar.
- Type a tag name and confirm.
- Select the tag to assign it to the file.
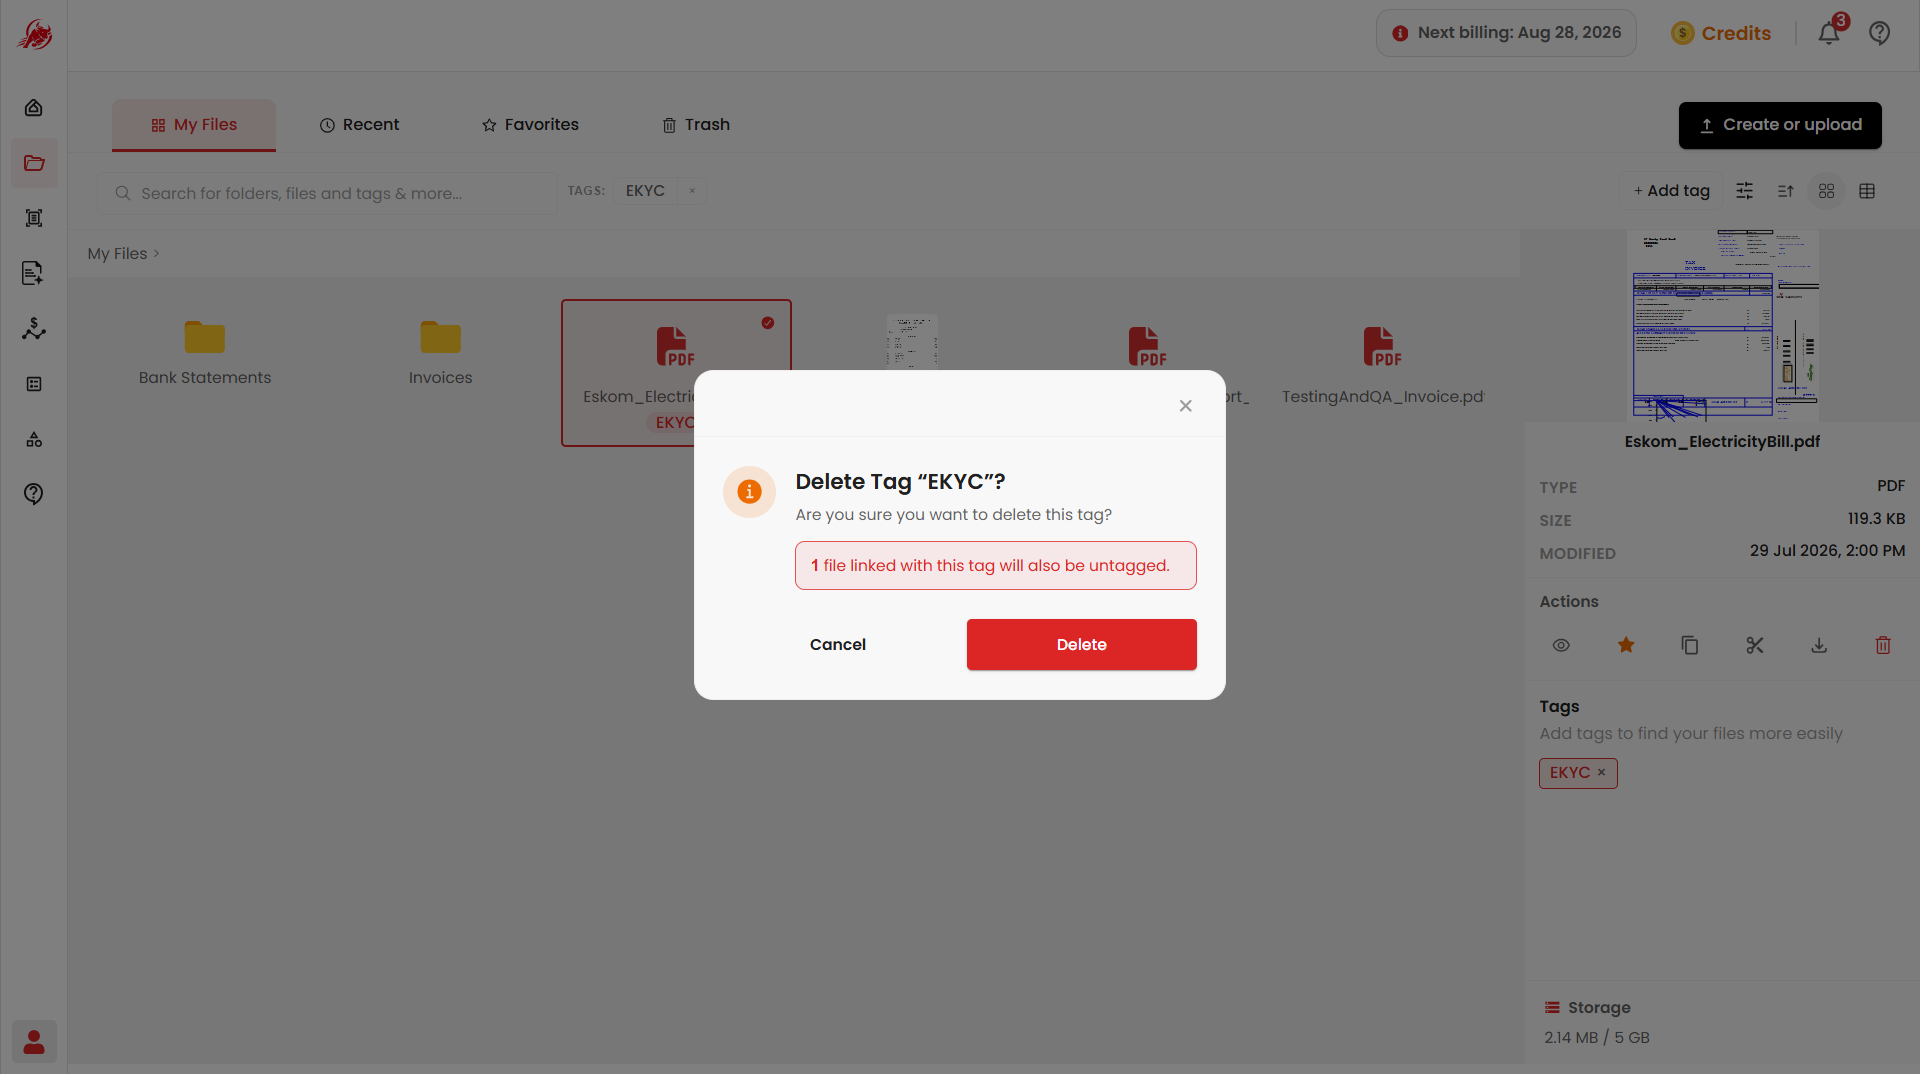
To delete a tag you no longer need, select it from the tags listed above and click Delete.
Search, sort, and filter
- Type in the Search bar to find a file by name or tag.
- Use the sort icon to arrange files A–Z, Z–A, or by date modified.
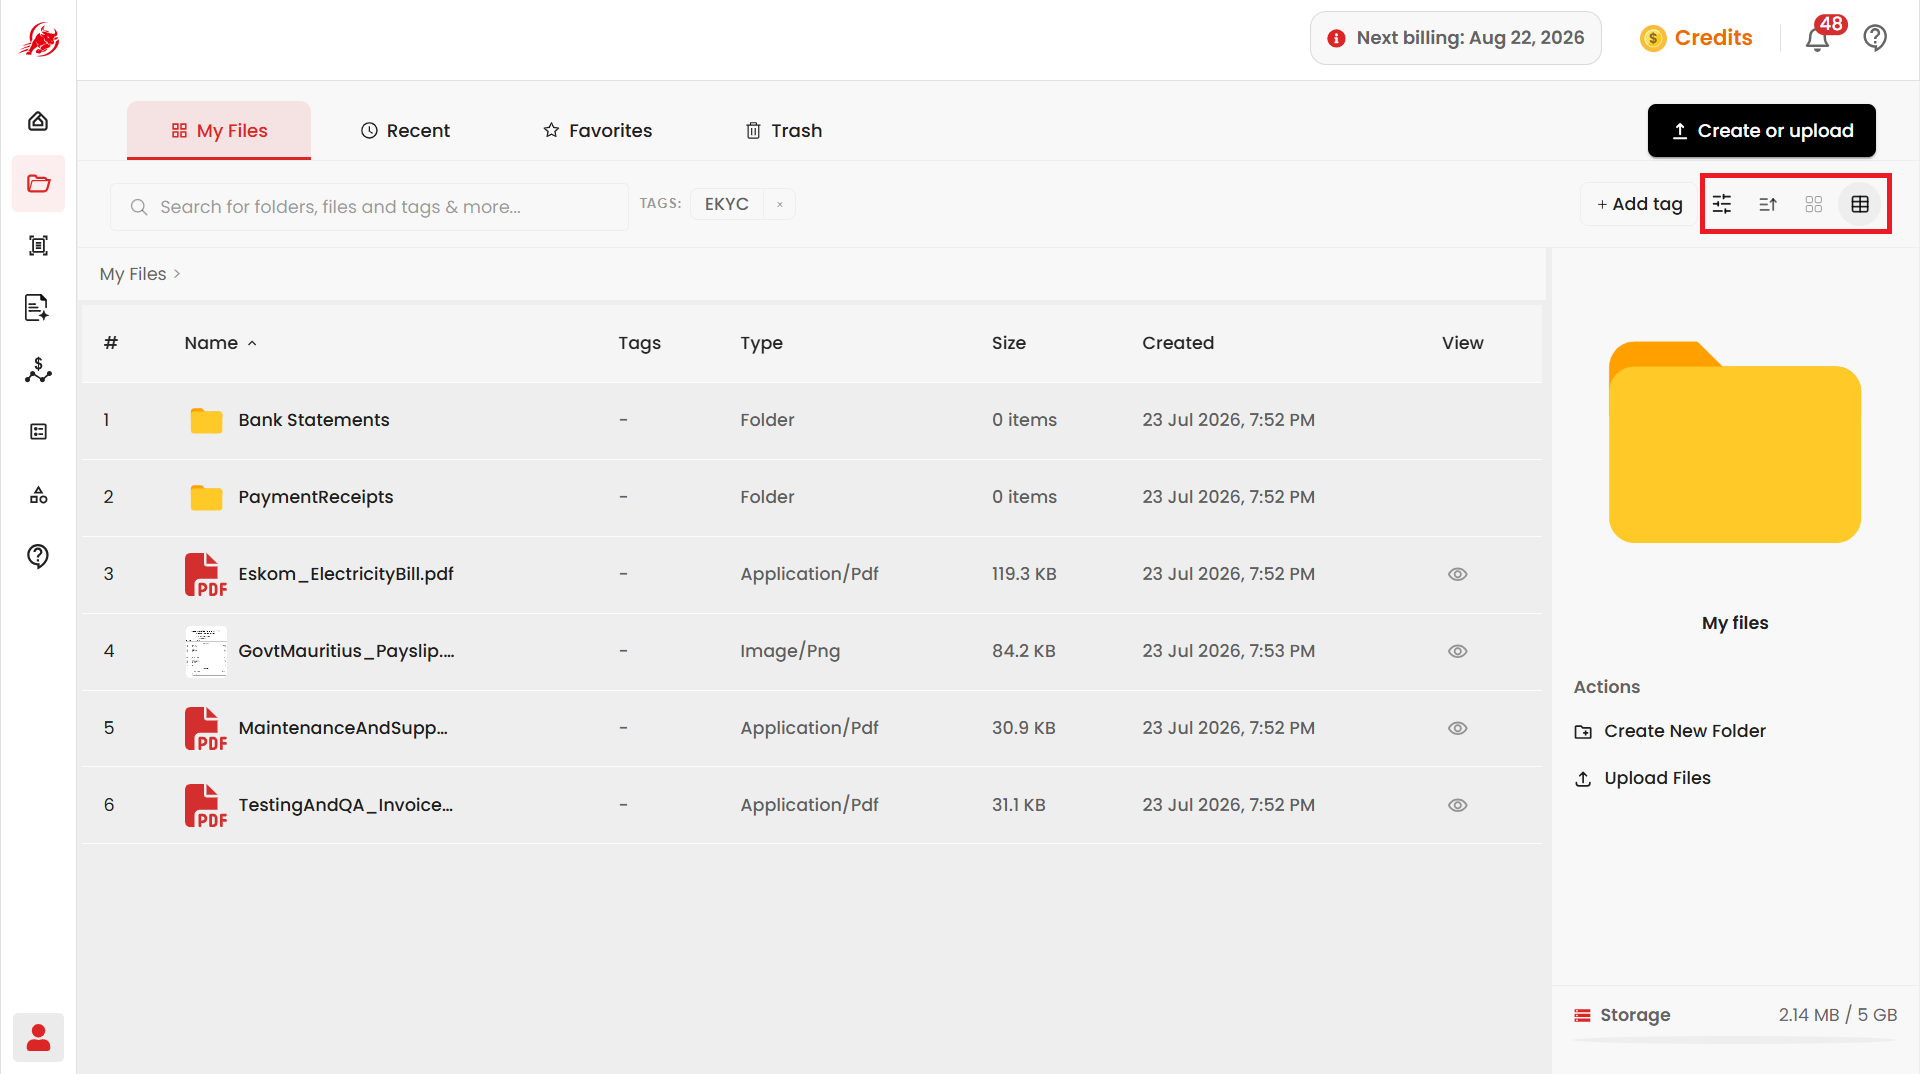
- Switch between Grid and List view using the icons in the top-right corner.
Restore or permanently delete a file
Deleted files go to Trash first, not directly removed.
- Open the Trash tab.
- Select the file.
- Choose Restore to bring it back, or Delete permanently to remove it for good.
TIP
Permanent deletion can't be undone.
Check your storage
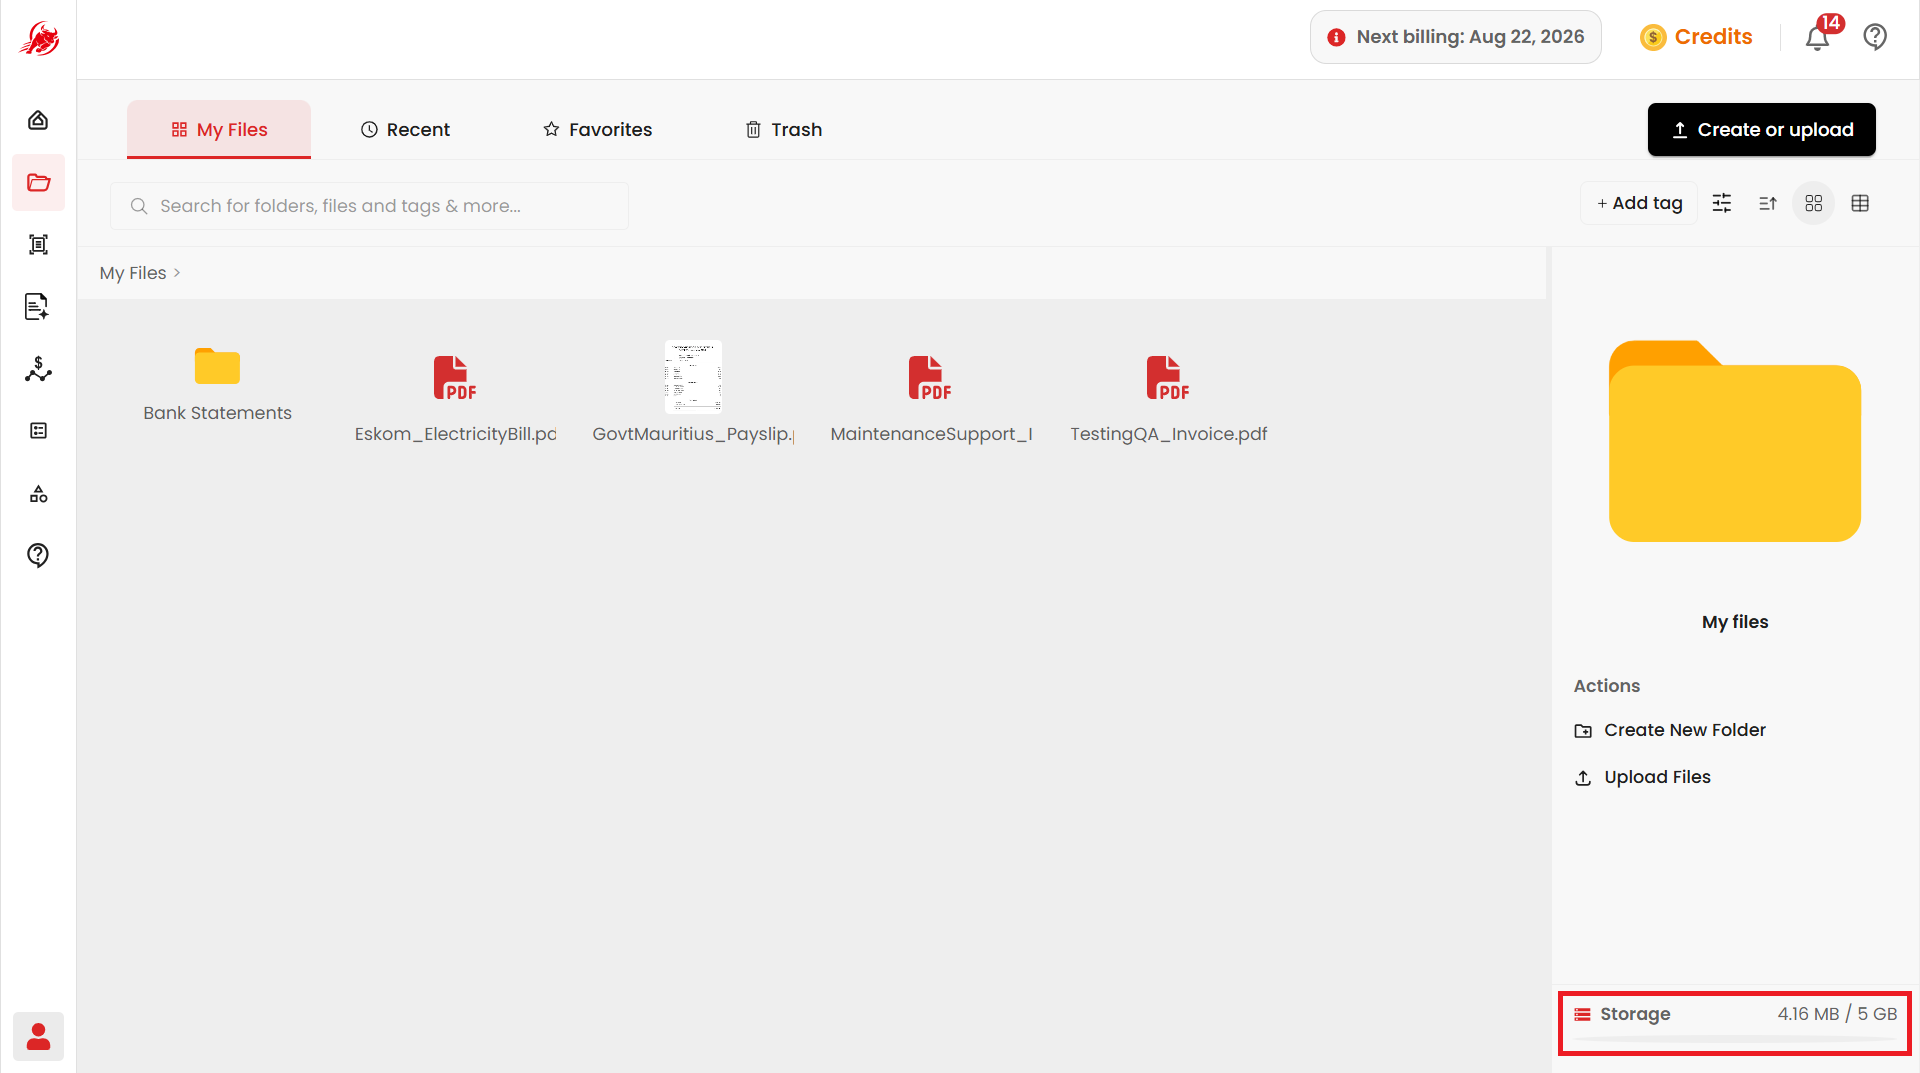
The Storage panel shows how much space your files are using against your plan's total storage limit.