
Appearance
Extraction
Extraction turns a document into text or structured data. Upload a file — or pick one you've already saved — and Regoxa reads it for you.
TIP
OCR (Optical Character Recognition) is the technology that reads text from a scanned document or image and turns it into text you can edit, search, and copy.
Add your document
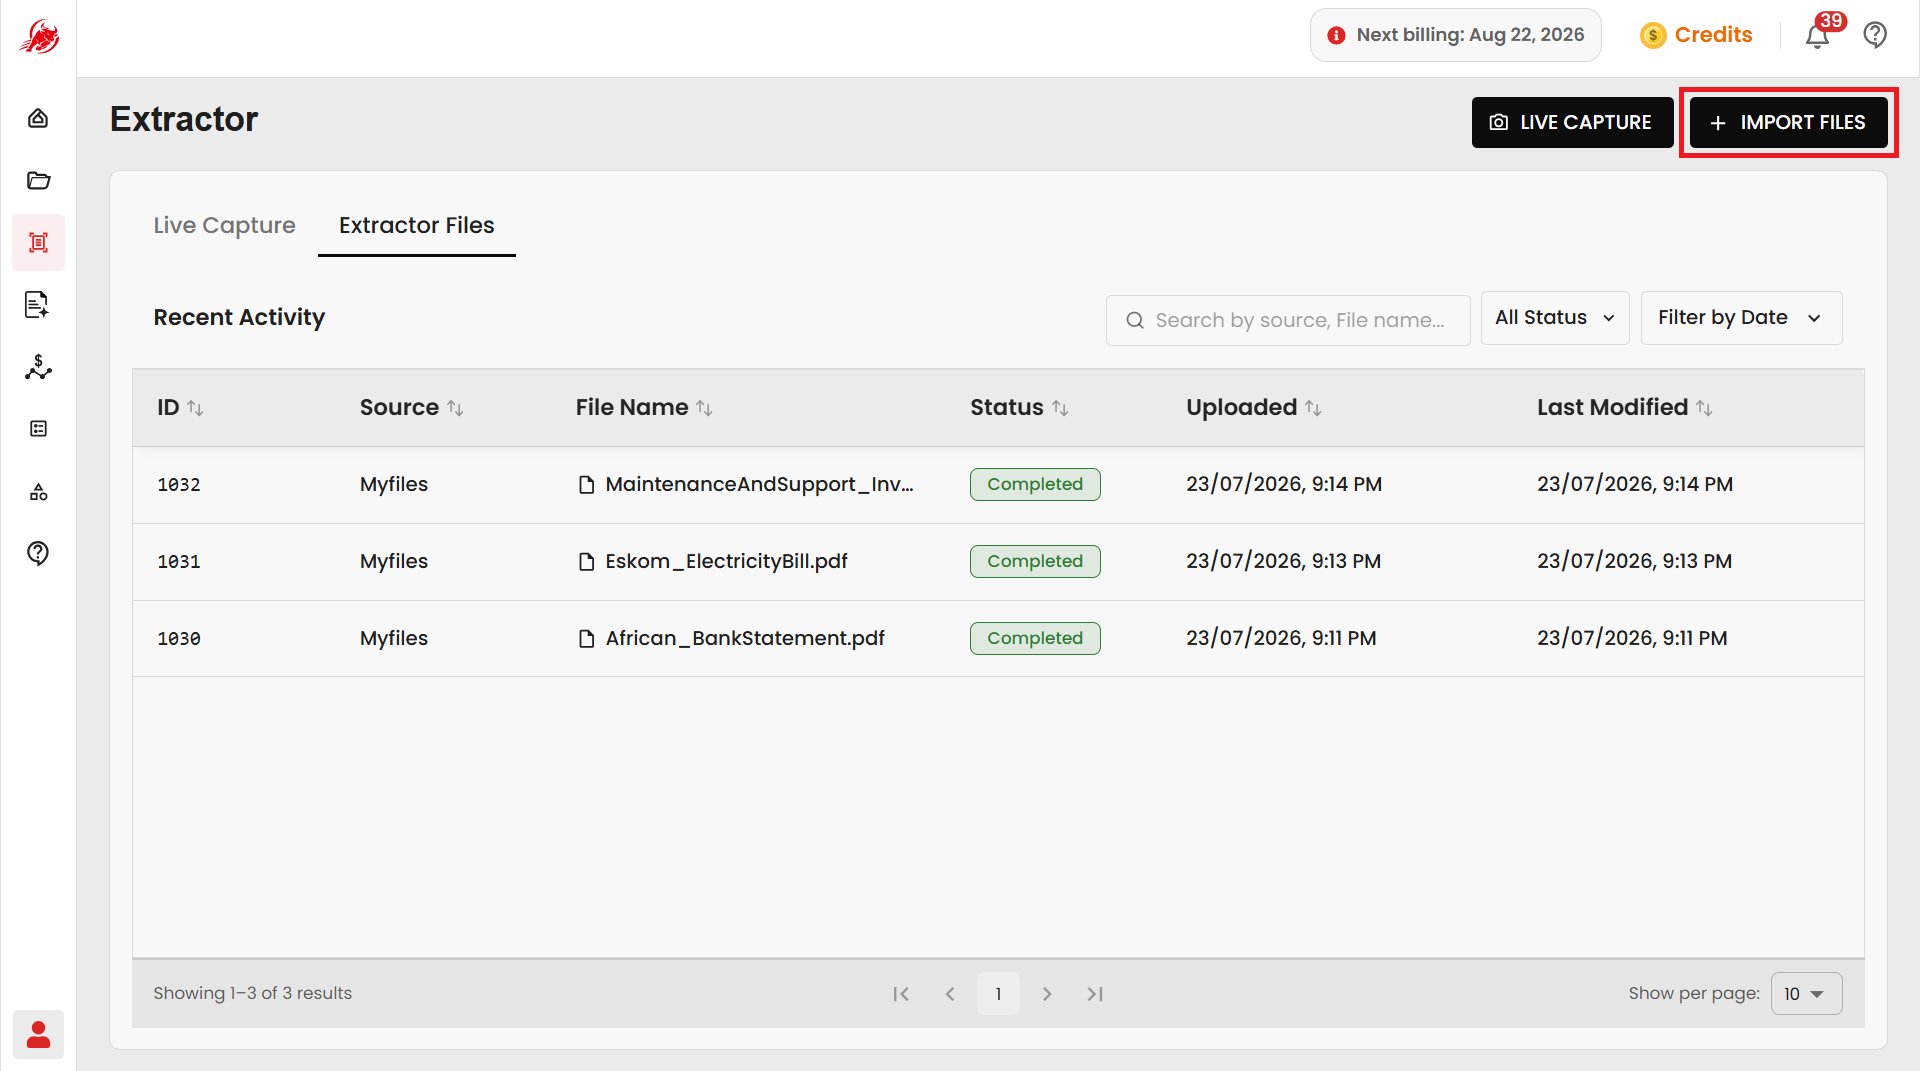
In the Extractor module, click Import Files.
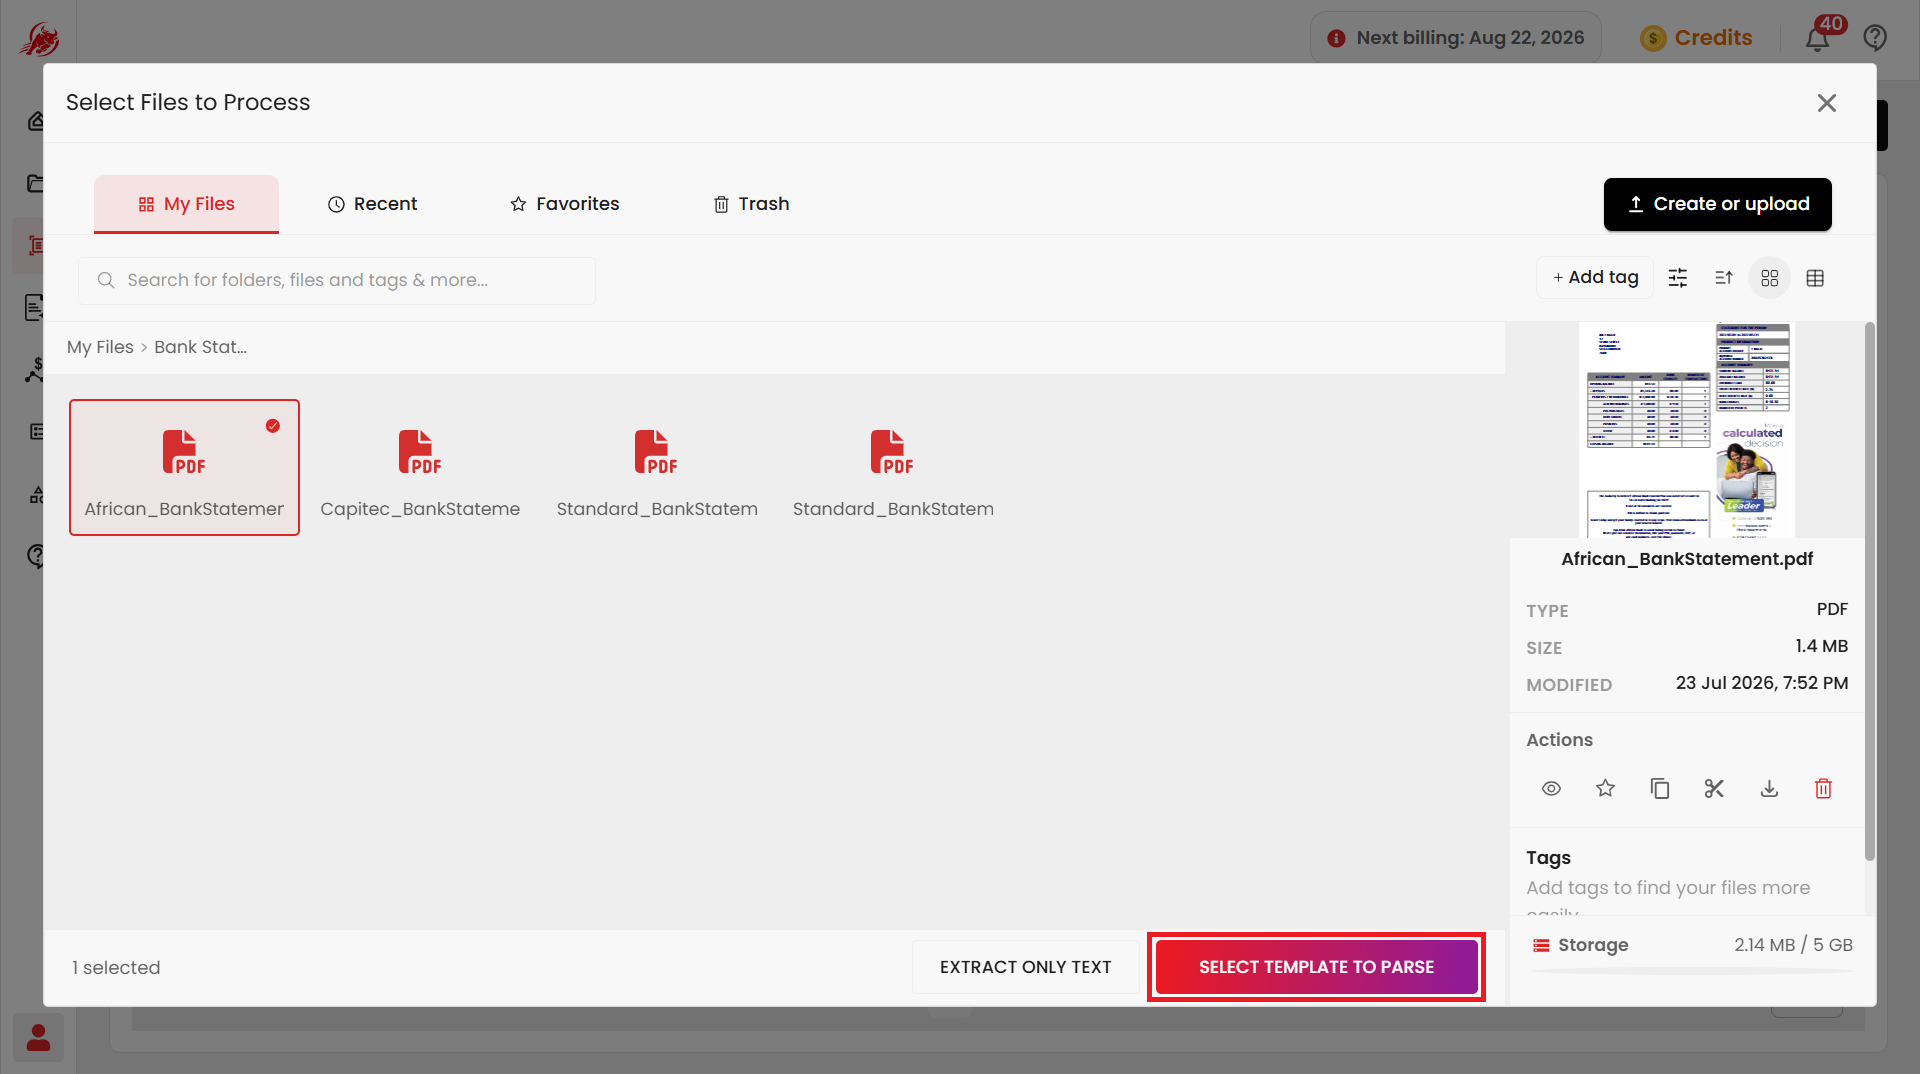
A window opens where you can pick a file you've already saved — under My Files, Recent, or Favorites — or click Create or upload to add a new one.
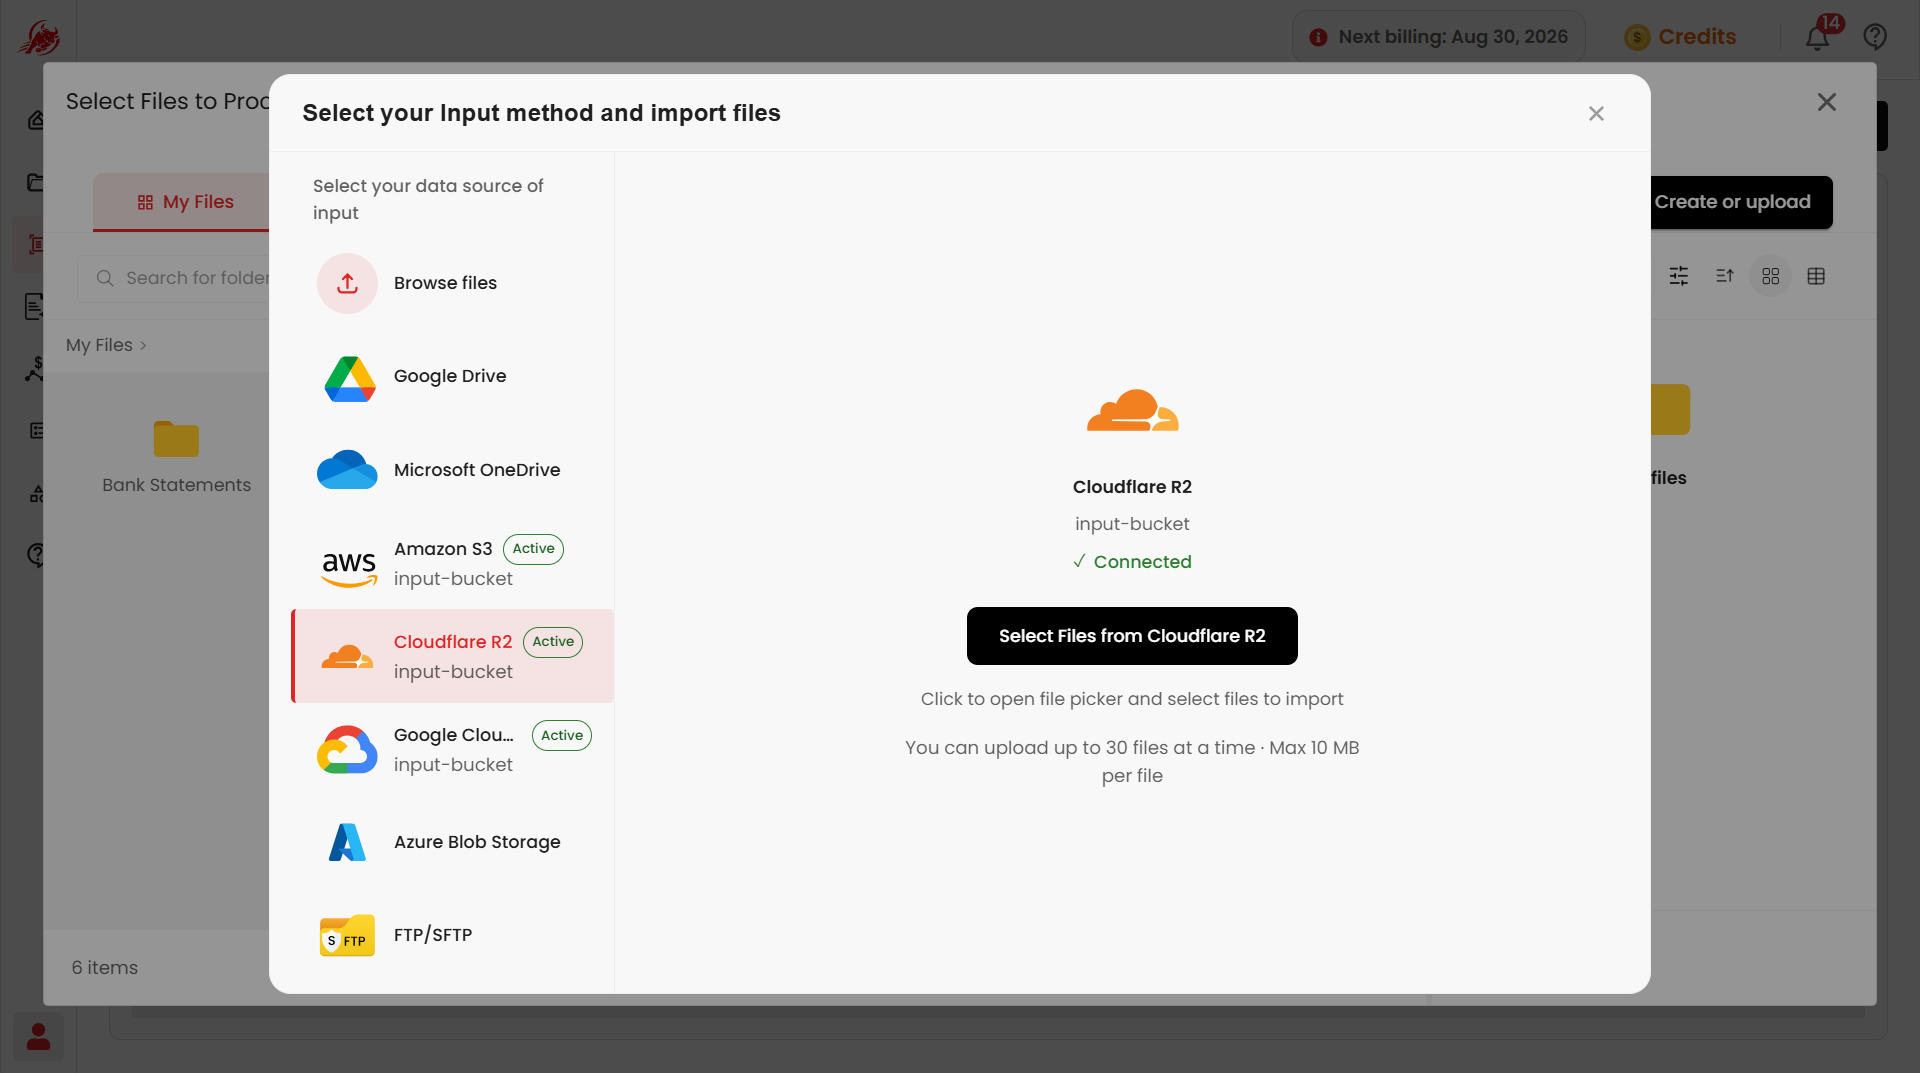
If you click Create or upload, choose where the file should come from:
- Browse files — pick a file from your computer.
- A connected app, such as Google Drive, Microsoft OneDrive, Amazon S3, Cloudflare R2, Google Cloud Storage, Azure Blob Storage, or FTP/SFTP.
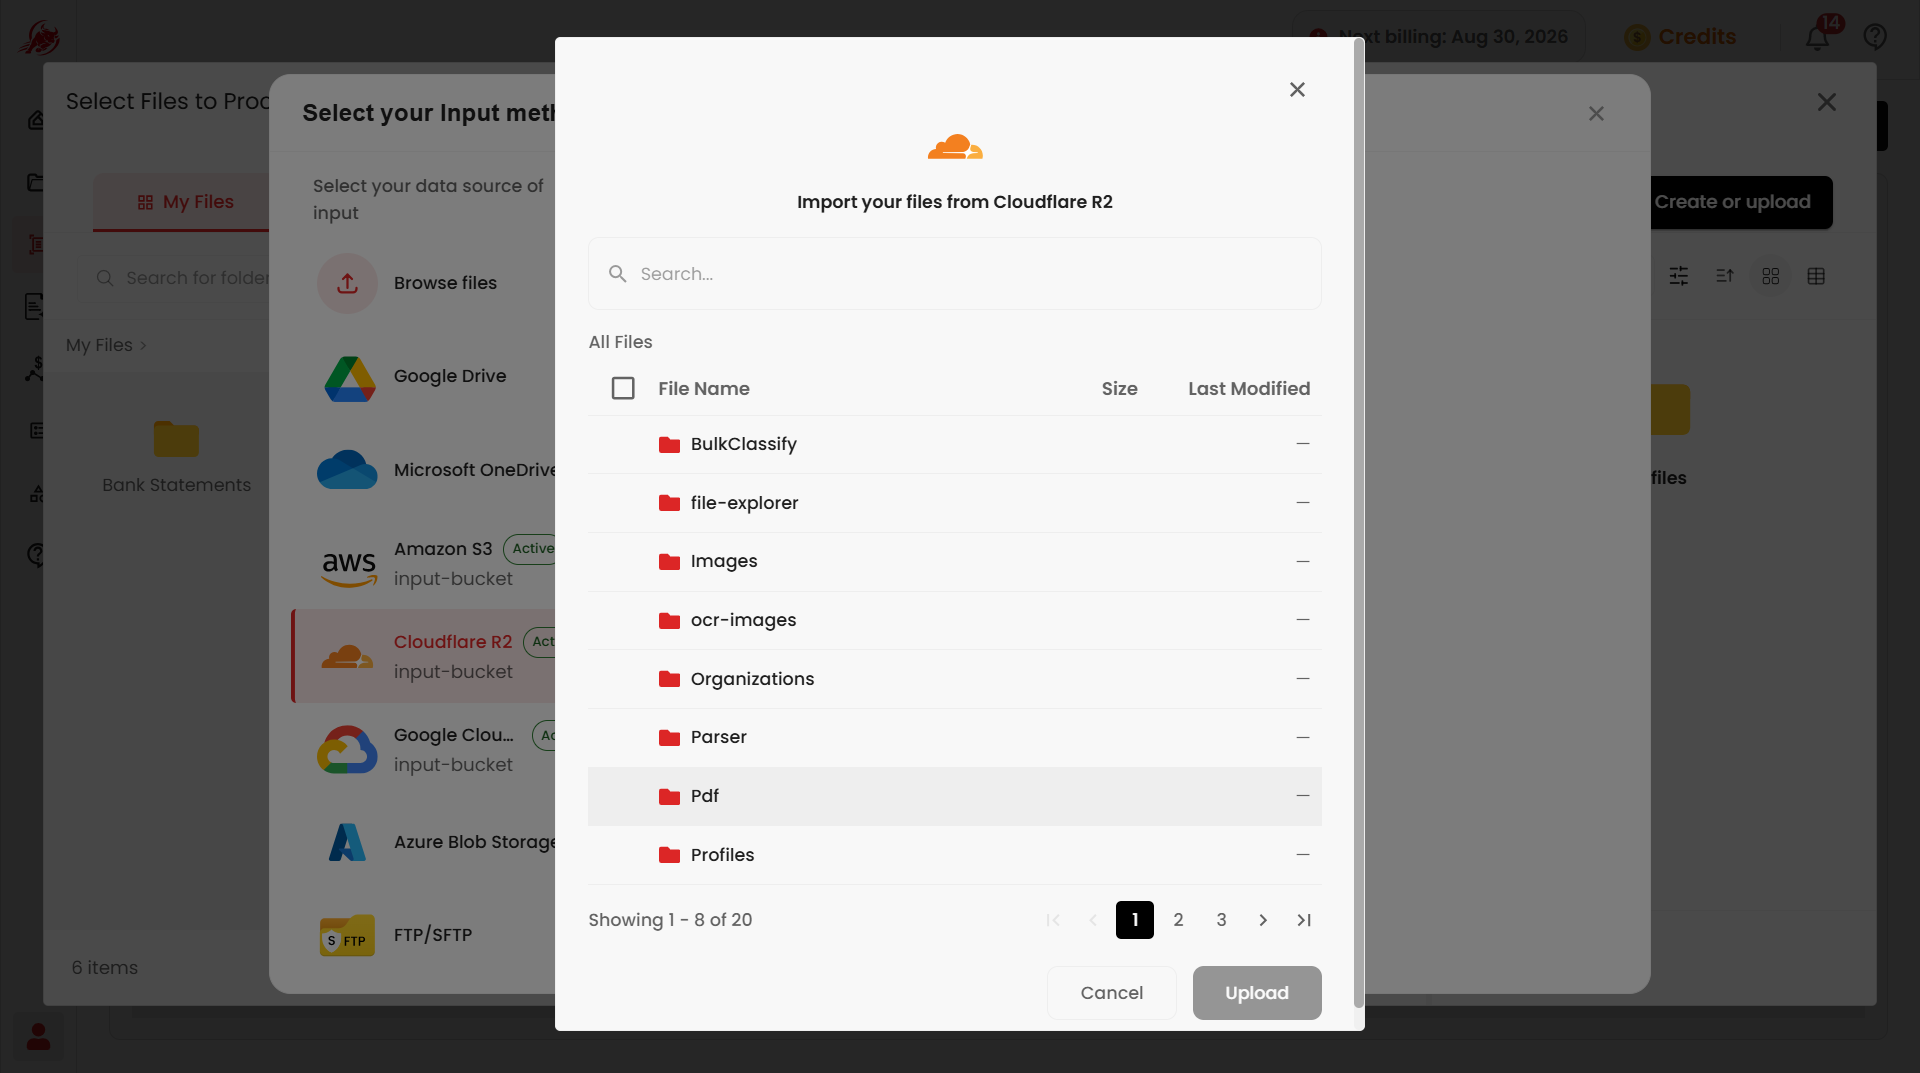
Picking a connected app opens its file list — select the files you want and click Upload.
TIP
These connected apps are called plugins. Set one up first from Plugins & Integrations so it shows up here.
Choose how to process it
Select your file, then pick one of two options at the bottom of the window:
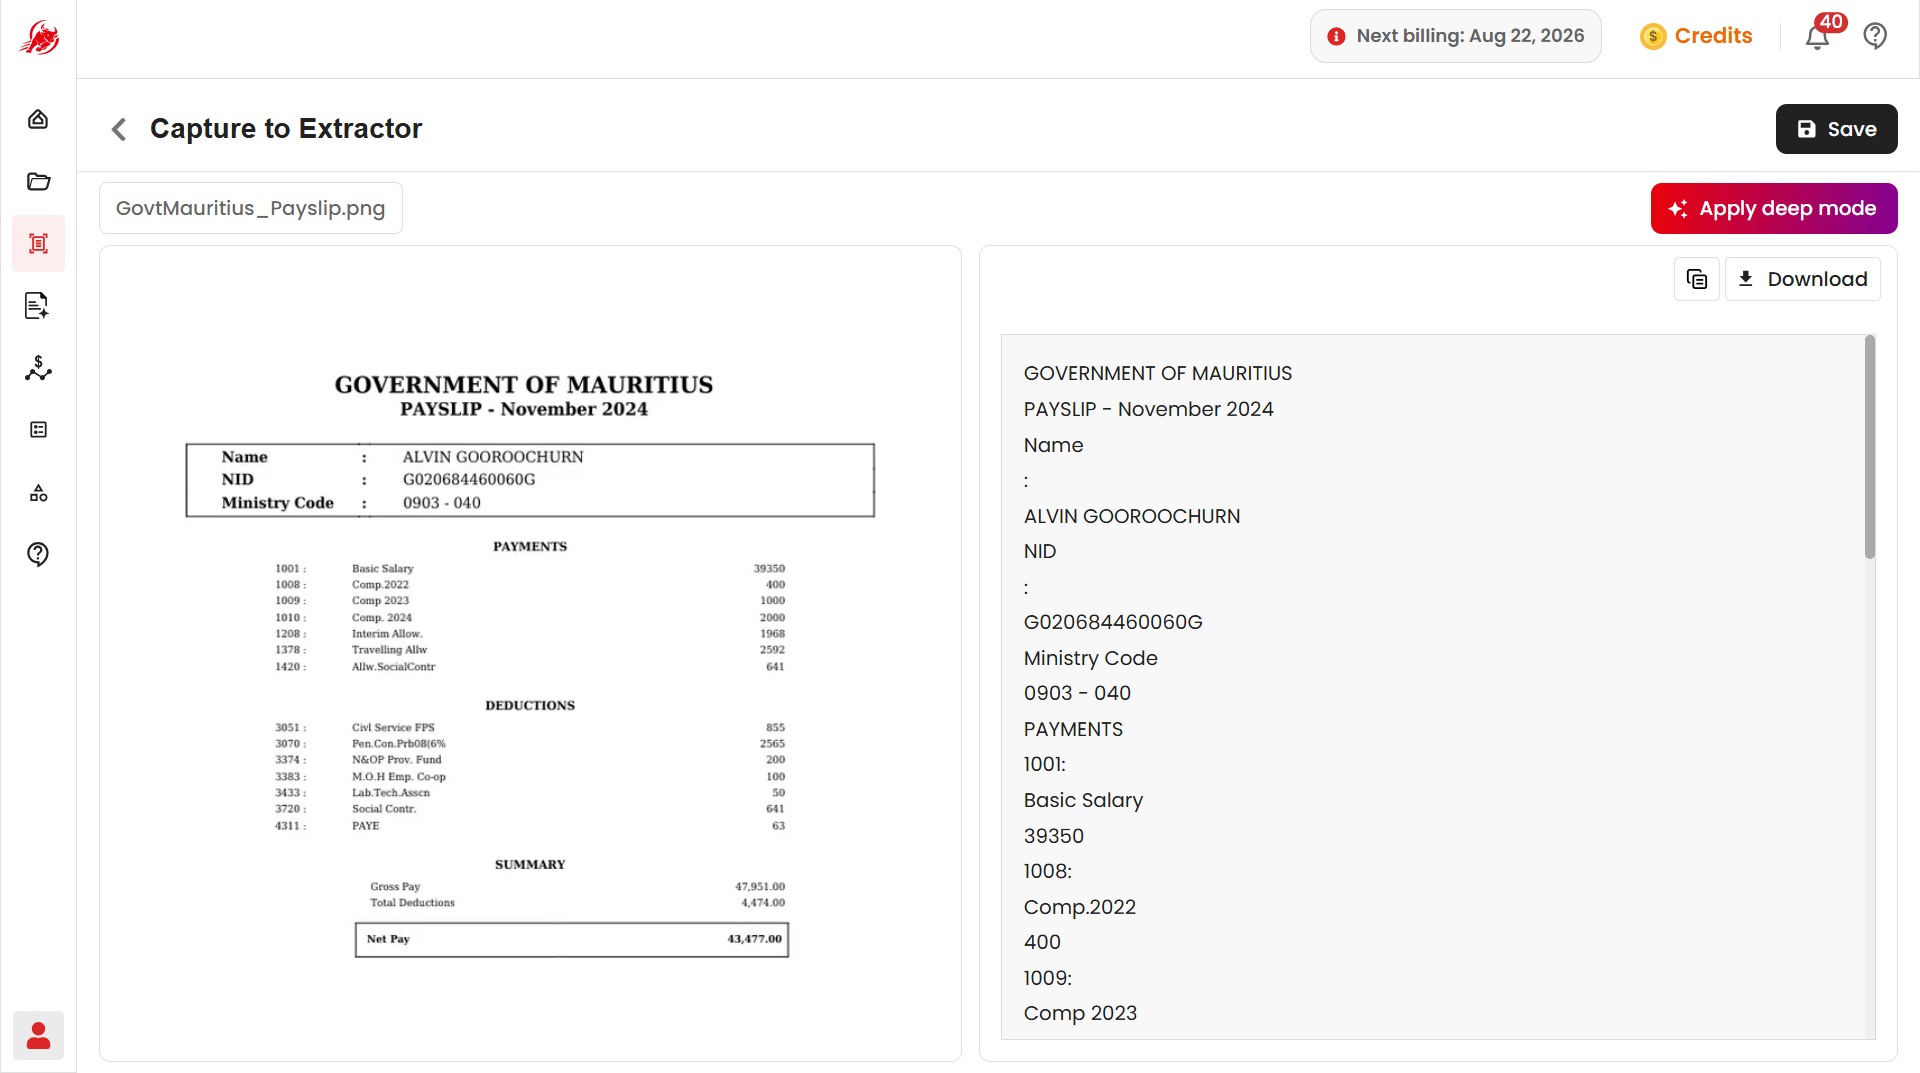
Extract Only Text — pulls out the raw text, with no structure. Use this for a quick read of any document.
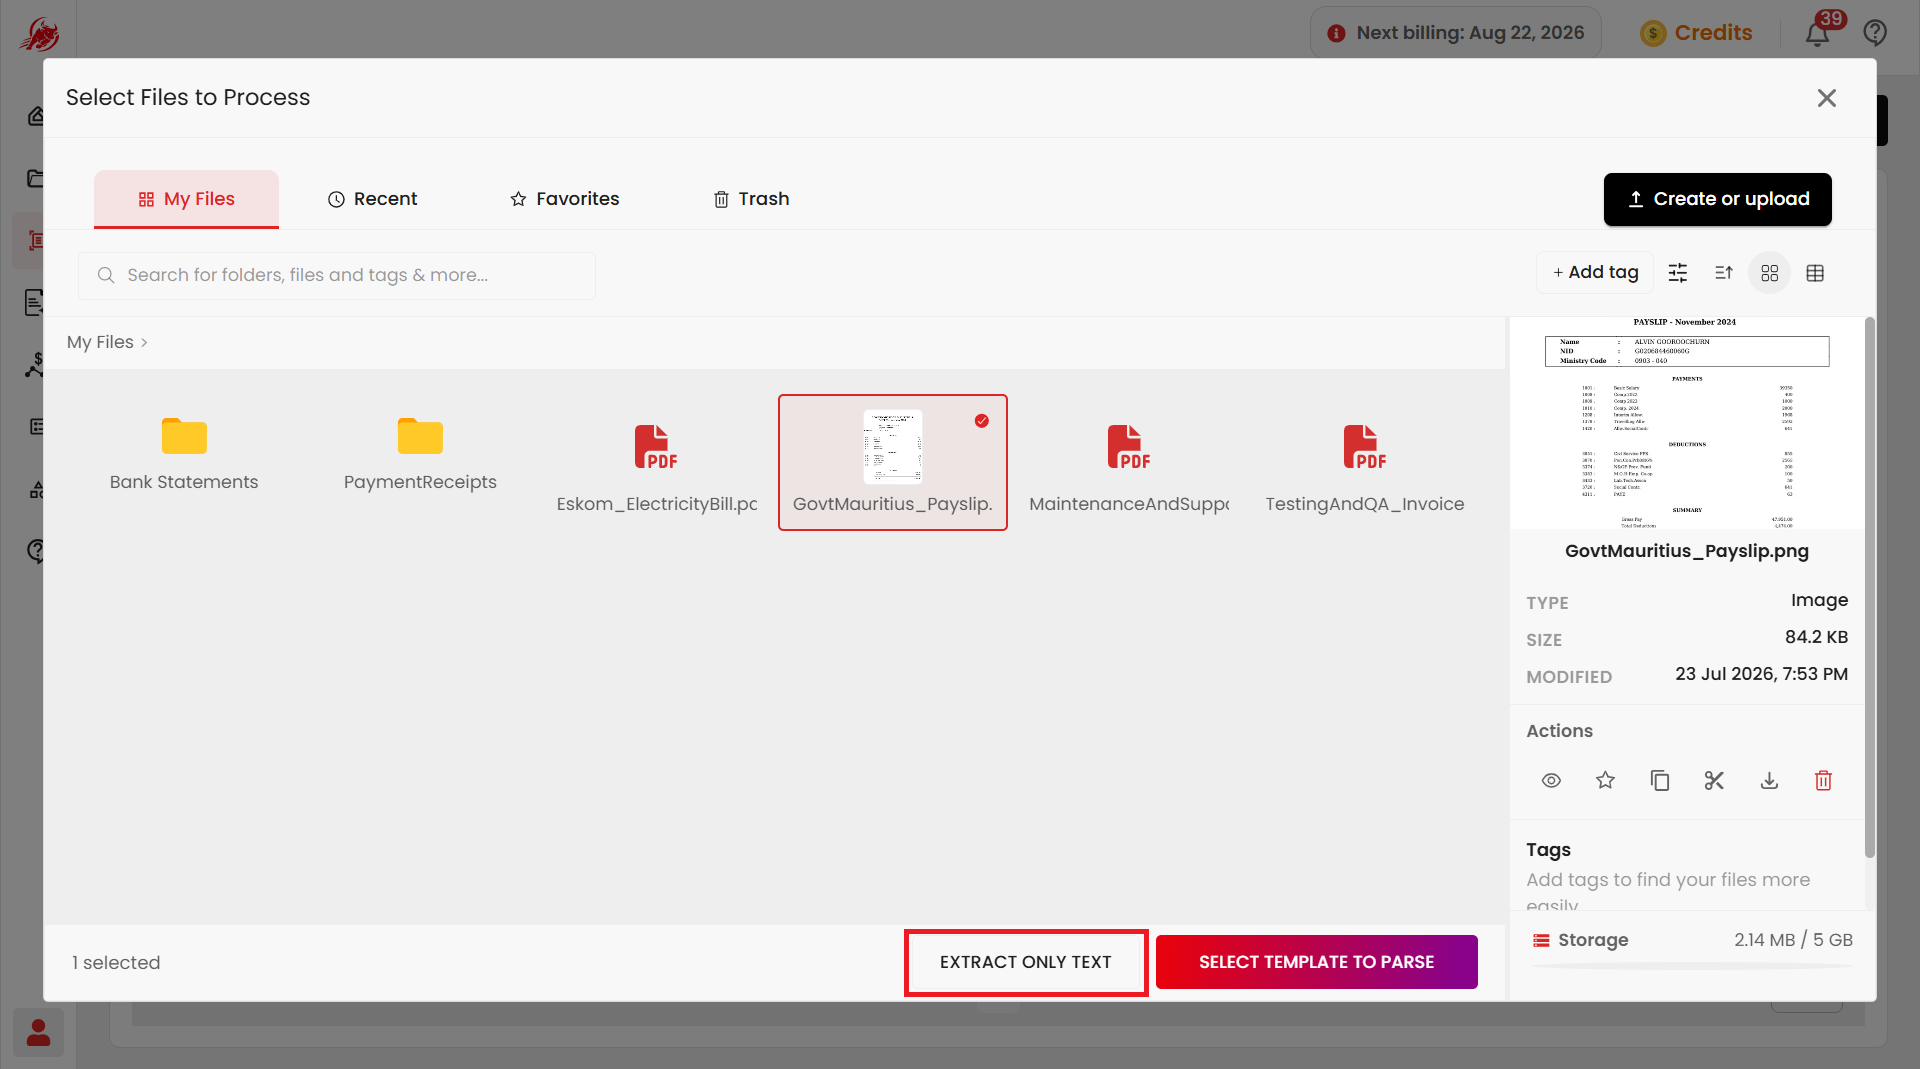
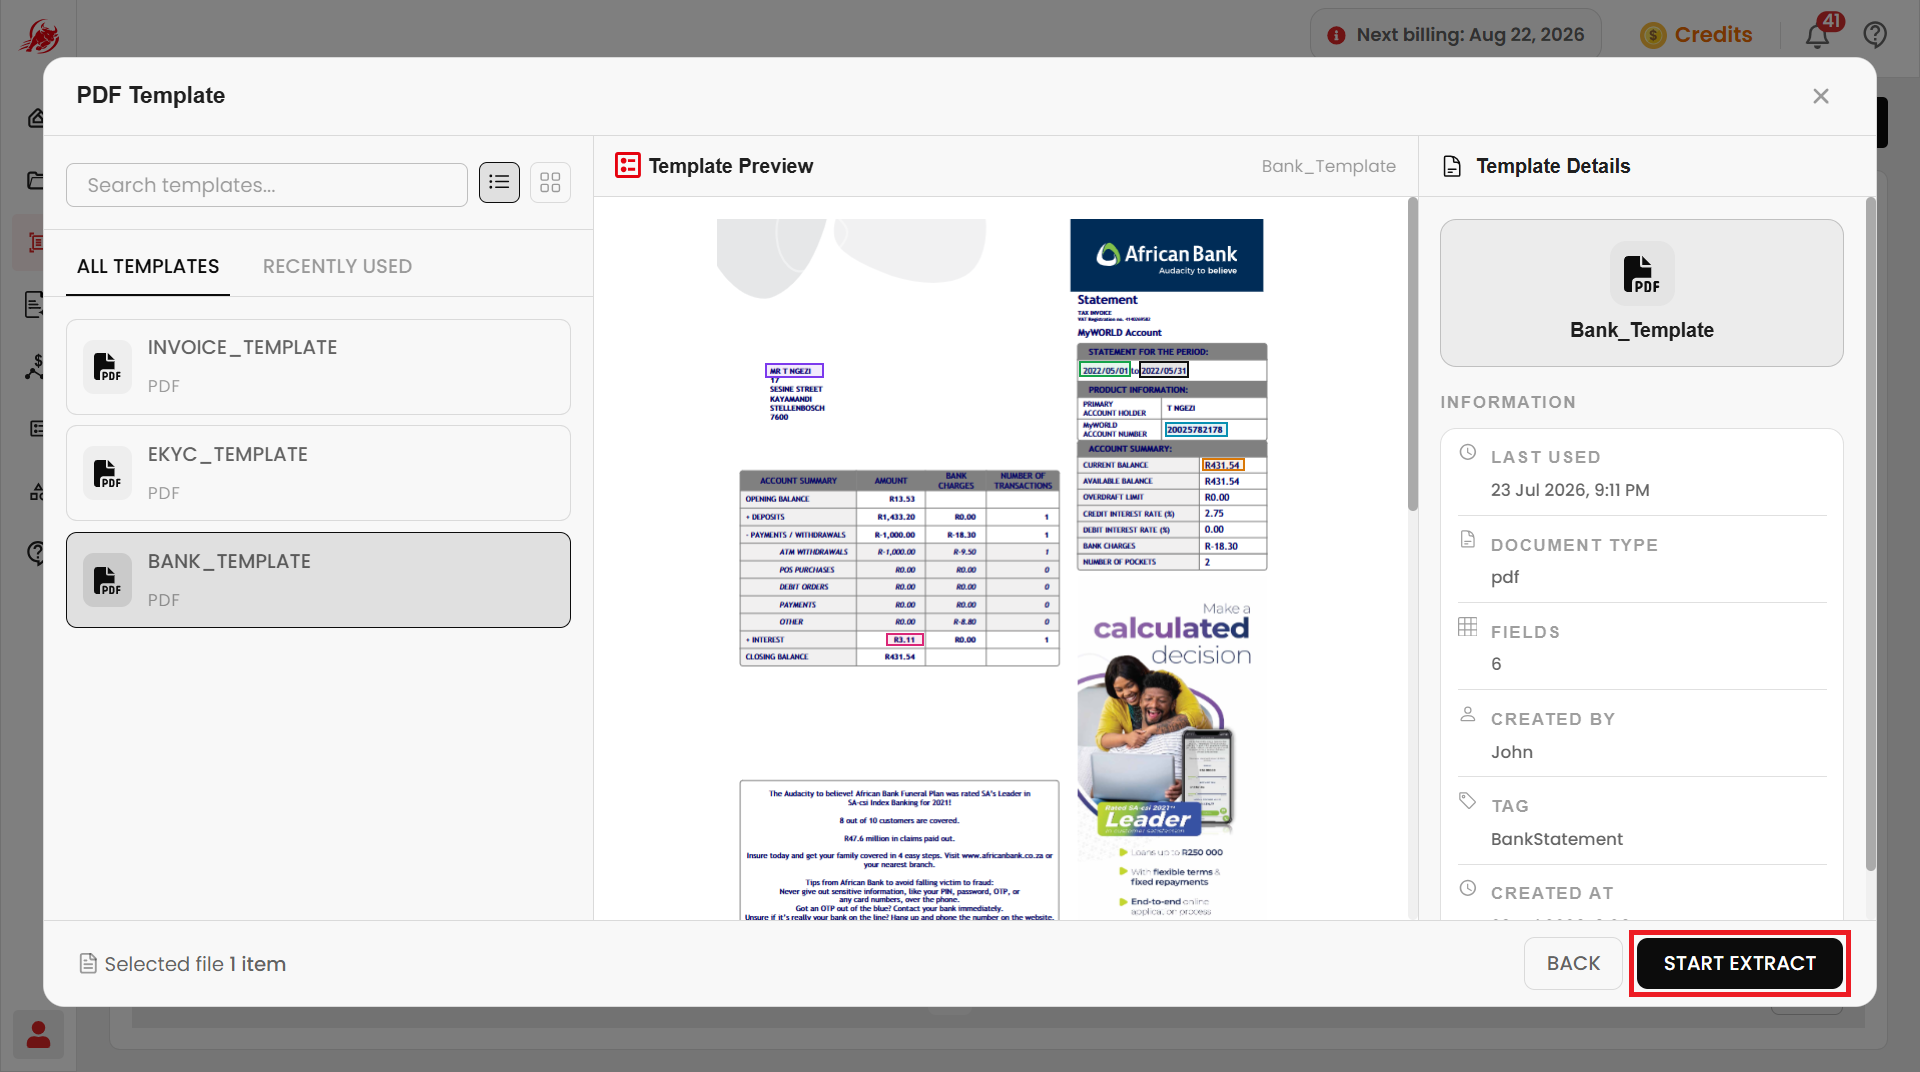
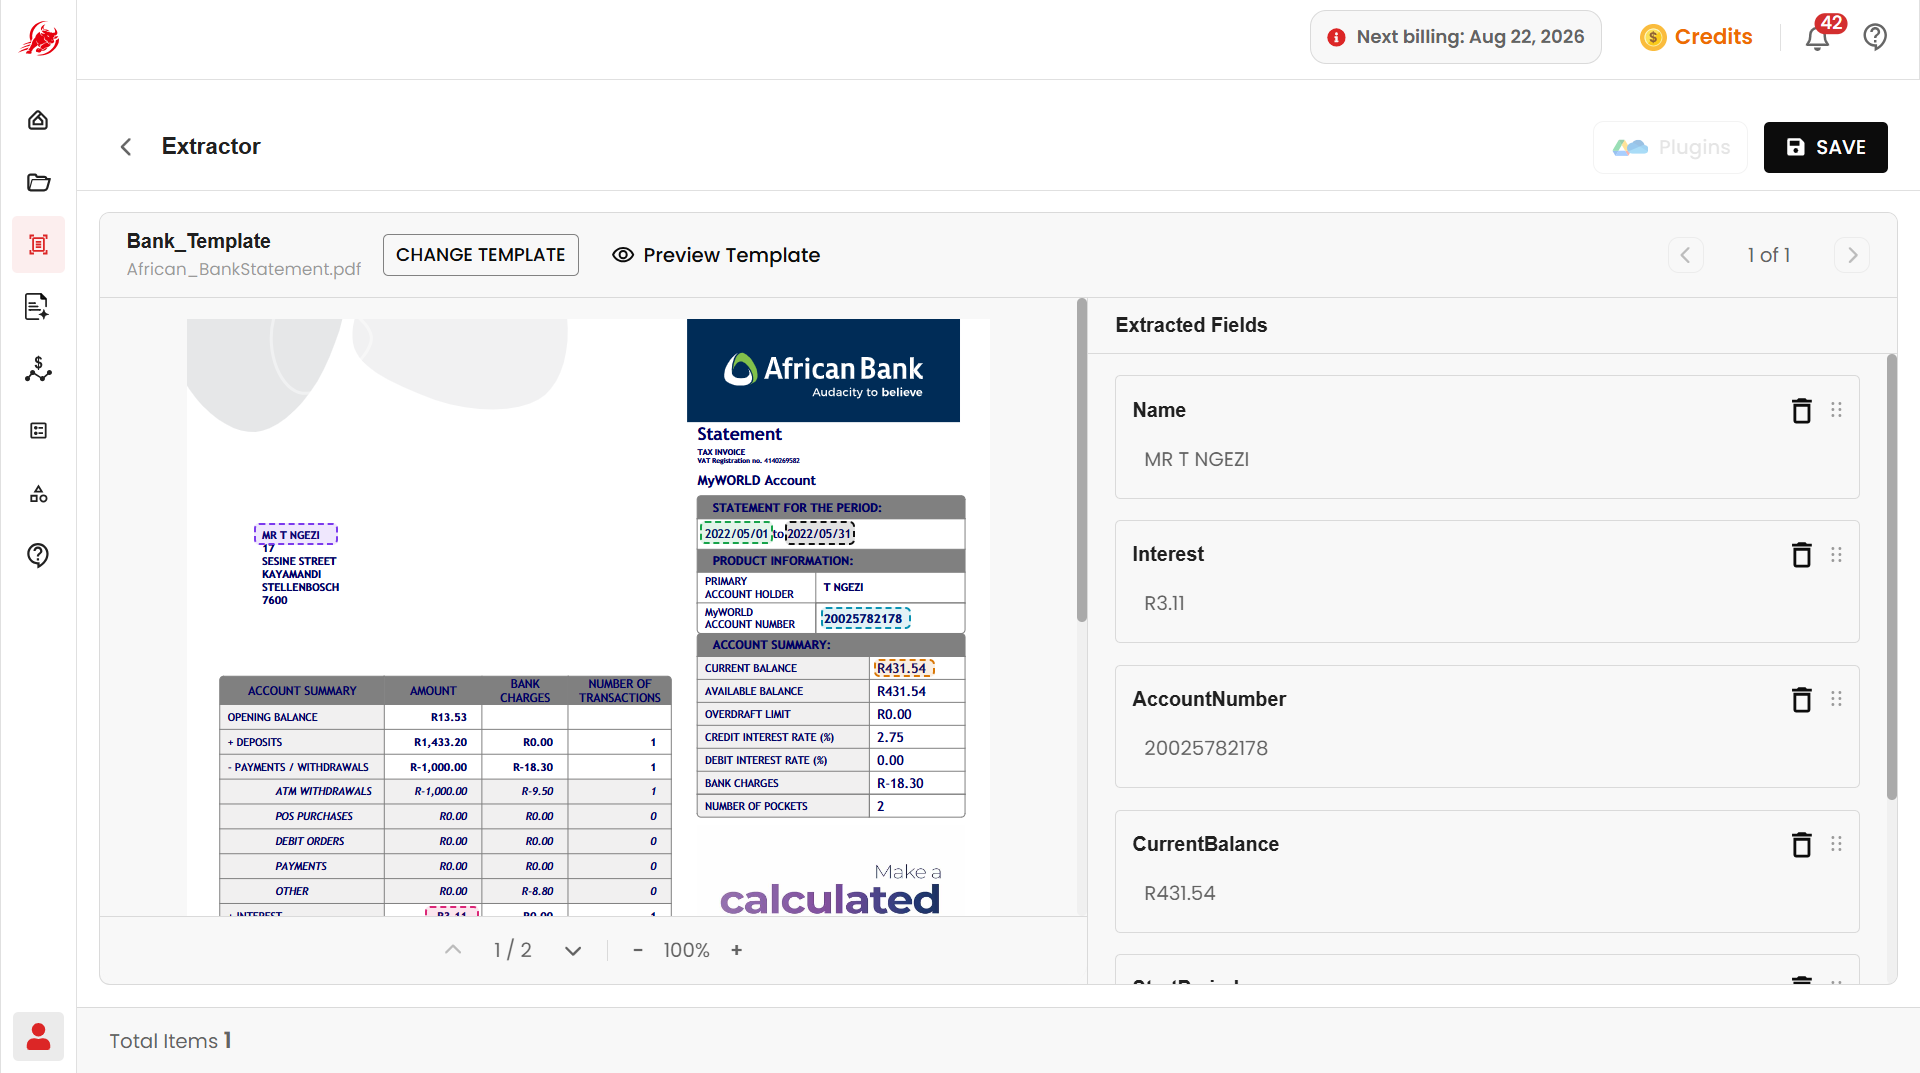
Select Template To Parse — pulls out specific fields using a template, such as Name, Account Number, or Current Balance. Use this for documents you process regularly, like bank statements or invoices.
TIP
A template is a saved pattern that tells Regoxa which fields to look for and where to find them on the page. See Template to create one.
Pick a template from the list, then click Start Extract.
Review the results
Extract Only Text shows the raw text next to your document. Click Apply Deep Mode for a more careful, accurate read, or use Copy and Download to grab the text.
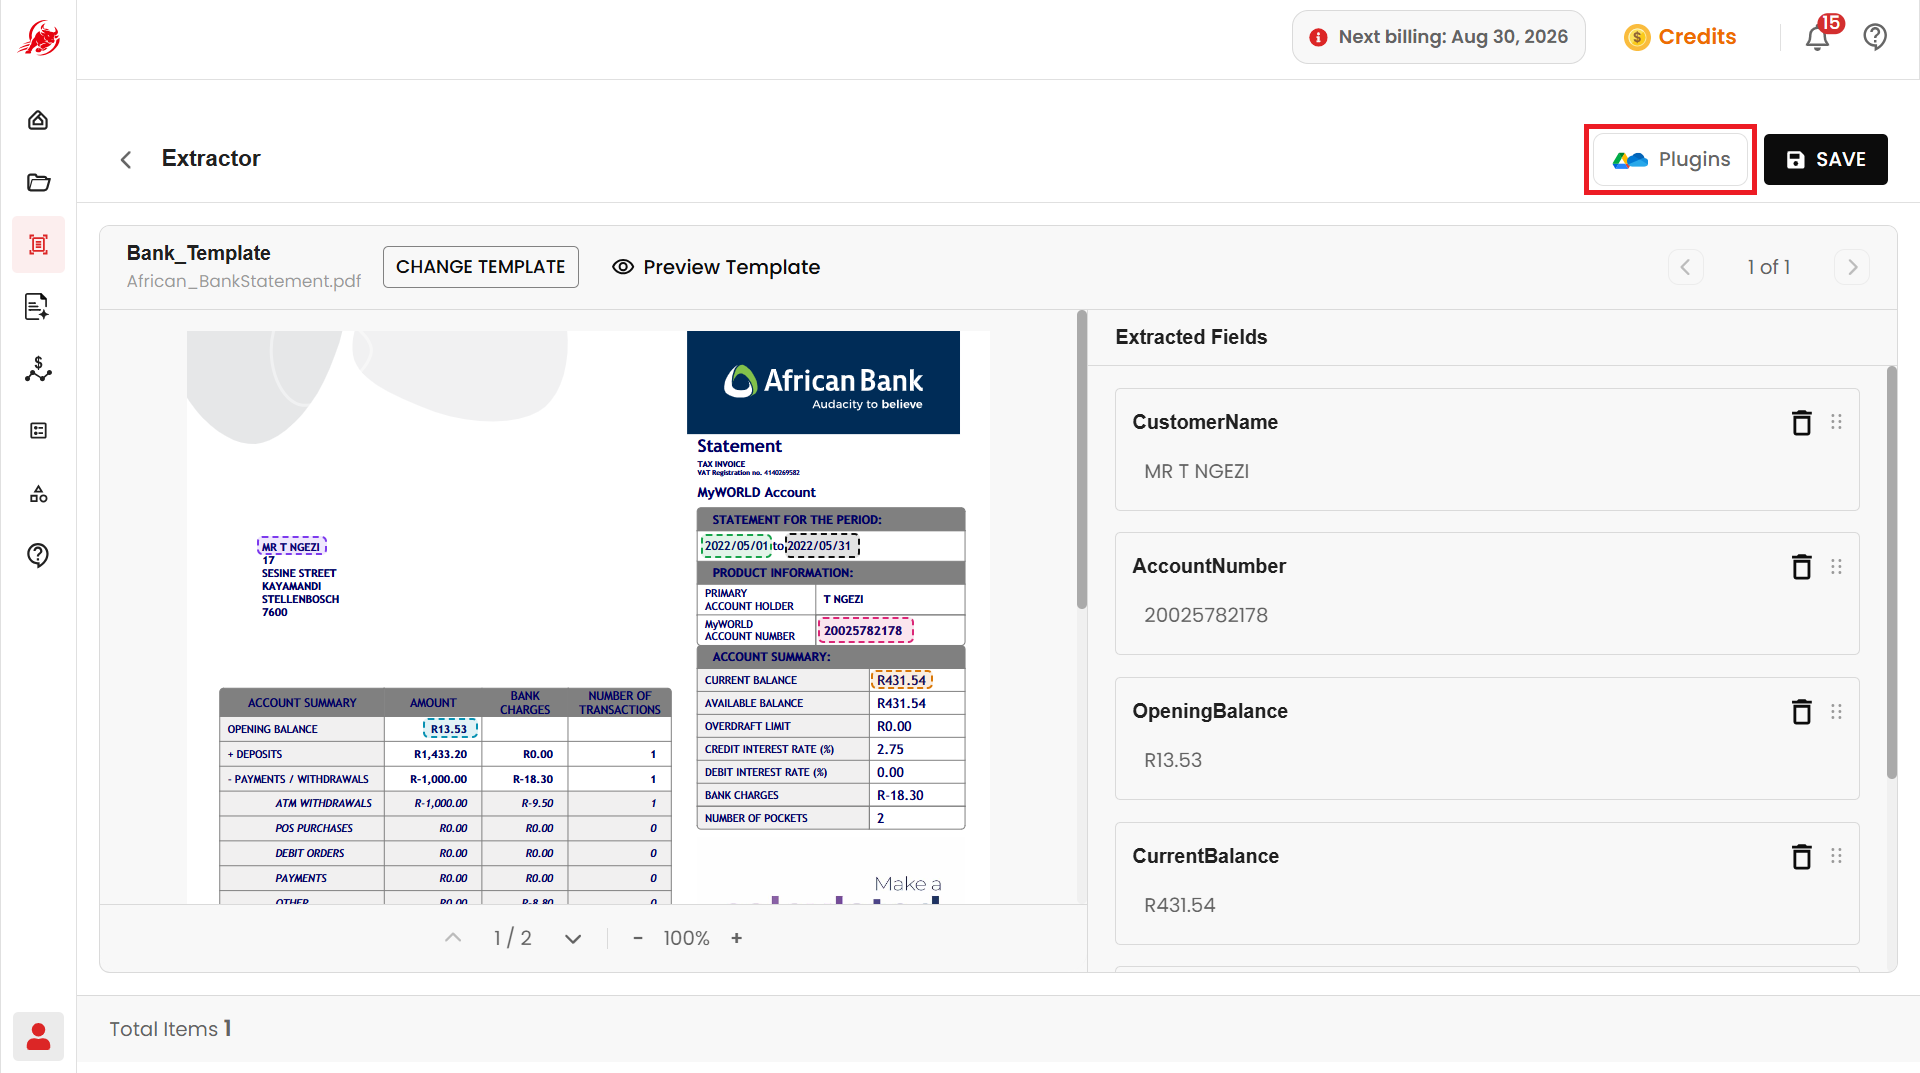
Select Template To Parse shows each field it found — like Name, Account Number, and Current Balance. Click a field to correct it, or use the trash icon to remove one you don't need.
TIP
You can change template and view template in the extraction page itself if required.
Save your results
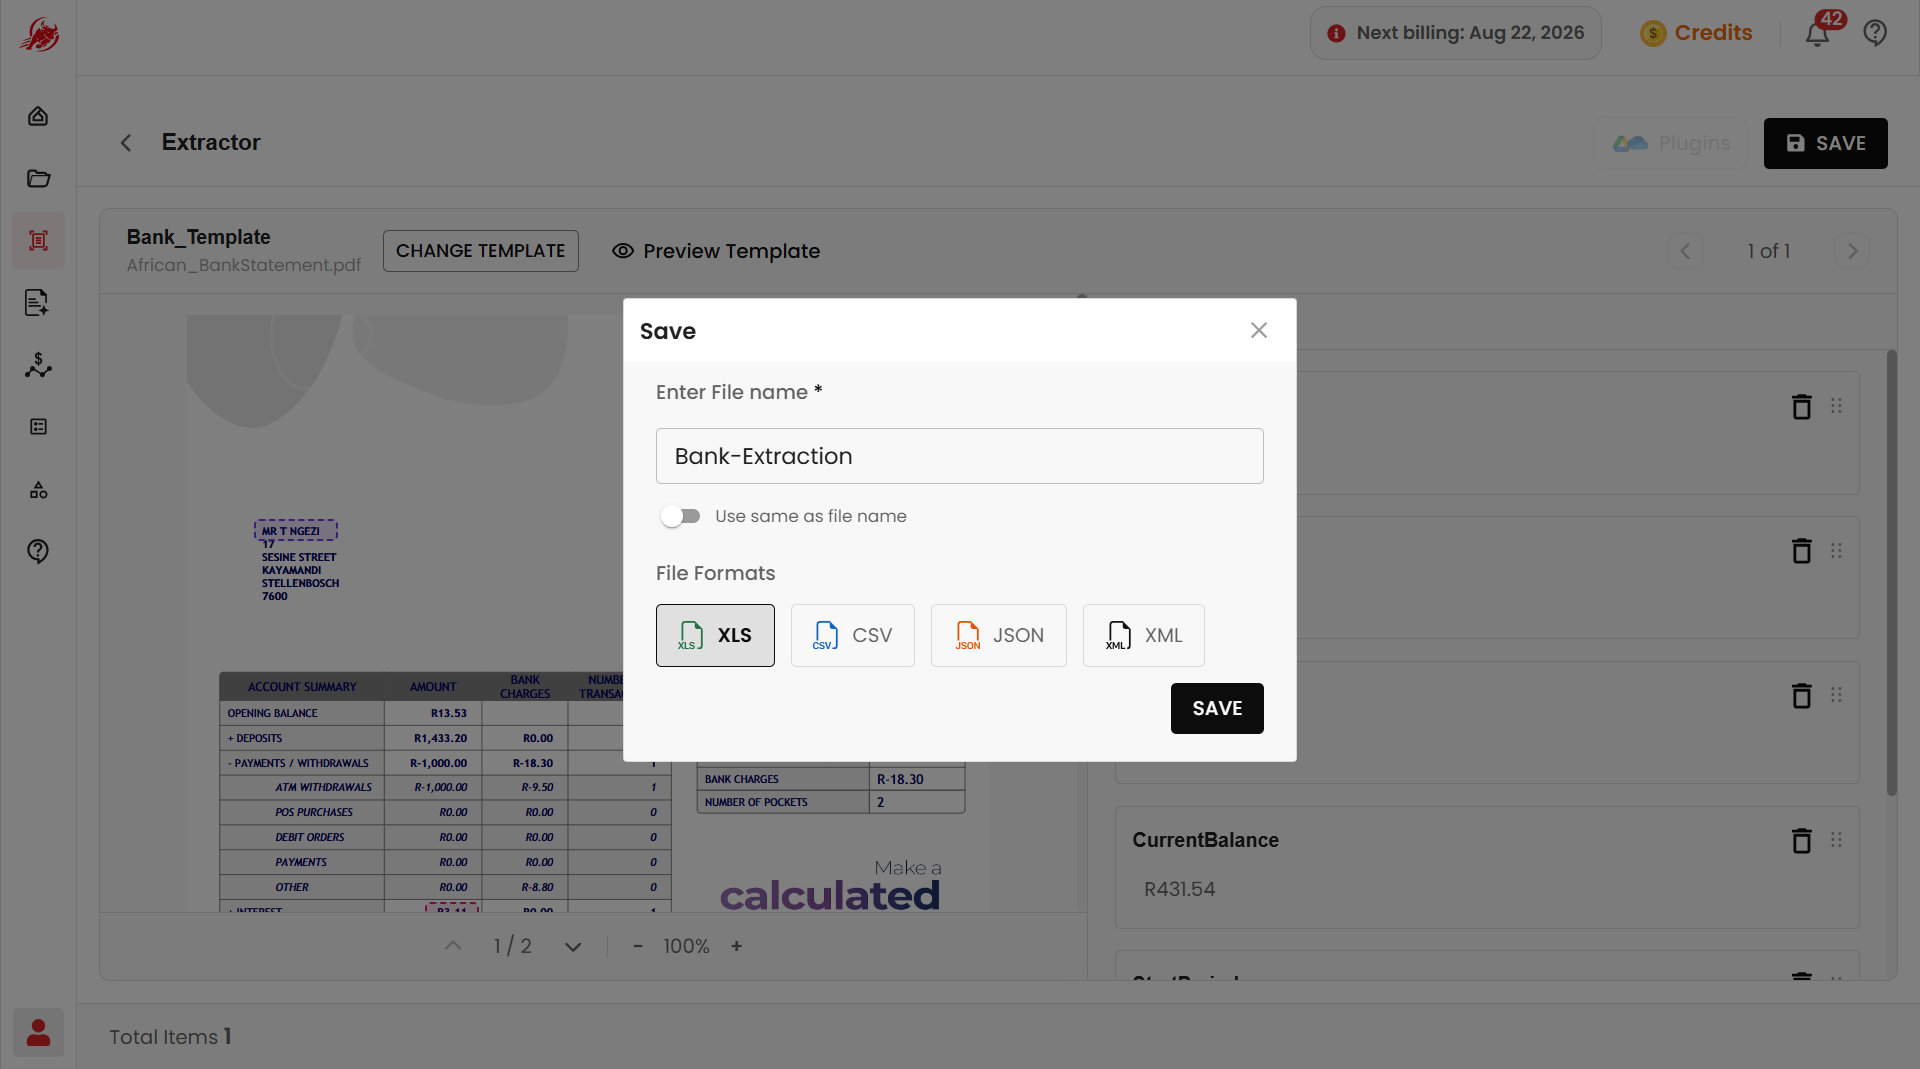
Click Save to store the results in your Workspace. Give the file a name and pick a format — XLS, CSV, JSON, or XML.
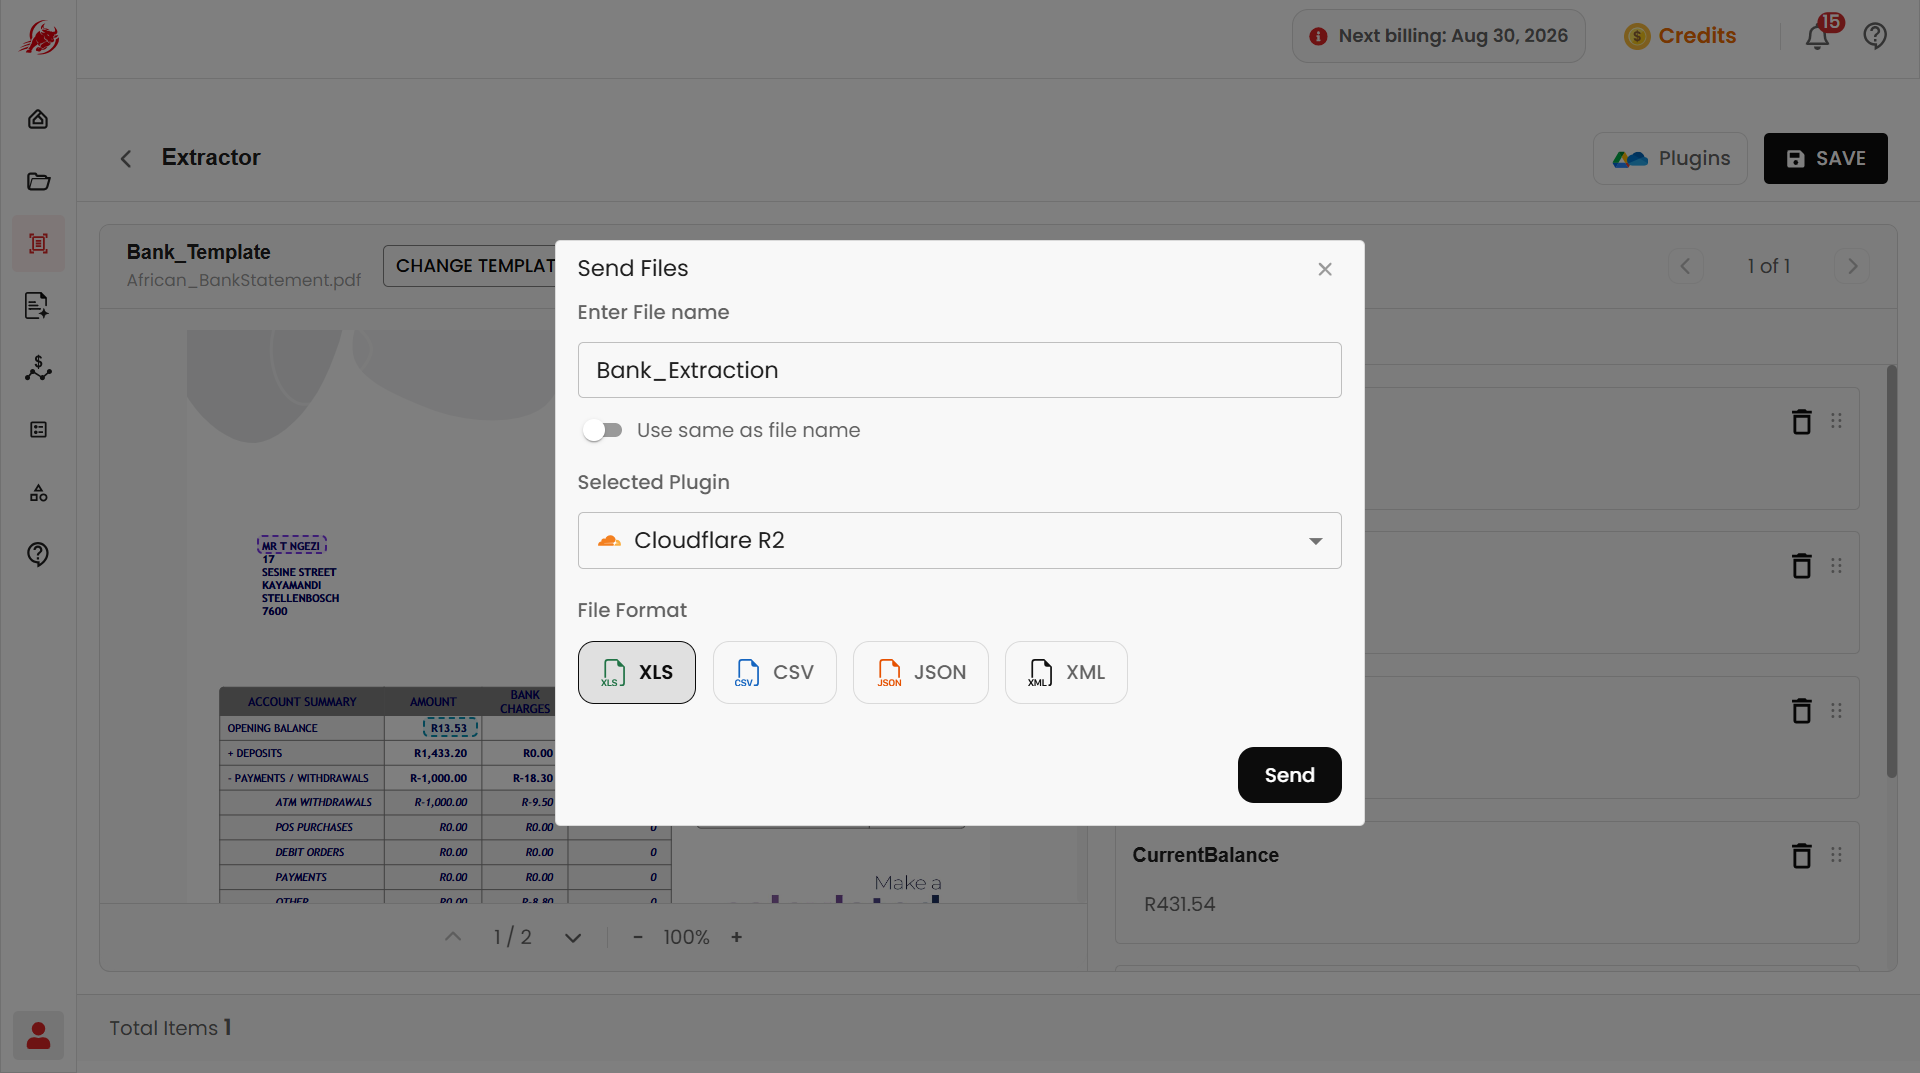
Click Plugins to send the results straight to a connected app instead. Choose the plugin and format, then click Send.
Tips for better results
- Scan or photograph documents clearly — sharper images give more accurate text
- Use PDF format for documents with structured data, like tables
- Turn on Deep Mode for documents where accuracy matters most, like invoices or legal paperwork
- Always check extracted fields before saving
- Save time on repeat document types by creating a template
Next steps
- Live Capture — extract text by scanning a physical document with your camera instead of uploading a file
- Template — create a reusable template for structured field extraction