
Appearance
Single Sign-On (SSO)
Single Sign-On (SSO) lets your team sign in to Regoxa with the same credentials they already use for other company tools. Your IT team sets it up once for the organisation; after that, everyone signs in without a separate Regoxa password.
This page covers how SSO login works, and how IT Administrators set it up for the organisation.
How SSO login works
- Enter your work email on the Regoxa login page.
- Regoxa checks your email domain to see whether your organisation has SSO enabled.
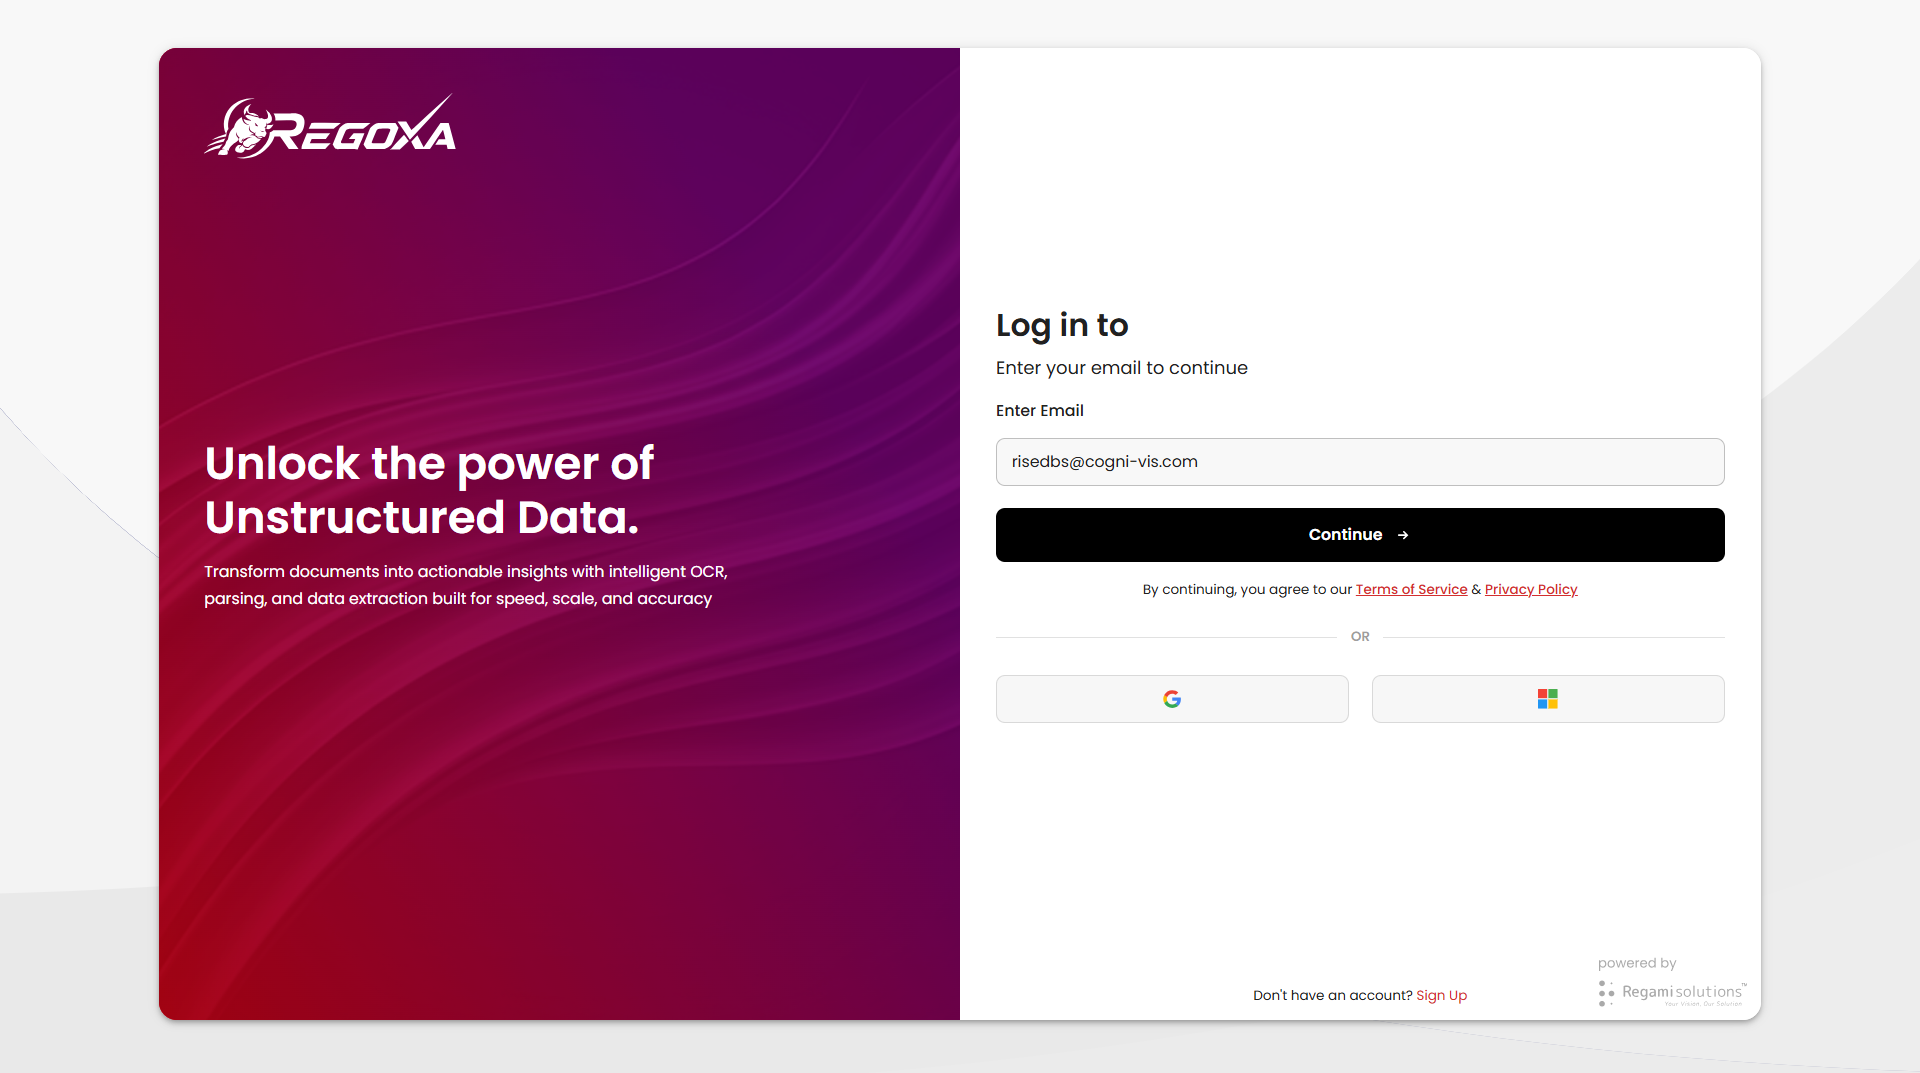
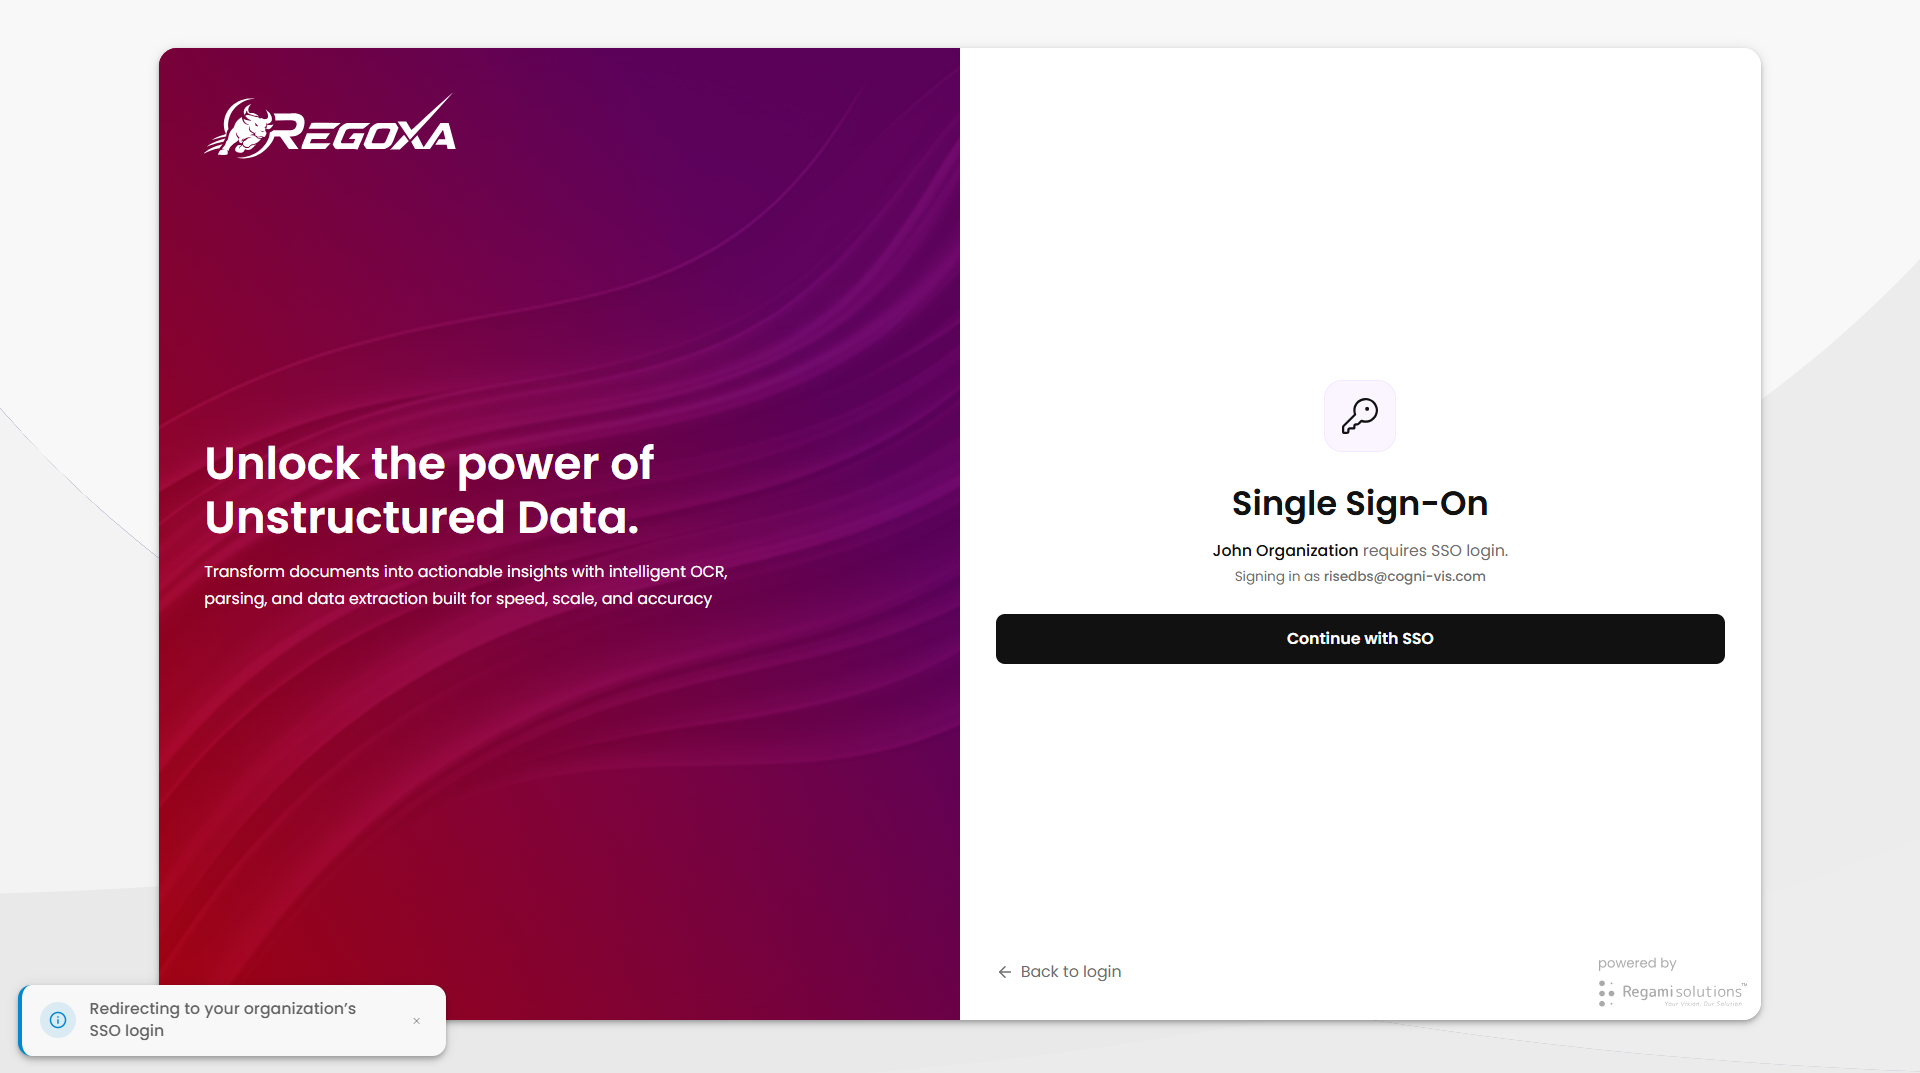
- If it does, you'll see Continue with SSO instead of a password field.
- This sends you to your company's Identity Provider (IdP) to log in as usual.
- Your IdP verifies you and returns your email to Regoxa, which confirms it matches what you typed — you're signed in if it does, blocked if it doesn't.
TIP
Don't see "Continue with SSO"? Your organisation probably hasn't turned SSO on yet, or your email domain isn't registered for it — contact your IT admin.
WARNING
Subdomains count as separate domains and must be registered individually for SSO to work.
How Regoxa matches your domain to your organisation
Every organisation in Regoxa is a tenant — its own space that can own one or more email domains. SSO is turned on for the whole tenant, not per person: if your email domain belongs to an organisation with SSO enabled, you're routed through SSO automatically; otherwise, you sign in normally.
Set up SSO (for IT Administrators)
Step 1 — Verify your domain
Before enabling SSO, you need at least one verified domain as SSO can be enabled only after your primary domain is verified.
Learn how to verify your domain here: Domain Security
Step 2 — Configure your identity provider
Tell your IdP where to send users after login, using SAML (the standard Regoxa and your IdP use to communicate securely).
Create a Microsoft Entra ID application for SSO
- Sign in to the Microsoft Entra admin center with an administrator account, then go to Identity → Applications → Enterprise applications.
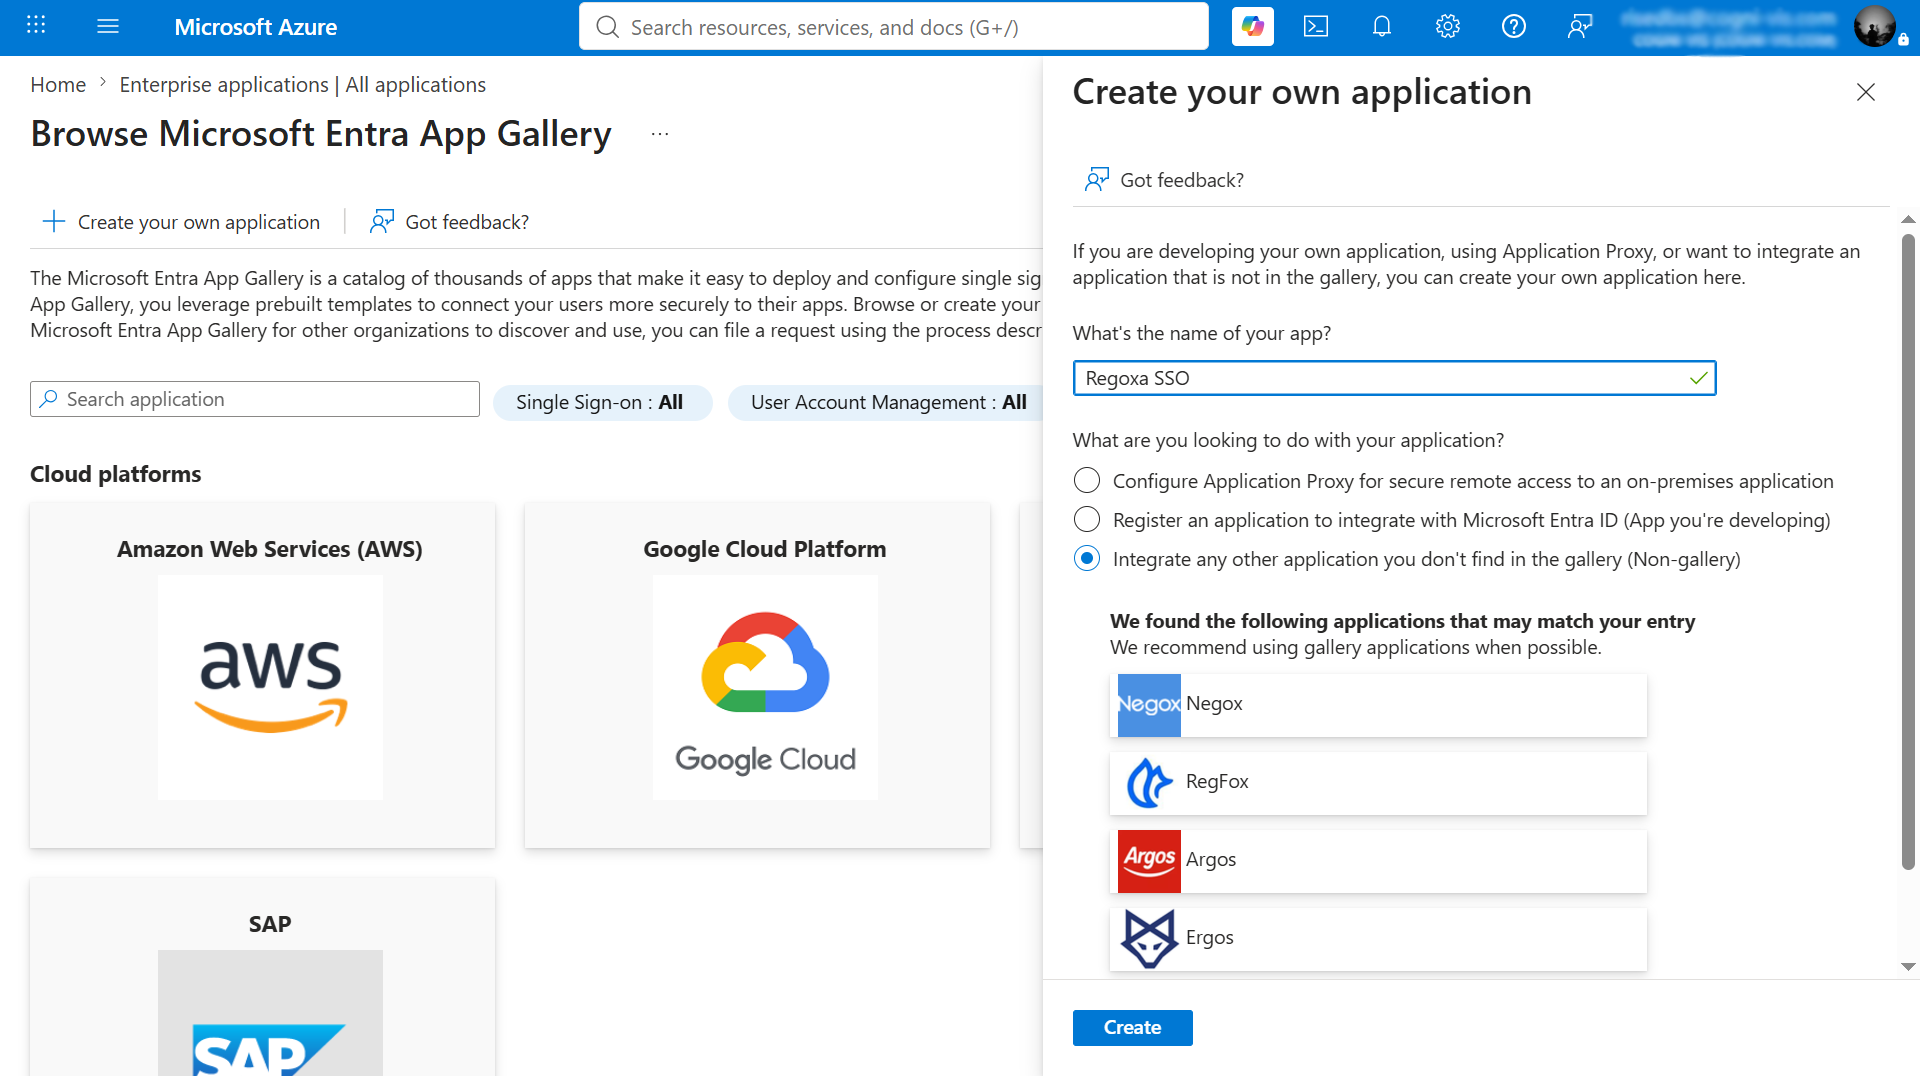
- Click New application → Create your own application, enter an application name, select Integrate any other application you don't find in the gallery (Non-gallery), then click Create.
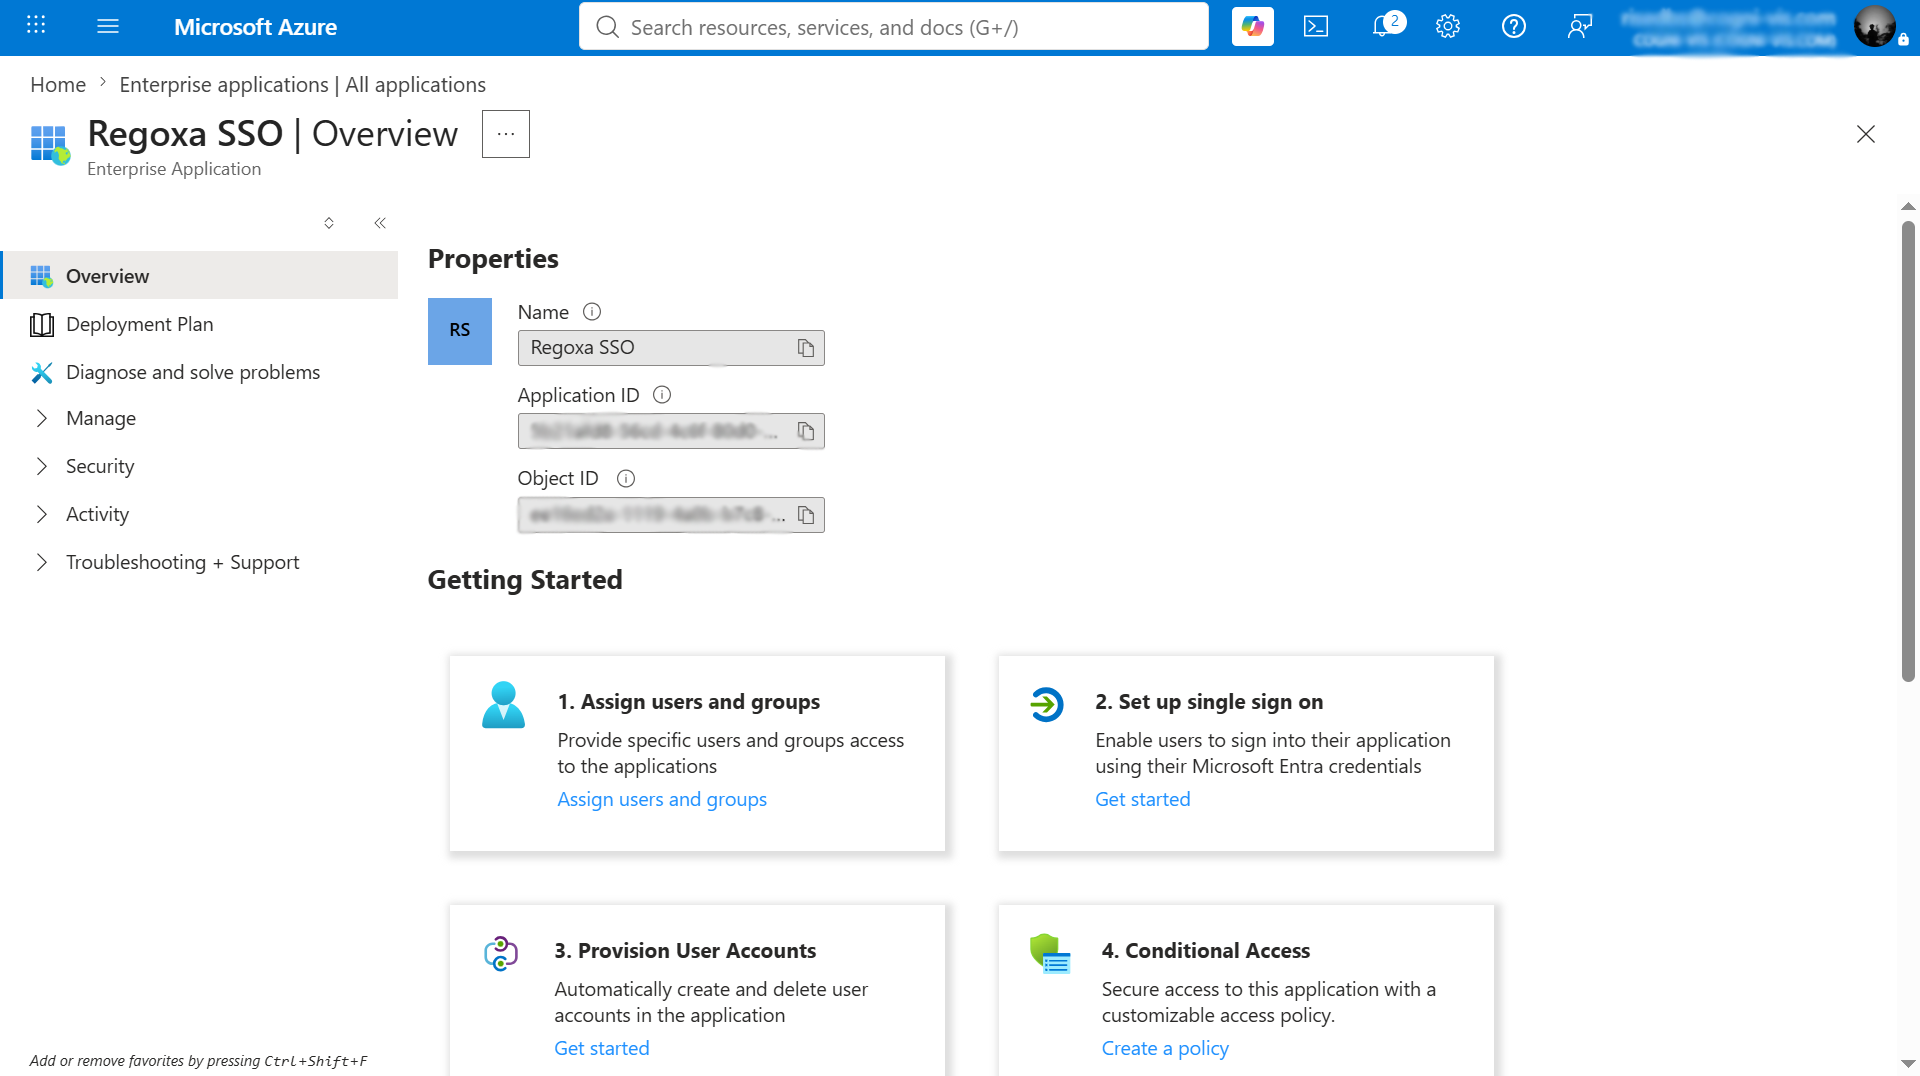
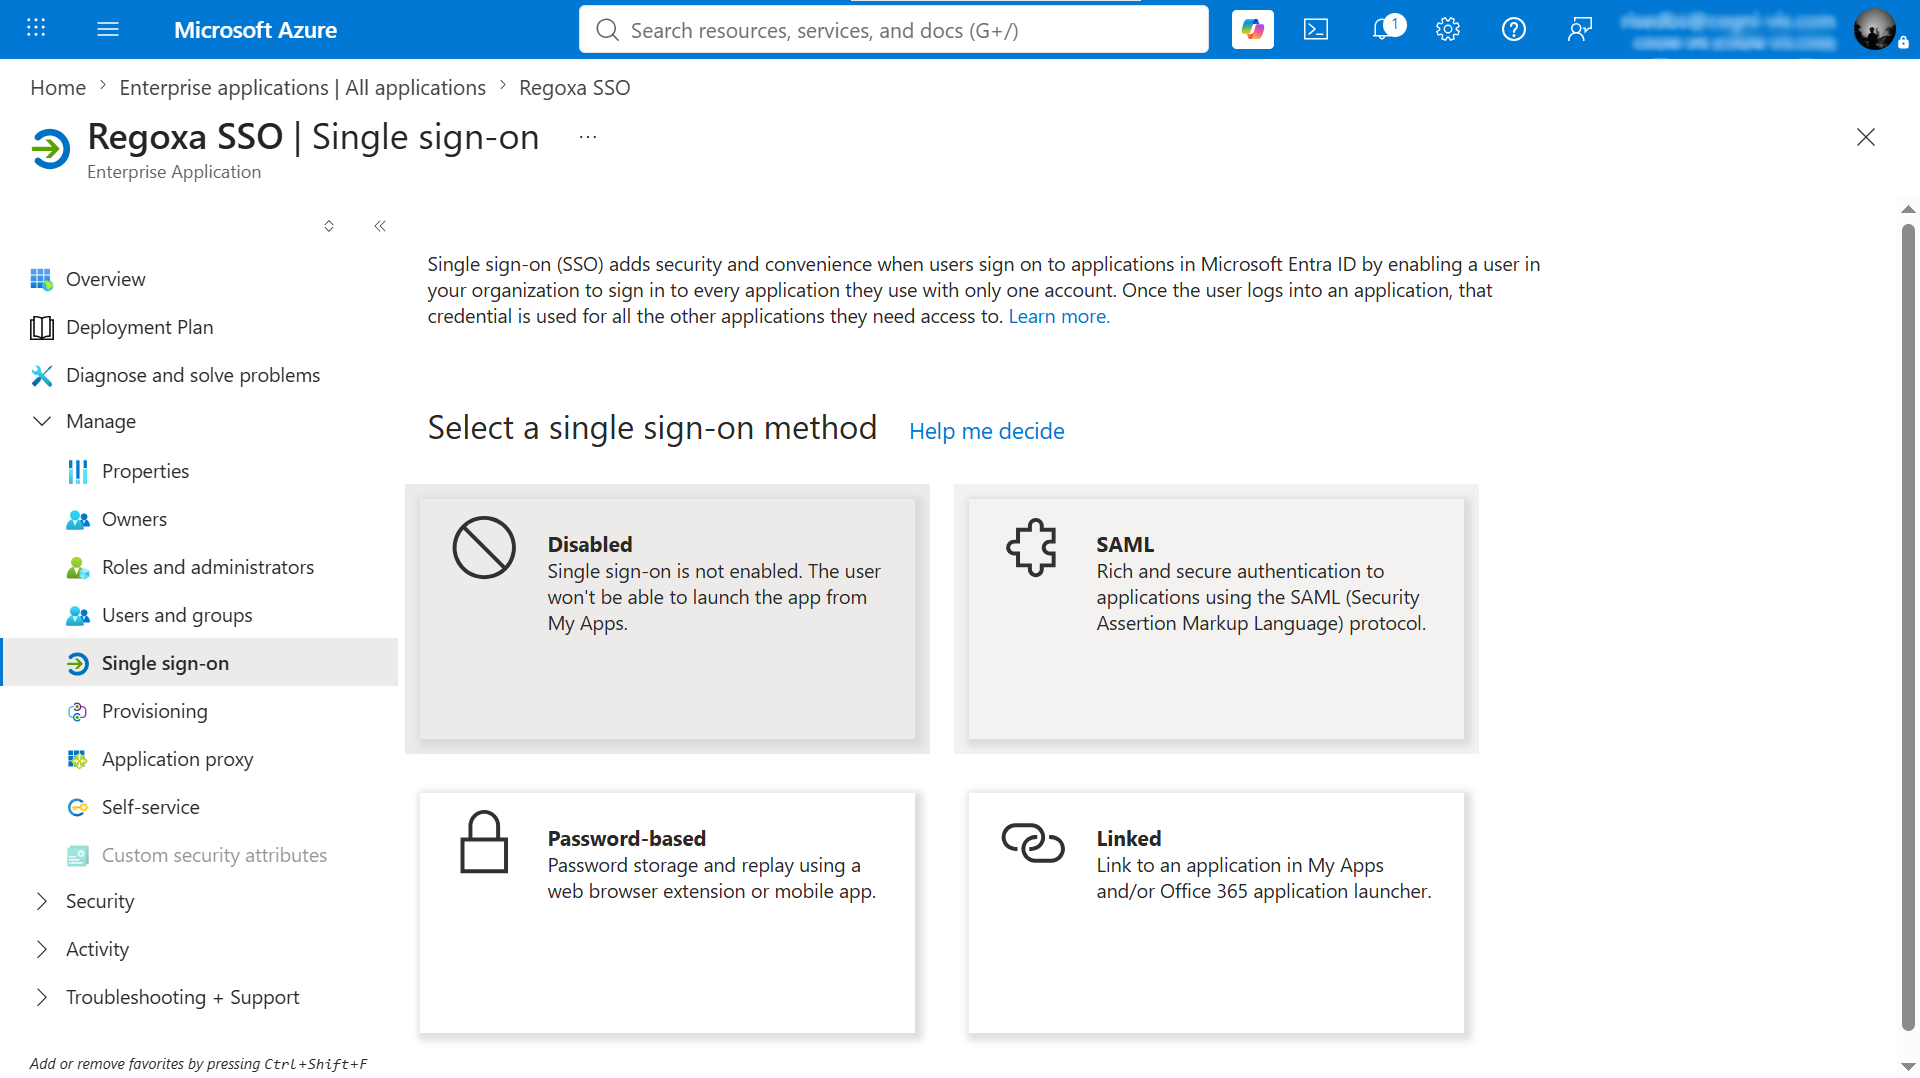
- Open the new application and go to Set up single sign-on → SAML.
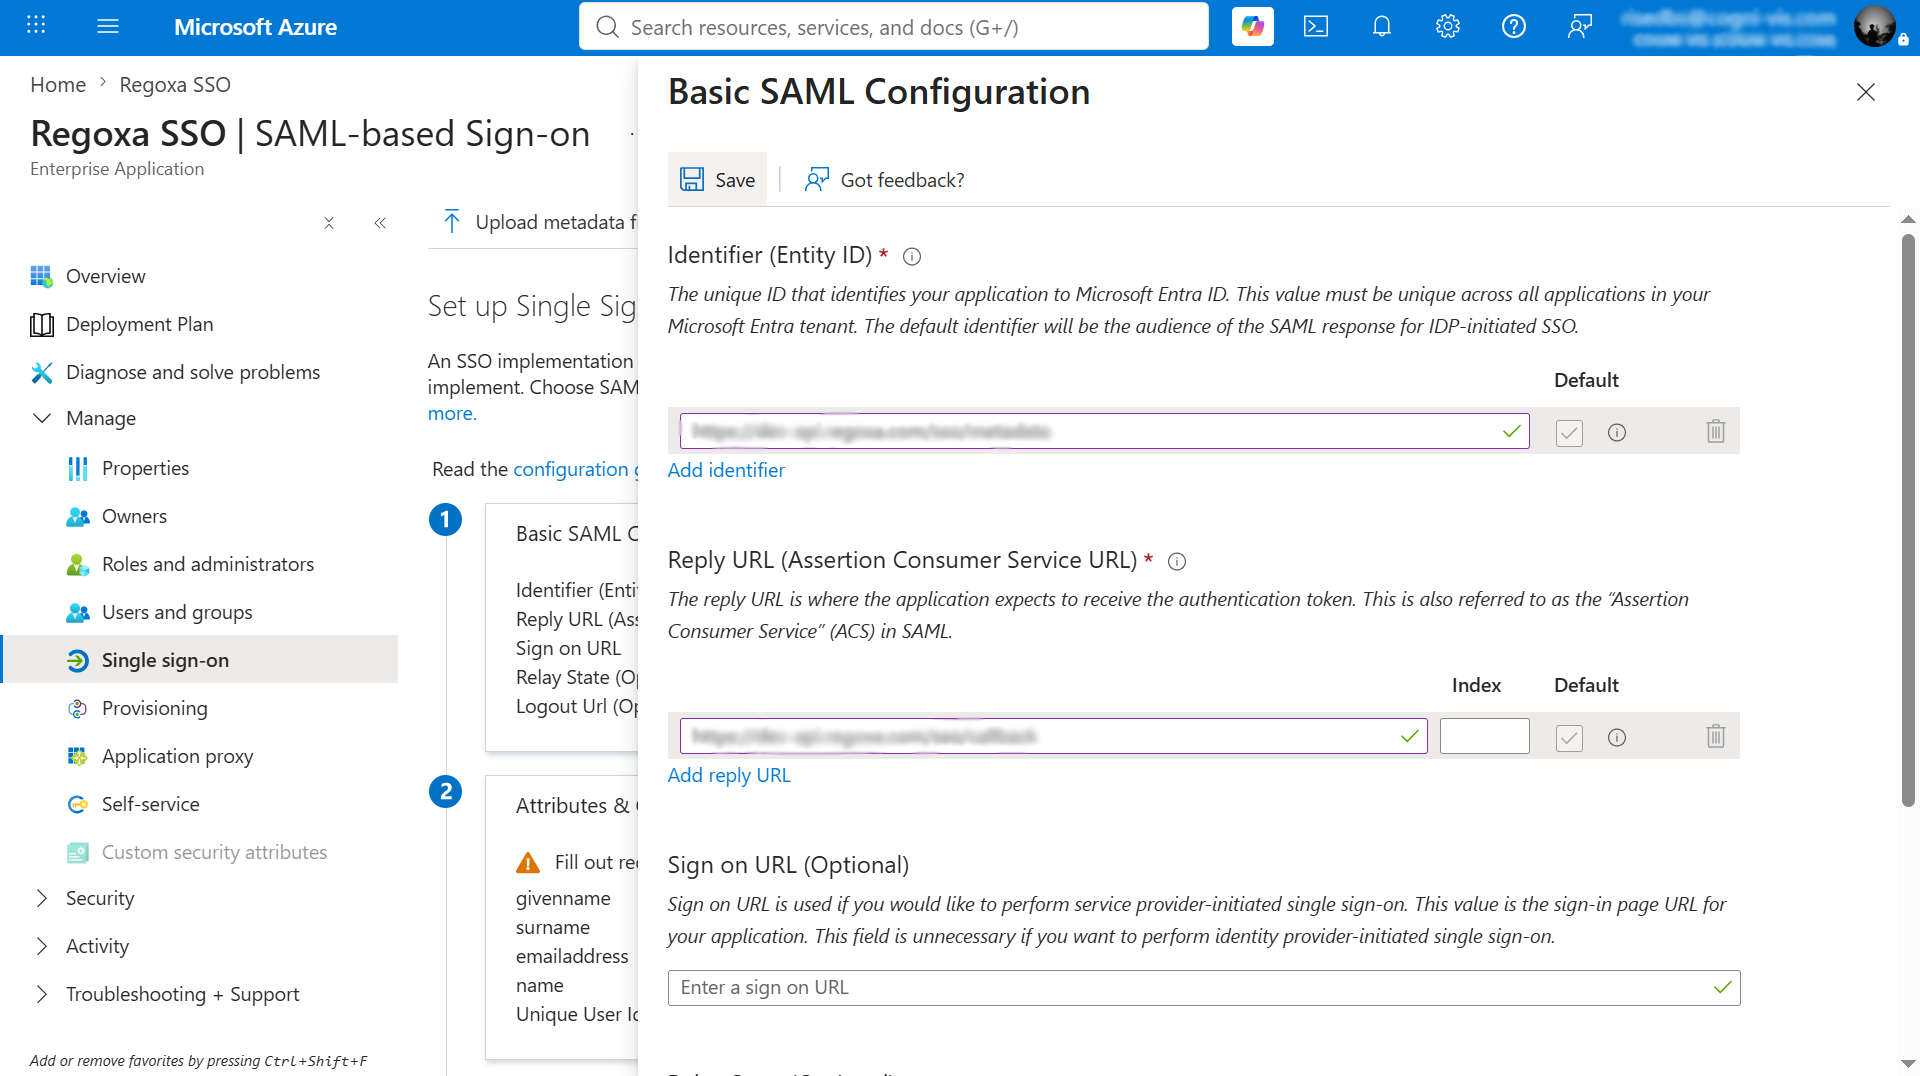
- Configure the Basic SAML details with Identifier (Entity ID) and Reply URL (Assertion Consumer Service URL)
- Check the Attributes & Claims details.
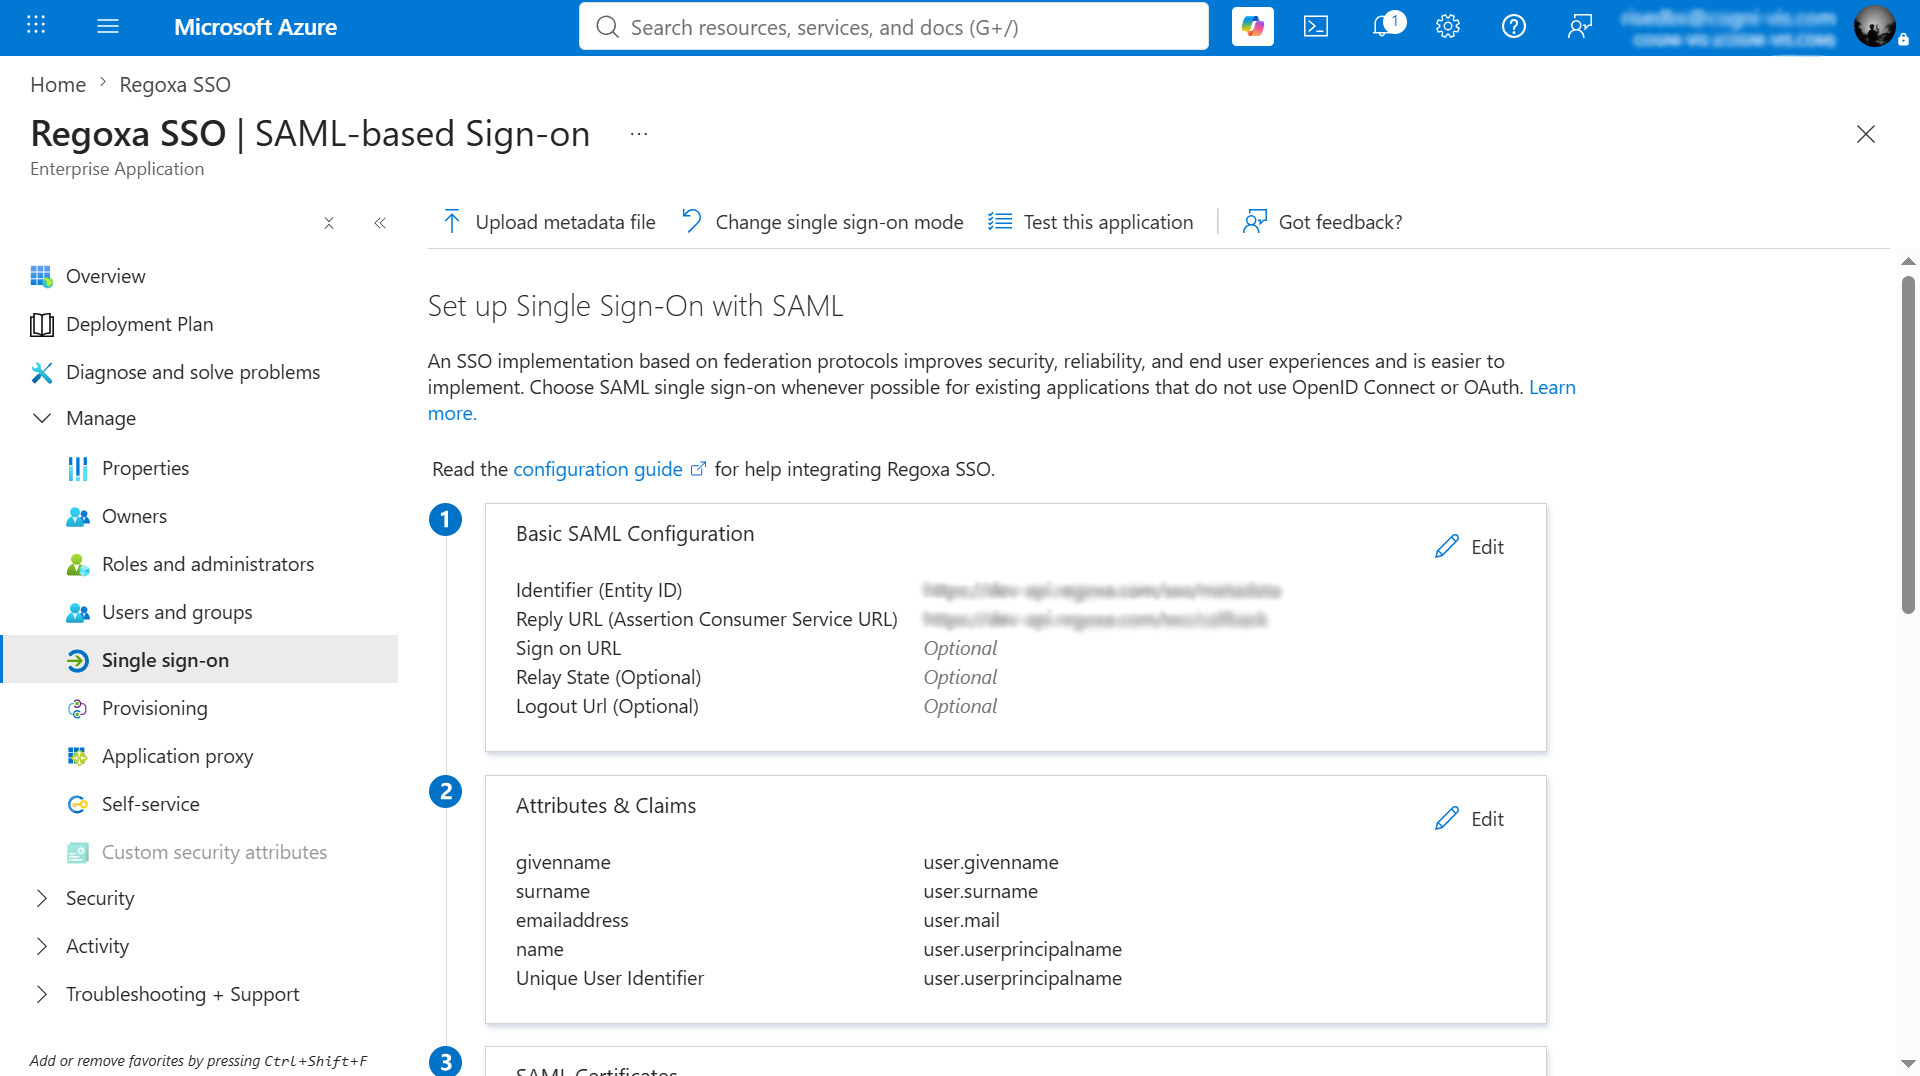
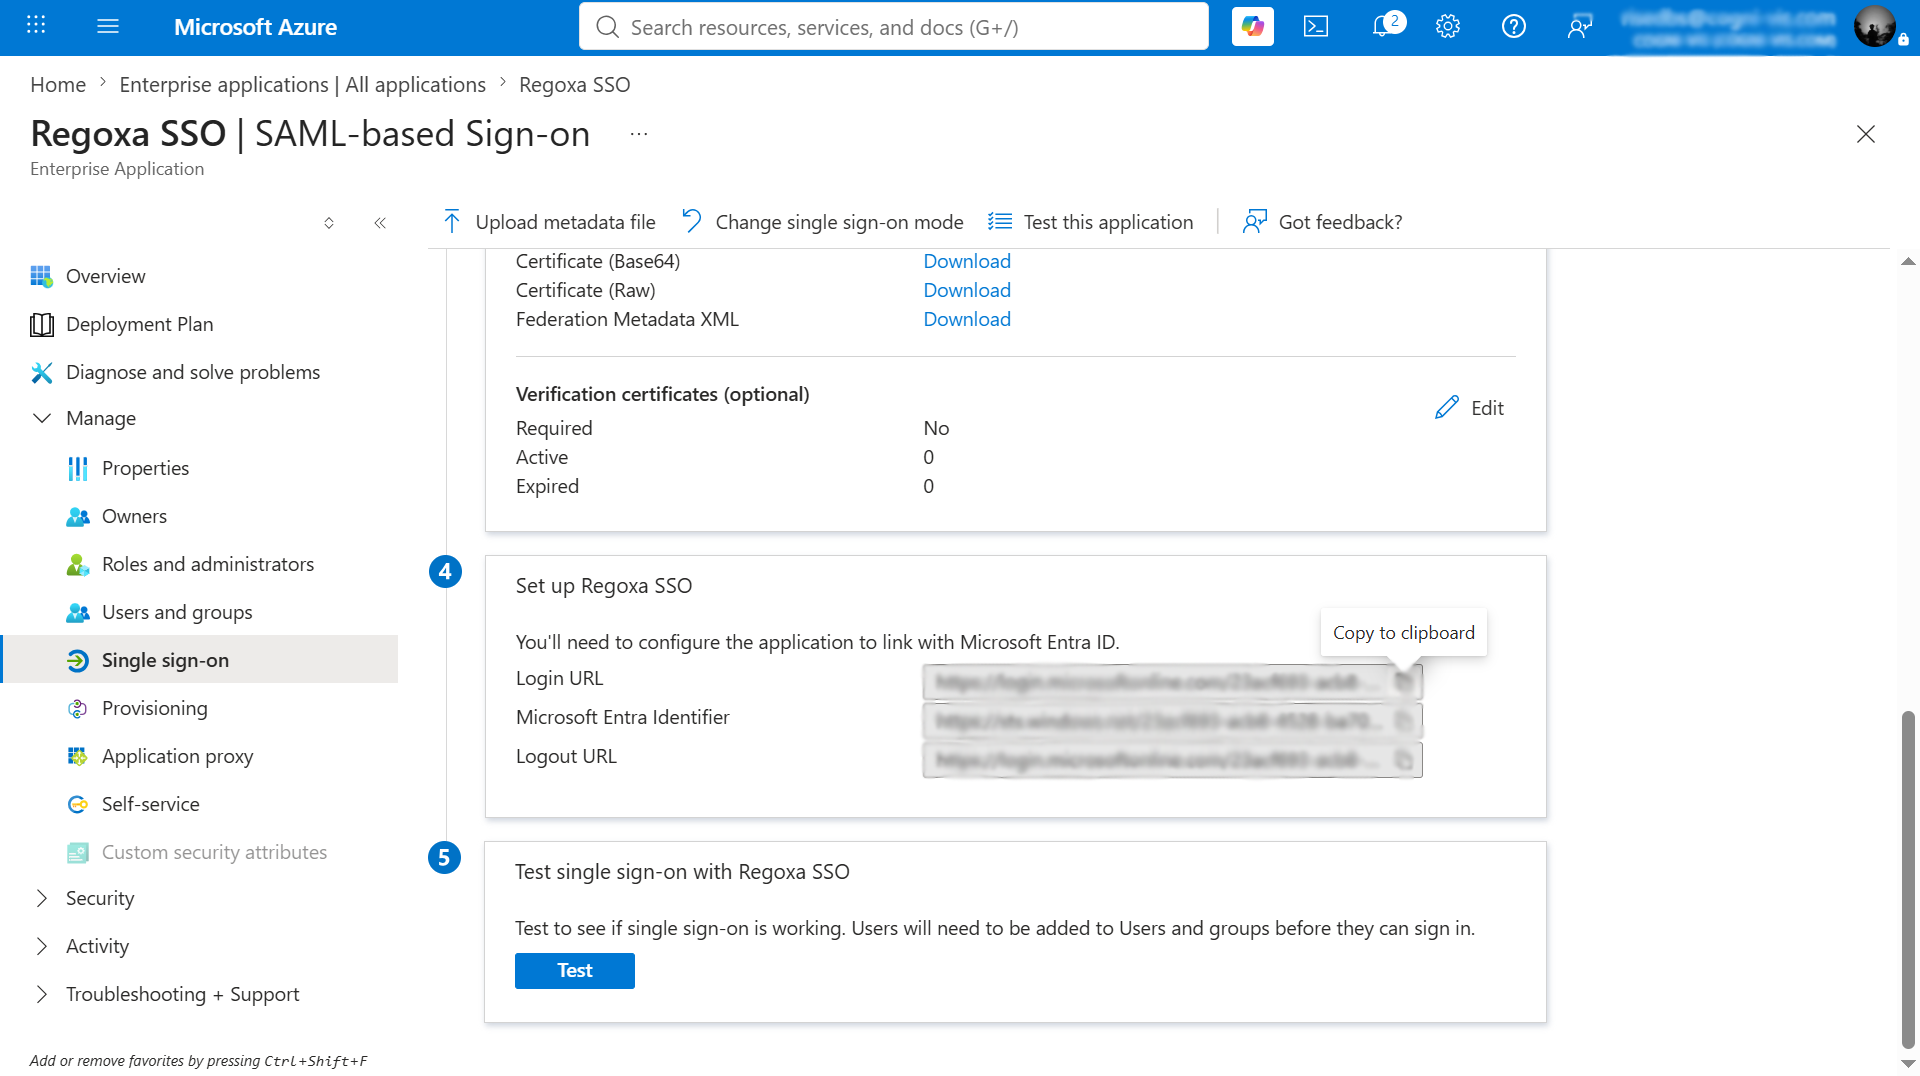
- Download the SAML Certificate (Base64).
- Copy the Login URL and Microsoft Entra Identifier from the SSO setup section.
TIP
Existing app registrations can be found under View all applications in the directory.
Step 3 — Enter your IdP details in Regoxa
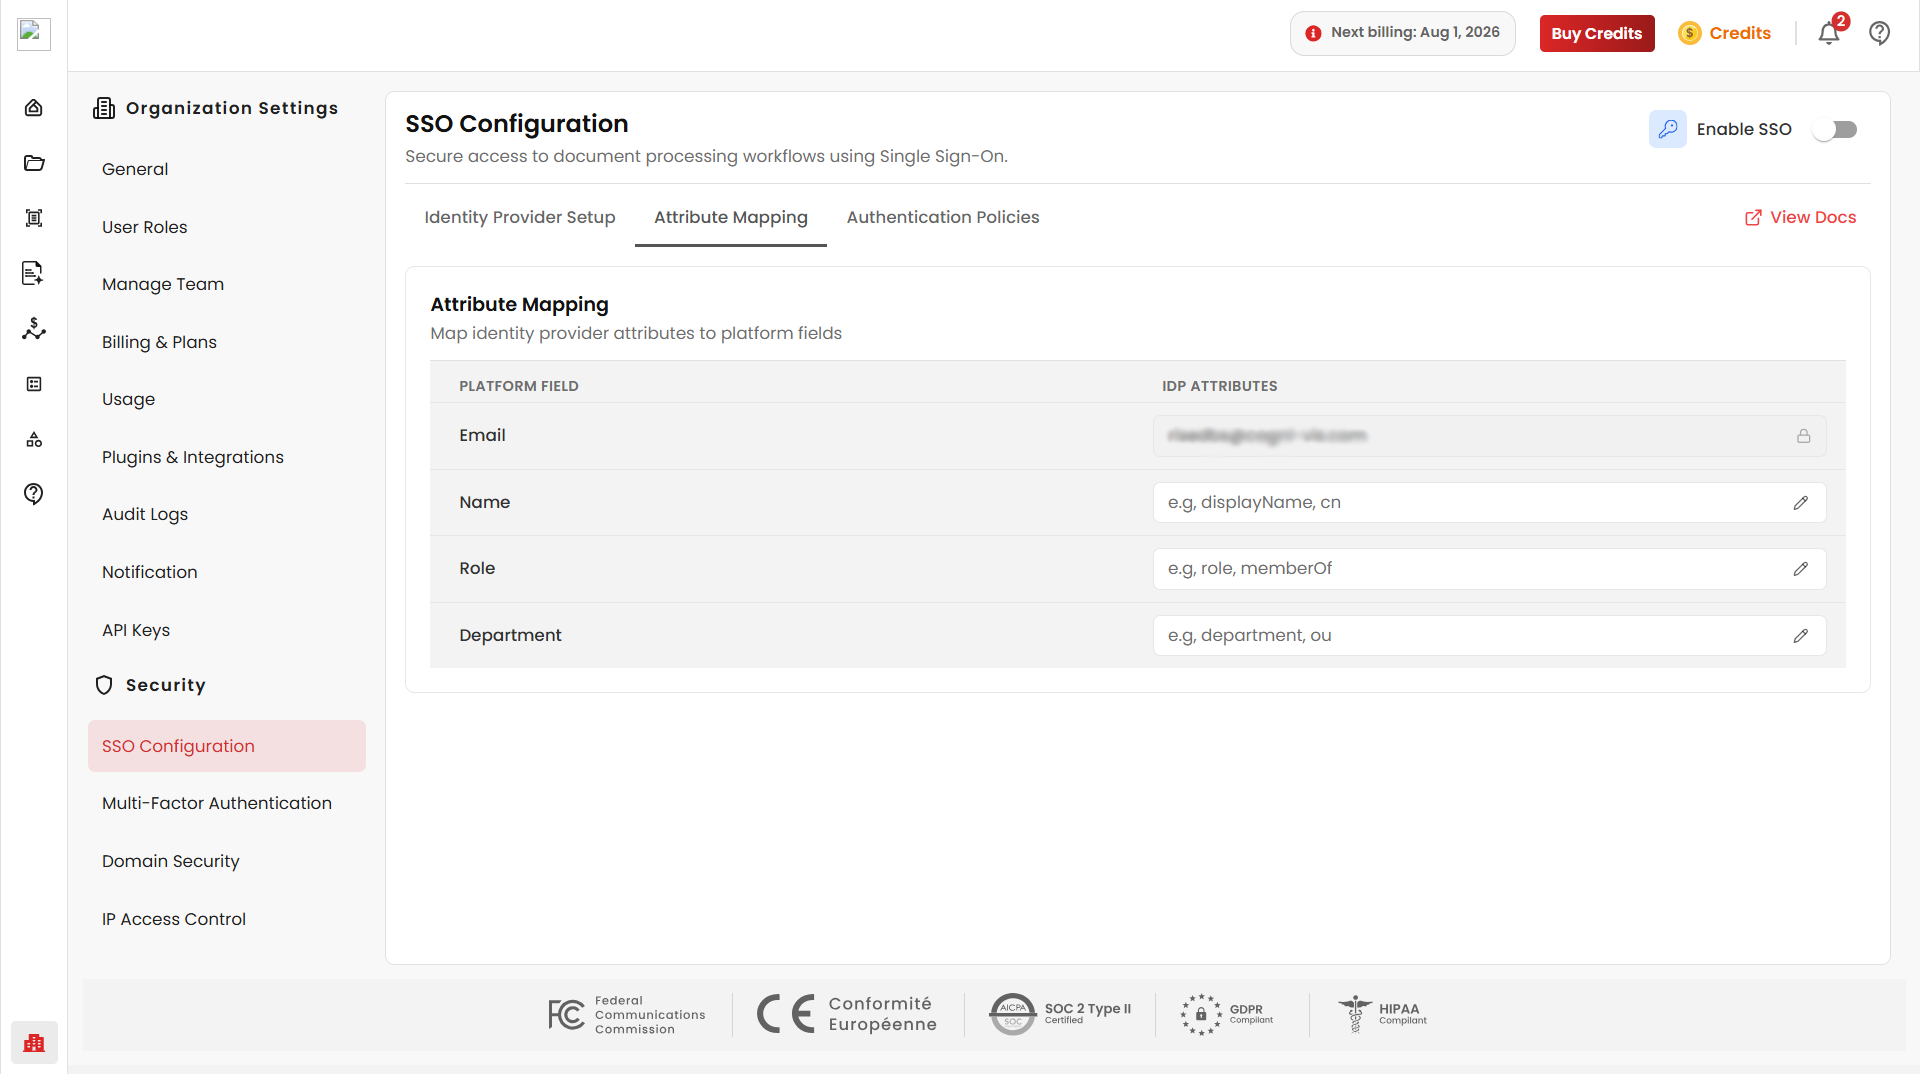
- Go to Organisation Settings → SSO Configuration.
- Enter the details from your Microsoft Entra IdP setup:
- Issuer / Entity ID: Login URL
- SSO Login URL: Login URL
- X.509 Certificate: upload the Base64 certificate
- IP Address (optional)
- Set attribute mapping (optional).
Step 4 — Authentication policy
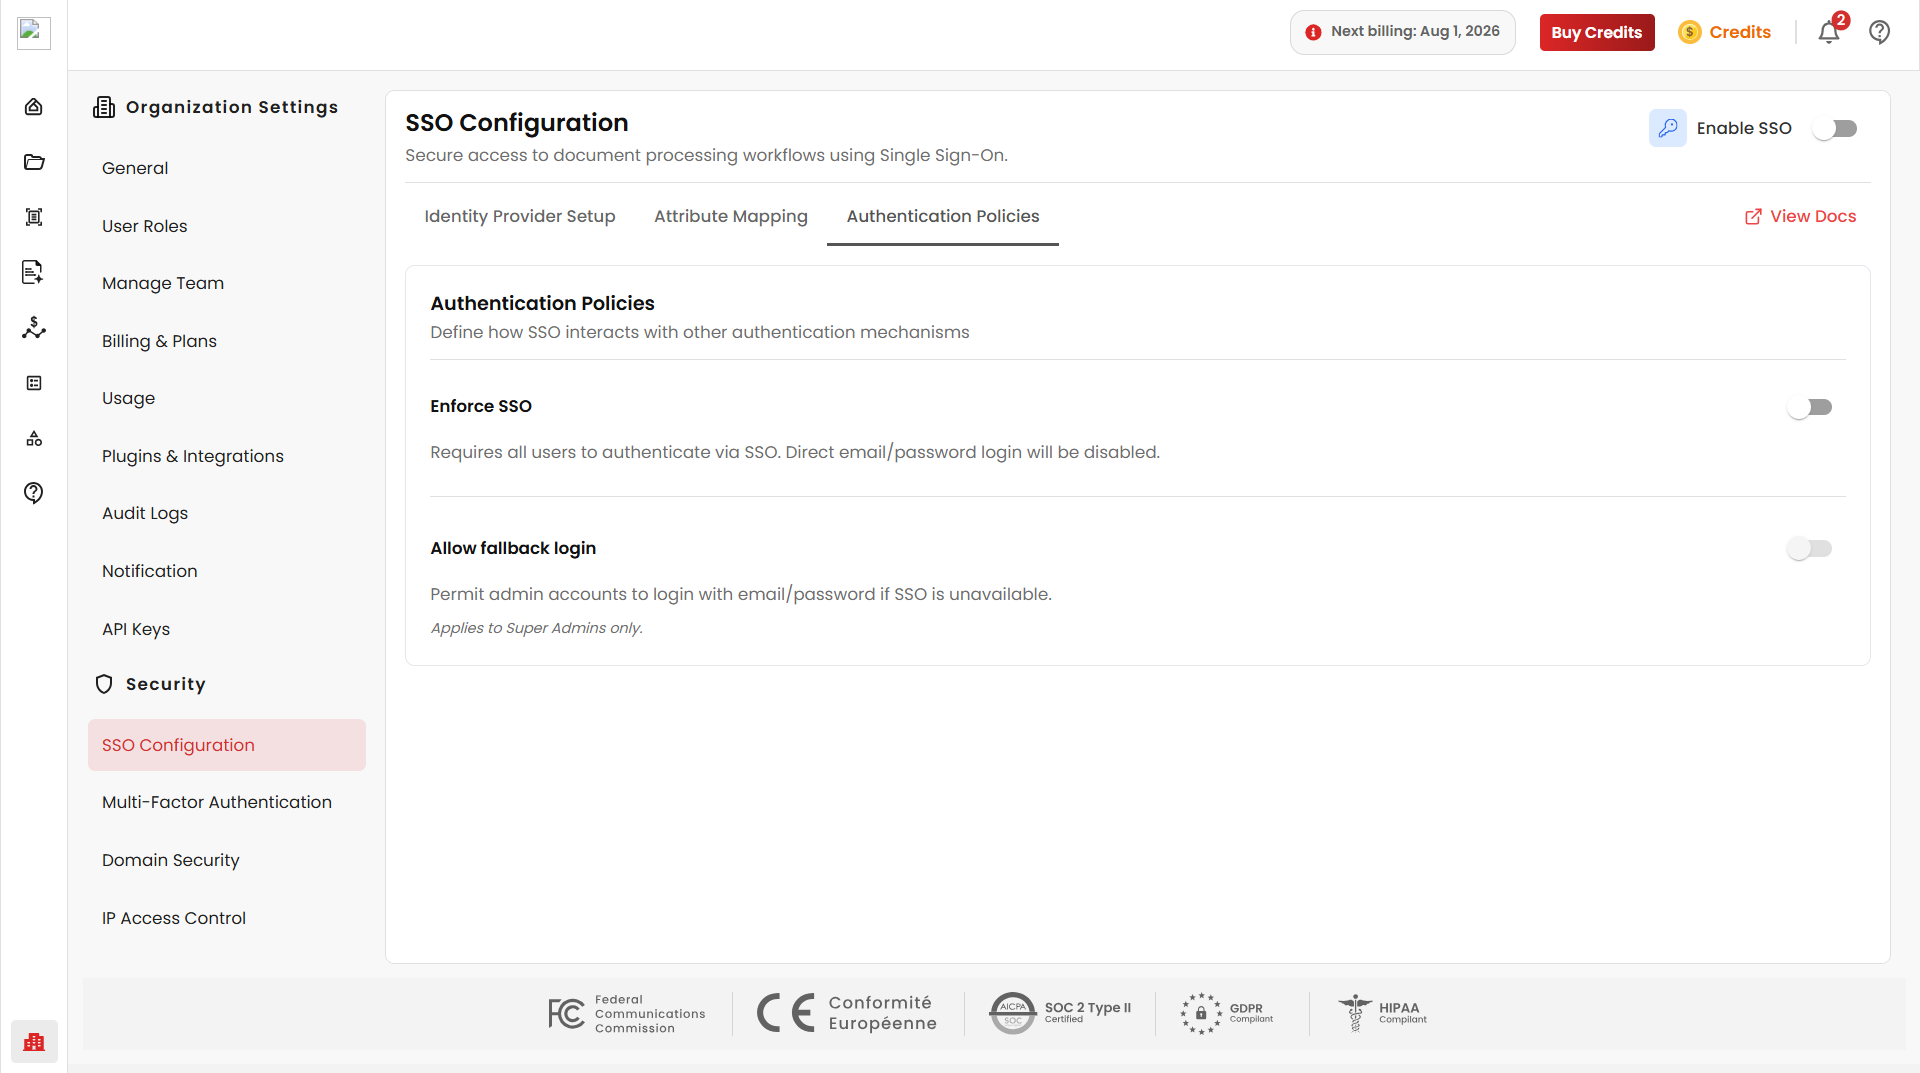
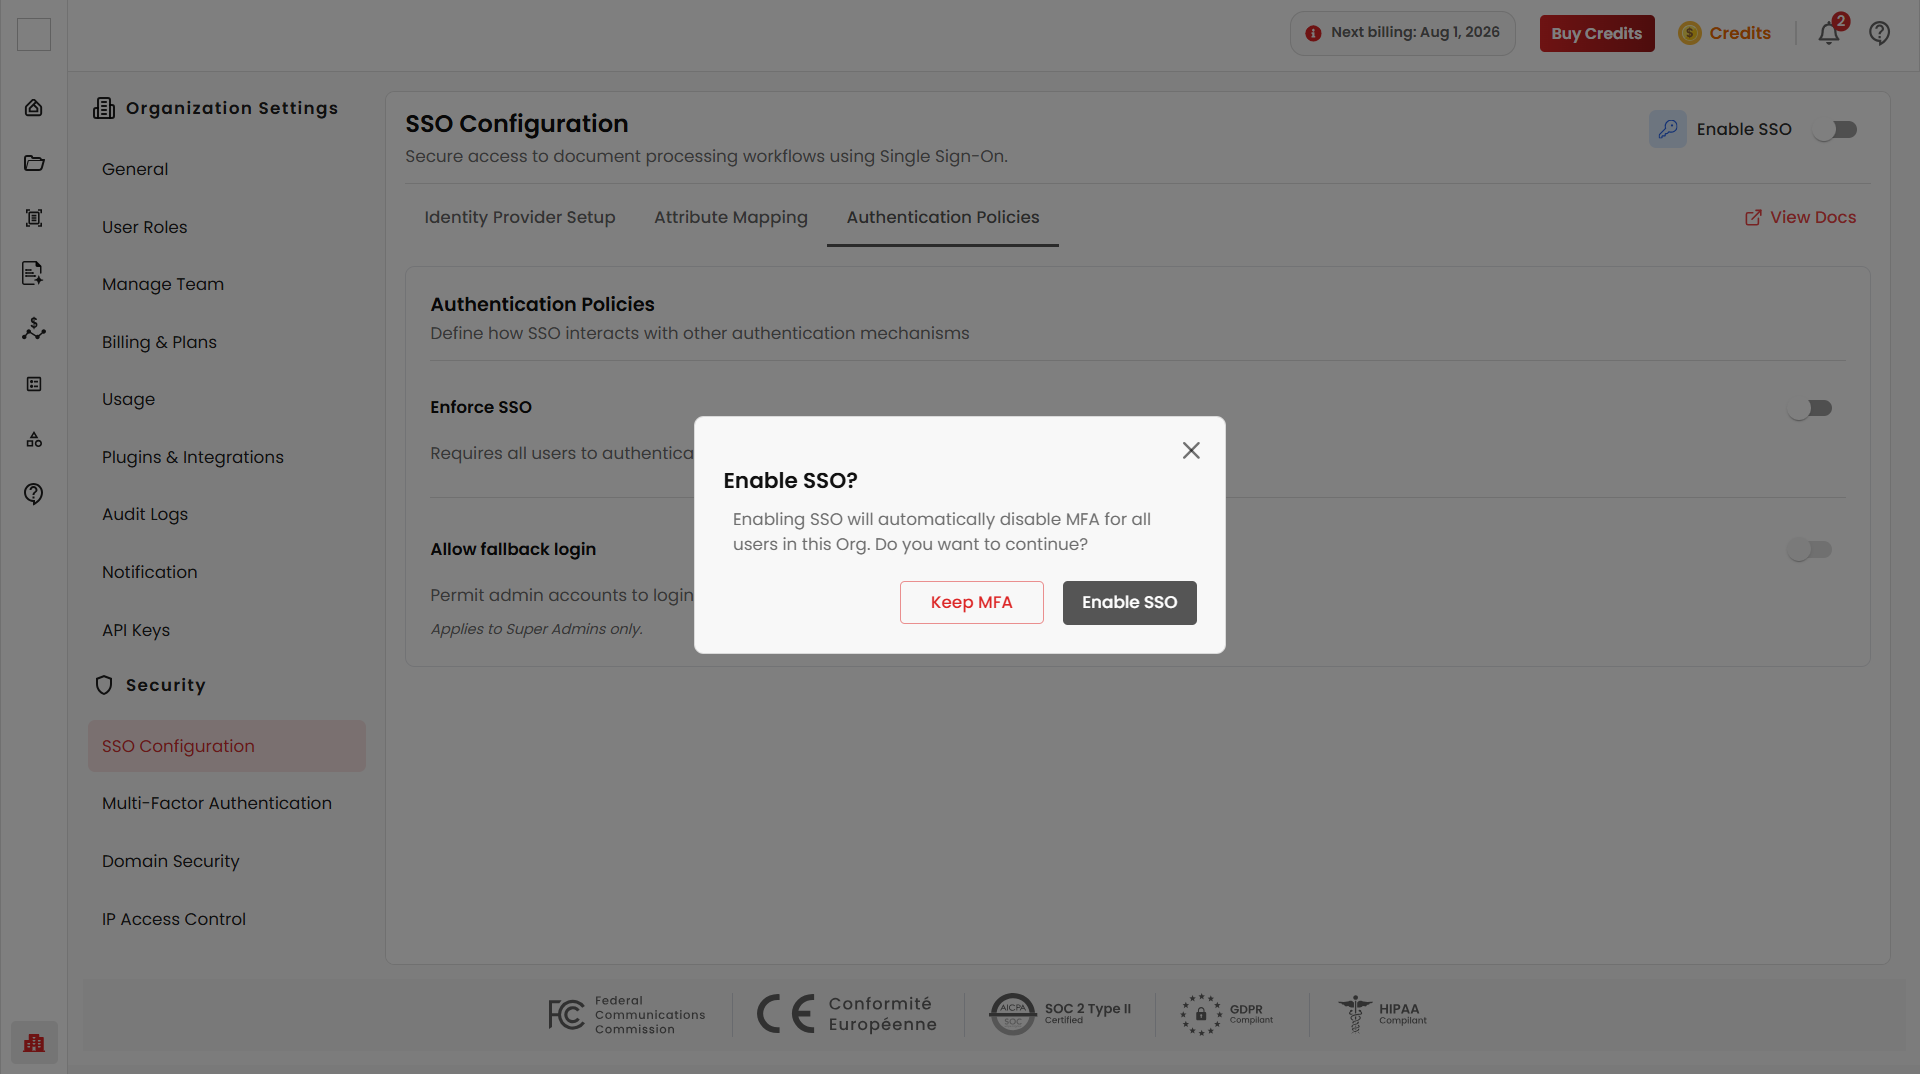
Regoxa currently supports one policy: Enforce SSO — every user must sign in through SSO, and the regular email/OTP login is turned off entirely.
Choose your authentication policy (optional).
Step 5 — Enable SSO
Click Enable SSO toggle that automatically disables MFA for all users in this organization.
TIP
You can come back to this page anytime to update these details.
Continue With SSO
- Log in using the email whose domain has SSO enabled.
- Click Continue With SSO to log in using organization credentials configured.
WARNING
MFA and SSO can't both be active. If MFA is currently enabled for your organisation, disable it before enabling SSO.
Security checks on every SSO login
Regoxa automatically verifies each SSO login before letting it through:
- Issuer check — confirms the response came from your IdP, not an impersonator
- Audience check — confirms the response was meant for Regoxa
- Time check — confirms the response is fresh, blocking reused ("replayed") logins
- Signature check — confirms the response wasn't altered, using your X.509 certificate
- Identity check — confirms the returned email matches what the user typed
If any check fails, the login is blocked.
Troubleshooting
| Problem | Likely cause | What to do |
|---|---|---|
| SSO option not shown at login | Domain not registered, or SSO not enabled | Check Domain Security and SSO Configuration |
| "SSO can be enabled once domain is verified" | No verified domain yet | Complete DNS verification in Domain Security |
| "MFA and SSO cannot be enabled together" | MFA is currently active | Disable MFA, then enable SSO |
| Email mismatch error | IdP returned a different email than what was typed | Log in again with the exact company email |
| "User not found" after SSO | User hasn't been invited to Regoxa yet | An admin should invite the user |
| Login fails after IdP redirect | Wrong certificate or login URL saved | Re-check the certificate and login URL in SSO Configuration |
| "Linked to SSO" shows a dash (–) | Domain hasn't been verified yet | Complete DNS verification in Domain Security |
Related
- Domain Security — verify your domain before enabling SSO
- Multi-Factor Authentication — alternative sign-in verification (can't be used together with SSO)